Imagine this: you’re getting ready for a night out, feeling fabulous, but something’s missing. You look down at your hands, and it hits you—your nails need a little something special. Enter the marmore effect. It’s chic, modern, and a perfect way to express your personality. This trendy nail art technique is a step up from your typical manicure and brings an air of sophistication wherever it goes. Whether you’re looking to stand out at an event or just want to treat yourself during a self-care day, marbled nails are where it’s at.
The Allure of Marbled Nails
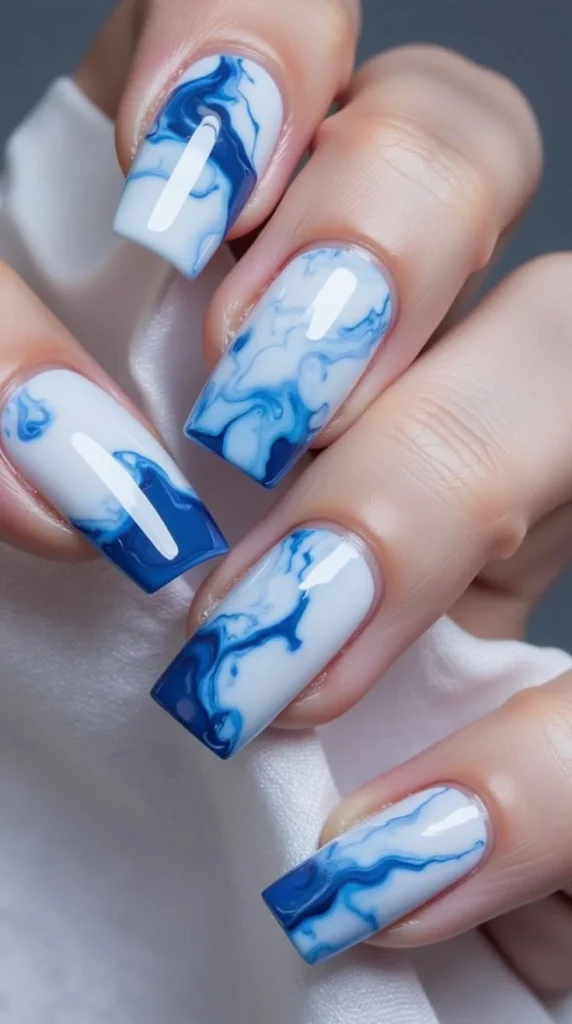
Let’s be honest—when you think of nail art, what comes to mind? Glittery tips, floral designs, or maybe classic reds? While those are all beautiful, the marmore effect takes it to a whole new level. It’s edgy yet elegant, and it allows for creativity. The swirling patterns reminiscent of beautiful marble stone can fit any vibe, whether you’re going for subtle or bold.
You might be wondering, why is this trend gaining popularity? Well, the allure lies in its versatility. The marble effect can be created in various color schemes, anything from soft pastels to vibrant jewel tones. Plus, this nail art stands out in photos, making it perfect for your socials.
Getting Started with Marbled Nails
Before diving into this artistic adventure, let’s equip you with some essential tools and tips to achieve the perfect marbled look.
Essential Tools
- Base coat
- Two to three nail polish colors (make sure they’re complementary)
- A small bowl of water or a nail art mat
- A toothpick or a needle for swirling
- Top coat
- A clean-up brush
Step-by-Step Guide to Creating Marbled Nails
Prep Your Nails: Start with clean, dry nails. This is essential to ensure your manicure lasts. Push back your cuticles and file your nails into your desired shape.
Apply a Base Coat: A good base coat helps the color adhere better and protects your natural nails. It’s an important step that shouldn’t be skipped.
Choose Your Colors: You’ll want to pick at least two colors that you think will complement each other. Consider going for contrasting shades to really see the marbled effect stand out.
Create the Marble Effect: Fill a bowl with room temperature water. Drip your chosen nail polishes on the surface of the water in alternating layers. Use your toothpick or needle to swirl them together gently, creating a marble pattern.
Dip Your Nail: This is where the fun starts! Dip your nail into the water, ensuring it’s covered with the marbled pattern. (It’s okay to get a little messy here!)
Clean Up: After you lift your finger from the water, use your clean-up brush to tidy around the nail. You’ll be surprised how easy it is to get a clean finish.
Apply a Top Coat: Finally, seal your design with a top coat to add shine and protection. Watch as your nails go from beautiful to absolutely stunning.
Common Mistakes to Avoid
We’ve all had our share of beauty blunders, right? Here are some pitfalls to steer clear of when trying out the marbled look:
- Skipping the Base Coat: This leads to chipping and doesn’t allow bold colors to shine through.
- Using Cold Water: It’s true, water temperature matters! Cold water can cause the polish to dry too fast.
- Rushing the Process: Breathe and take your time. Nail art is a journey, not a race.
Quick Beauty Tips for Perfect Marbled Nails
- Experiment with Colors: Try out different combinations until you find your favorite. Who knows, you may invent the next big nail trend!
- Use Glitter Polish: Adding a touch of glitter to your design can elevate the glamour even further.
- Seek Inspiration Online: Pinterest and Instagram are treasure troves for creative ideas. Searching for hashtags like #UnhasMarmorizadas can lead to endless inspiration.
Incorporating Marble Nails into Your Life
Now that you’ve nailed down the technique (pun intended!), let’s talk about how to make this trend work for you throughout the seasons.
Seasonal Styles
- Spring: Think pastel colors for a light and airy vibe. Dusty pinks and lavenders create a soft marbled look that’s perfect for blooming flowers and sunny days.
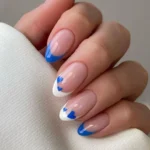
- Summer: Bright colors and prints are in during summer. Try vibrant oranges, yellows, and blues to mimic the sun-soaked skies.
- Fall: Earthy tones like burnt orange, deep greens, and browns create a warm, cozy feel.
- Winter: Wintry whites, icy blues, and sparkling silver can add a frosty touch to your look!
Conclusion
The marmore effect is not just about making your nails look beautiful; it’s a form of self-expression that allows you to showcase your personality in a chic way. If you’re looking to challenge your nail game, marbled nails are the perfect option! You can find endless inspiration and tutorials to guide you through the process of creating your own stunning nail art.
Looking to further enhance your nail designs? Explore these fabulous ideas for decorated red nails with this incredible guide. If you’re interested in long-lasting styles, check out this article on gel nails that can keep your designs looking fresh for weeks. And if the almond shape has piqued your curiosity, don’t miss these delicate almond nail ideas that you will simply adore!
So, are you ready to dive into the world of marbled nail art? You won’t regret it!