
Discover 38 Fun and Creative Melt-and-Pour Soap Recipes
If you’re searching for a fulfilling and creative project, look no further than melt-and-pour soap making! This delightful hobby allows you to create beautiful, customized soaps without the need for complex processes or hazardous materials. Whether you’re a beginner or an experienced DIYer, these 38 free melt-and-pour soap recipes will inspire you with endless possibilities. Let’s dive into the world of homemade soap!
Why You Will Love Melt-and-Pour Soap Making
Melt-and-pour soap making is an incredibly accessible craft. You can create vibrant and aromatic bars of soap in just a few simple steps. Here are some reasons why you’ll enjoy this DIY project:
- Simple Process: No need for lye; just melt the soap base, add your ingredients, and pour!
- Customizable: Personalize your soaps with different colors, fragrances, and additives.
- Quick Results: Most recipes take under an hour from start to finish, making them perfect for quick gifts or self-care treats.
- Safety First: Unlike other soap-making methods, melt-and-pour does not require handling hazardous materials like lye.
Ingredients
While specific recipes will include unique ingredients, here are the basic components you’ll need for most melt-and-pour soaps:
- Melt-and-Pour Soap Base: Available in various types such as glycerin, shea butter, goat’s milk, and olive oil. Choose one that suits your skin type.
- Colorants: Soap-safe colorants or natural options like turmeric or beet juice.
- Fragrance Oils: Skin-safe fragrance oils or essential oils for scent.
- Additives: Optional botanicals, exfoliants (like oatmeal or coffee grounds), or skin-nourishing oils (like vitamin E).
Equipment
Here’s a list of essential equipment you’ll need for your melt-and-pour soap project:
- Microwave or Double Boiler: For melting the soap base.
- Soap Molds: Silicone molds work best for easy removal.
- Mixing Utensils: Use a spatula or wood stick to stir your ingredients.
- Thermometer: Optional, but helpful for checking the soap base temperature.
- Spray Bottle with Rubbing Alcohol: Helps eliminate bubbles in the finished soap.
Step-by-Step Instructions for Melt-and-Pour Soap Making
Let’s outline a basic method for making your melt-and-pour soap. Use this as a foundation for all 38 recipes!
Prepare Your Workspace: Clear a clean, flat surface and gather all your ingredients and equipment.
Cut the Soap Base: Take your melt-and-pour soap base and cut it into small, even cubes to ensure even melting.
Melt the Soap Base:
- Microwave Method: Place the cubes in a microwave-safe container. Heat in 30-second intervals, stirring in between, until completely melted.
- Double Boiler Method: Fill the lower pot with water and place the soap cubes in the upper pot. Heat gently until melted, stirring occasionally.
Add Color and Fragrance: Once melted, remove from heat and let cool slightly (approximately 120°F/49°C). Add your chosen colorants and fragrance oils. Use approximately 0.5 oz of fragrance oil per pound of soap base for a well-scented soap.
Incorporate Additives: Stir in any additional ingredients such as botanicals or exfoliants.
Pour into Molds: Carefully pour the mixture into your soap molds. Fill to the top, but leave a small amount of space for expansion.
Spray with Alcohol: Lightly mist the top of the poured soap with rubbing alcohol to eliminate any surface bubbles.
Cool and Set: Allow the soap to cool and harden at room temperature for several hours or in the refrigerator for quicker results.
Unmold and Store: Once completely set, gently remove the soap from the molds. Store your finished soap in a cool, dry place, ideally wrapped in plastic wrap or in airtight containers to maintain freshness.
Tips for Success
- Ensure all utensils and molds are dry before starting, as water can affect the soap mixture.
- If you want softer soap, use a higher percentage of glycerin-based soap.
- If your soap mixture has bubbles, give it a gentle tap on the counter before it sets.
Common Mistakes to Avoid
- Overheating the Base: This can cause burns and degrade the soap quality. Always melt at lower temperatures and in short bursts.
- Adding Too Much Fragrance: While it’s tempting to add more for stronger scent, too much can irritate the skin.
- Not Curing: Some recipes may require additional curing time depending on the ingredients used, so always check instructions carefully.
Variations and Customization Ideas
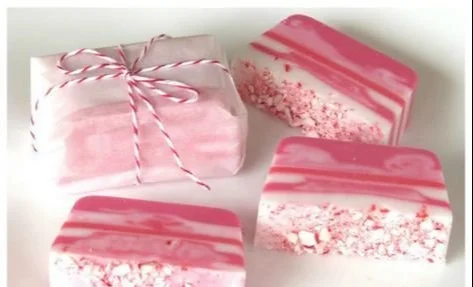
- Color Swirls: For a marbled effect, melt separate colors in different containers, and pour them simultaneously in a mold.
- Layered Soap: Allow the first layer to set slightly before pouring the second layer on top.
- Herbal Infusions: Add dry herbs or tea leaves (like chamomile or green tea) for natural benefits.
Storage and Shelf Life
Homemade melt-and-pour soaps generally have a shelf life of 6 to 12 months when stored in a cool, dry place away from direct sunlight. Wrapping them in wax paper or placing them in airtight containers can help maintain freshness and prevent moisture loss.
Safety Tips
- Work in a well-ventilated area, especially when using fragrance oils.
- Always wear gloves if you have sensitive skin or allergies to certain ingredients.
- Ensure all materials are skin-safe to avoid any allergic reactions.
Frequently Asked Questions
Q1: Can I use regular food coloring for my soap?
A1: It’s best to use soap-safe colorants as food coloring can alter the soap’s texture and may not be skin-safe.
Q2: How do I get rid of bubbles in my soap?
A2: Lightly spraying the surface with rubbing alcohol before it sets can help eliminate bubbles.
Q3: Can I use essential oils instead of fragrance oils?
A3: Yes! Many people prefer essential oils for their natural scents and benefits. Just remember that essential oils are often stronger, so use them sparingly.
Q4: What type of mold is best for melt-and-pour soap?
A4: Silicone molds are the most recommended as they allow for easy release and come in many shapes and sizes.
Q5: Can I add exfoliants like sugar or coffee grounds?
A5: Absolutely! Exfoliants can provide added skin benefits, but use them sparingly to avoid a harsh scrub.
Conclusion
Melt-and-pour soap making presents a fantastic opportunity to express your creativity while producing useful and beautiful homemade gifts. With these 38 unique recipes and tips, you’re well on your way to crafting delightful soaps that you’ll be proud to share. So gather your supplies, embrace your inner artist, and have fun with this wonderfully relaxing DIY project! Happy soap making!