
Embrace the Art of Homemade Cranberry Vanilla Shea Butter Soap
Picture this: the scent of fresh cranberries blending with warm vanilla wafts through your home as you create a delightful handmade soap. The holiday season is the perfect time to express your creativity and share thoughtful, personalized gifts with loved ones. By making your own cranberry vanilla shea butter soap, not only are you indulging in self-care, but you’re also crafting a gift that feels luxurious and heartfelt, a true treat for anyone on your gift list.
Why Make Your Own Soap?
Have you ever browsed through rows of soaps at the store, only to feel overwhelmed by the choices? Many products are packed with synthetic ingredients and harsh chemicals that can irritate the skin. Let’s be honest, wouldn’t you prefer something pure, natural, and made with love? Creating your own soap at home allows you to choose your ingredients—you can customize textures, scents, and colors to suit your preferences. Plus, the process is enjoyable and can be a therapeutic escape from our busy lives.
Gather Your Ingredients
Before diving into the soap-making process, it’s essential to gather all your ingredients. You’ll need:
- Shea Butter: It’s the star of our soap, known for its moisturizing and nourishing properties.
- Cranberry Fragrance Oil: This gives the soap its enticing berry scent; alternatively, you could use real cranberry extract for a more natural approach.
- Lye: This is necessary for the saponification process (don’t worry, we’ll talk safety in a bit).
- Water: Distilled is best.
- Colorants: Natural ones like beet juice or cosmetic-grade colorants can be used to give your soap a festive hue.
You might be wondering where to find these ingredients. Craft stores, health food stores, and online shops are fantastic resources. And if you’re still looking for more DIY inspiration, check out these cozy DIY candle ideas for an aromatic twist to your gifts as well.
Understanding the Saponification Process
Now, let’s dive into the science behind soap making, specifically saponification. This is the process where fats (like shea butter) react with lye to create soap and glycerin. It may sound complex, but here’s the truth: once you get the hang of it, it’s incredibly straightforward.
- Safety First: Always wear gloves and goggles when working with lye. It’s a caustic substance, and safety should be your number one priority.
- Mixing Lye and Water: Carefully add the lye to distilled water (never the other way around, which can cause a dangerous reaction). This mixture will heat up and produce fumes; stand back and let it cool.
- Melt the Shea Butter: Gently heat the shea butter until it liquefies. This can be done using a double boiler or microwave.
Combine and Blend
Once both the lye mixture and melted shea butter have cooled to about 100-110°F, it’s time to blend them together.
- Combine: Slowly pour the lye solution into the melted shea butter while using a stick blender or whisk to mix thoroughly.
- Add Fragrance and Color: Once the mixture thickens to a light trace (think cake batter consistency), add your cranberry fragrance oil and any colorants. Stir well to combine.
Pour into Molds
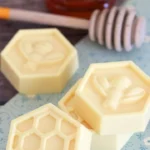
After blending, pour your soap mixture into molds. You can pick cute shapes that resonate with the holiday season or simple bar molds for a classic look. The soap will need to sit undisturbed for about 24-48 hours to harden.
Cutting and Curing Your Soap
Once the soap has set, it’s time to slice it into bars. Depending on the thickness of your pour, you might end up with various sizes—a fun surprise! But after cutting, don’t forget to cure your soap. Place the bars in a cool, dry area for about 4-6 weeks. This process allows any remaining lye to neutralize, making your soap safe and lovely for use.
Packaging Your Soap for Gifting
Now that your cranberry vanilla shea butter soap is ready, packaging becomes vital to its presentation. Consider using holiday-themed boxes, clear bags with ribbons, or even personalized tags. It’s these little details that elevate your homemade gift into something special. Plus, a handmade soap paired with a lavender candle makes an excellent duo for a self-care package!
Common Mistakes to Avoid
In any DIY project, mistakes can happen. Here are a few common ones and how to avoid them:
- Not Measuring Precisely: Soap making relies on accurate measurements. Always use a scale for both lye and oils.
- Skipping Safety Gear: Always prioritize safety when handling lye. Your health comes first!
- Rushing the Curing Process: Patience is key! Let your soap cure fully for optimal results.
Bonus Tips for the Best Soap Making Experience
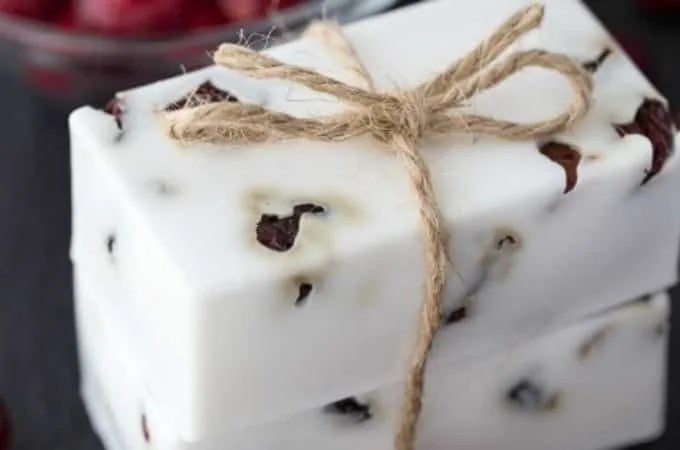
- Experiment with Add-Ins: Adding oats, dried cranberries, or essential oils can enhance the texture and aroma of your soap.
- Frozen Cranberry Bundles: Consider freezing small cranberry bundles in the soap for a festive look—just make sure the berries are well distributed.
- Stay Inspired: If you’re looking to expand your bath creations, the wide world of holiday DIY projects can fuel your creativity year-round.
Conclusion
Making your own cranberry vanilla shea butter soap is not only a wonderful way to pamper yourself but also a delightful gift for friends and family. As you unleash your creativity, consider exploring even more soap-making ideas, like cranberry vanilla shea butter soap recipes or try out new fall soap recipes to capture different seasonal scents. For captivating holiday inspirations, dive into simple yet impressive Christmas melt and pour soap recipes and discover endless possibilities in your soap-making journey. Let your creativity shine and enjoy the process of crafting something beautiful!