
Discover the Joy of Cold Process Soap Making
Imagine standing in your kitchen, surrounded by beautifully vibrant colors and charming scents wafting through the air. You’re not just cooking or baking; you’re crafting something special, something that blends both art and science. You’re making cold process soap, and trust me, it’s as rewarding as it sounds.
If you’ve ever felt the need to express your creativity or want to create a product that’s both beautiful and nourishing for your skin, you’re in the right place. Cold process soap making isn’t just a fun hobby; it’s a wonderful way to indulge in self-care while giving a personal touch to your skincare routine.
The Allure of Soap Making
You might be wondering why so many people are falling in love with making their soap at home. Let’s be honest, who doesn’t want a luxurious bar of soap that not only smells divine but also caters to their skin’s every need? We’ve all dealt with those store-bought bars that promise all sorts of benefits but end up drying our skin out or leaving us feeling unsatisfied. Soap making gives you the power to control every ingredient, and it’s truly empowering.
From experimenting with different oils and butters to adding in your favorite essential oils, every step allows you to unleash your inner artist. The colors, the textures, and the scents become extensions of your personality. So let’s dive into what makes this craft so special.
What Does Cold Process Soap Mean?
Cold process soap making is a method where you combine fats (like olive oil or coconut oil) with a concentrated lye solution. Yes, lye sounds intimidating, but with proper precautions, you can handle it safely. The magic happens during the saponification process, where lye transforms the oils into soap. Here’s the kicker: since it’s made at a low temperature, it retains the benefits of all the luxurious oils you’re using.
Why You Should Try It
- Customizable: You can make soap that addresses your skin’s specific needs.
- Eco-Friendly: You control what’s in your soap, so no mystery chemicals.
- Cost-Effective: Once you’ve got the basics, making your own soap is cheaper than buying high-end brands.
- Creative Outlet: The possibilities are endless with colors, scents, and designs.
The Basic Supplies You’ll Need
Ready to start your soap-making journey? Here’s a quick rundown of the essential items you’ll need:
- Oils: Olive oil, coconut oil, palm oil, and shea butter are popular choices.
- Lye: Sodium hydroxide is essential for the saponification process.
- Purified Water: Water is necessary to mix lye and oils.
- Soap Molds: You can use silicone molds or even repurpose old containers.
- Stick Blender: This speeds up the mixing process and helps achieve trace.
- Thermometer: To monitor temperatures before combining lye and oils.
- Scale: Accuracy is key in soap making, so a digital scale is a must.
- Safety Gear: Goggles, gloves, and a mask to protect yourself from lye.
Step-by-Step Guide to Cold Process Soap Making
Now that we’ve covered the essentials, let’s get into the nitty-gritty. Here’s how you can make your own beautiful, skin-loving soap:
1. Prepare Your Workspace
Start by cleaning your workspace thoroughly. Safety first, right? Make sure to gather all your supplies and wear your protective gear (goggles, gloves). You want to feel confident and secure as you start this beautiful journey.
2. Measure Ingredients Accurately
Using your scale, measure out the oils and lye. Here’s a simple rule of thumb: always add lye to water, never the other way around! It creates a chemical reaction that can be dangerous.
3. Mix Lye and Water
In a well-ventilated area, carefully mix the lye with water—this mixture will heat up and can be caustic, so handle it with care. Once it cools, you’ll see the magic start to happen.
4. Melt Your Oils
While your lye solution cools, gently heat your solid oils until they’re melted. Then, combine them with your liquid oils. Let everything cool until it’s around 100-110°F (38-43°C).
5. Combine Lye and Oils
Once both mixtures are at the right temperature, slowly pour the lye solution into the oils. Use your stick blender to blend until it reaches trace, which looks like a pudding-like consistency.
6. Add Extras
This is where the fun begins! Add essential oils, colorants, and any special ingredients like oatmeal or honey.
7. Pour into Molds
Carefully pour your soap mixture into molds. Don’t worry about perfection; the beauty of handmade soap is in its uniqueness!
8. Insulate and Wait
Cover your molds with a towel and let them sit undisturbed for 24-48 hours. This allows the saponification process to continue in a warm environment.
9. Unmold and Cut
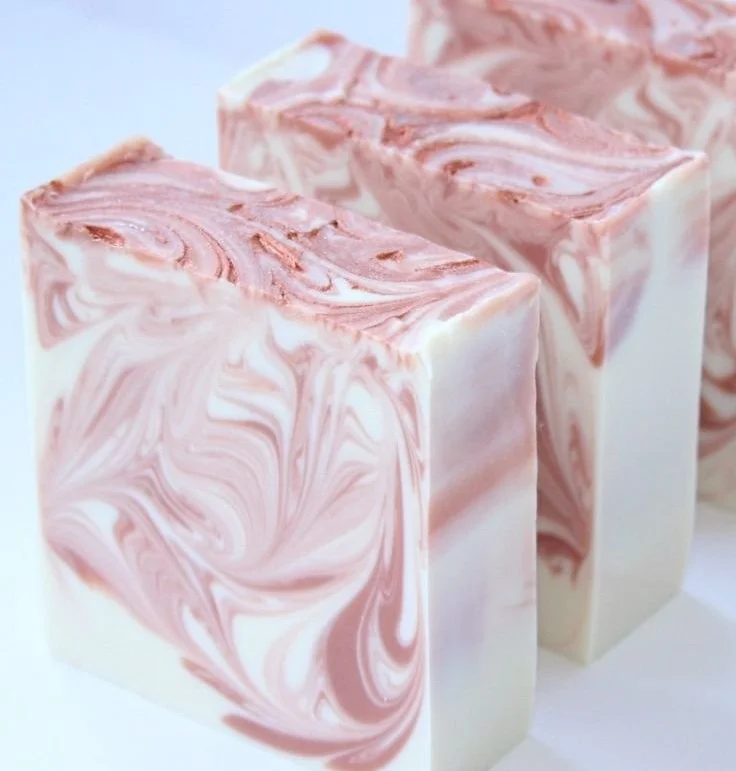
Once your soap has set, pop it out of the molds and cut it into bars. You can let them cure on a drying rack for about 4-6 weeks to allow excess moisture to evaporate.
10. Enjoy Your Creation
There’s nothing quite like the satisfaction of using soap you made yourself. It’s not just a product; it’s a labor of love!
Common Mistakes to Avoid
We’ve all stumbled at some point, especially when learning something new. Here are a few common pitfalls in cold process soap making:
- Not Weighing Ingredients: Precision is everything in soap making. Skipping the scale can lead to disastrous results.
- Ignoring Safety Precautions: Always wear gloves and goggles when working with lye.
- Rushing the Process: Patience is a virtue. Letting your soap cure is essential for a good end product.
Quick Beauty Tips for Beginners
- Start Small: Try a simple recipe before diving into complicated designs.
- Use Good Quality Ingredients: Your skin will thank you for it!
- Experiment with Scents: Blend different essential oils to find your favorite combinations.
- Document Your Process: Keep notes on what you did; it’ll help you improve in the future.
FAQs About Cold Process Soap Making
How long does it take to make soap?
The actual hands-on process takes just a few hours, but your soap needs to cure for 4-6 weeks before it’s ready to use.
Can I use any oils?
Not all oils saponify well. Stick to commonly used oils like olive, coconut, and palm.
What if my soap doesn’t harden?
If your soap is too soft, it may need more time to cure, or you could’ve used too much coconut oil, which can lead to a soft bar.
Bonus Self-Care Ideas
While your soap is curing, why not pamper yourself? Here are some self-care activities you can indulge in:
- Pampering Bath: Treat yourself to a long, relaxing bath.
- Journaling: Write down your soap-making experience and how you felt about the process.
- Meditation: Take some time to relax your mind and appreciate your creative endeavors.
Best Routine for Busy Women
Life gets hectic, and that’s okay! You can incorporate soap making into your busy schedule with a little planning:
- Choose a Weekend: Dedicate a few hours over the weekend for your soap-making session.
- Prep Ahead: Measure your ingredients the night before, so you can get right to work.
- Batch Make: Create multiple batches to use and gift. You’ll always have a lovely personalized gift on hand.
Conclusion
Crafting cold process soap is like embarking on a journey of self-discovery and wellness. Who knew that a simple bar could hold so much creativity, love, and care, not only for yourself but also for those around you? The next time you wash your hands or enjoy a relaxing bath, you can take pride in knowing you made a product that’s not only beautiful but also kind to your skin.
So why not take that plunge? Gather your ingredients, invite a friend over for some fun, and let your creativity flow. You’re not just making soap; you’re embracing a beautiful outlet that enriches your life and boosts your self-care routine. Trust me, once you make your first batch, you’ll wonder why you didn’t start sooner!