
Start Your Soap Making Journey with Natural Ingredients
Imagine this: you’ve just had a long day, and all you want is some time to unwind. You light a few candles, fill up your tub, and surround yourself with your favorite relaxing scents. You reach for that glorious bar of soap you’ve been saving, but you end up thinking… wouldn’t it feel even better if you made it? Well, here’s the truth: making DIY soap bars has never been easier, and I promise, you don’t have to be a beauty expert to get started.
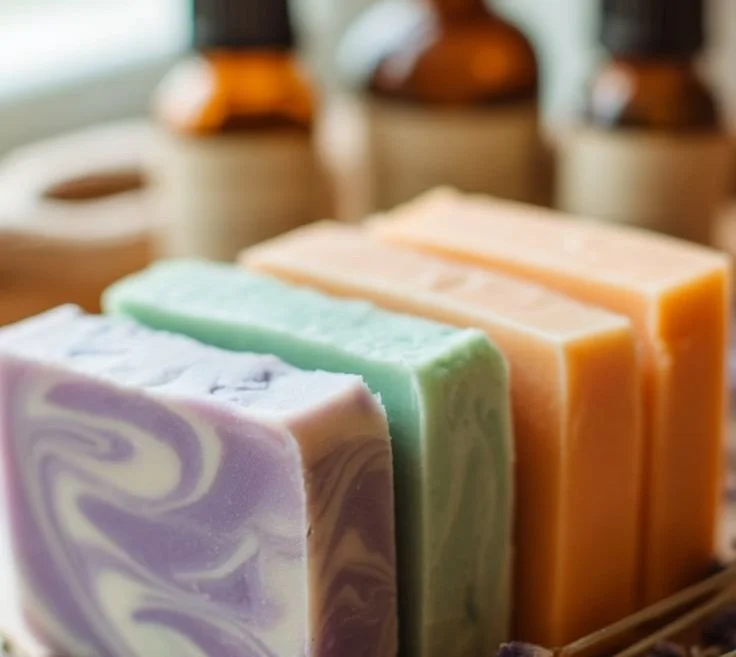
From fragrant lavender stress relief soap to invigorating eucalyptus respiratory soap and bright mood-boosting citrus bars, this guide is all about creating beautiful, natural soaps right in your kitchen. Let’s dive into this fun, creative journey that doesn’t just give you handcrafted soap but also fills your space with delightful aromas and offers a perfect self-care treat.
Gather Your Supplies
Before we leap into the fun part of creating your soap, let’s make sure you have everything you need!
Basic Supplies
- Soap Base: You can choose from glycerin, goat’s milk, or shea butter bases. These are available at craft stores or online.
- Essential Oils: Choose your favorites based on the benefits you’re looking for, like lavender for relaxation or eucalyptus for respiratory support.
- Dyes (Optional): Natural colorants like beet powder, turmeric, or activated charcoal can add a playful touch.
- Soap Mold: Silicone molds work great; they’re easy to clean and release the soap perfectly.
- Mixing Tools: A microwave-safe bowl, whisk or spoon, and measuring spoons.
- Labels: (Can you believe it’s necessary?) It’s nice to label your creations, so you know which is which!
Quick Tip: Don’t worry if you can’t find any specific ingredient right away. A quick internet search should guide you to nearby stores, or you might find some great alternatives!
Creating Lavender Stress Relief Soap
Lavender is known for its calming properties, making it the perfect choice when you’re looking to unwind after a stressful day. Let’s get started!
Ingredients
- 1 pound of glycerin soap base
- 15 drops of lavender essential oil
- Purple soap dye (optional)
- Dried lavender flowers (for decoration)
Instructions
Melt the Soap Base: Cut the glycerin soap base into small cubes and place them in a microwave-safe bowl. Heat in 30-second intervals, stirring in between until completely melted.
Add Essential Oils: Once melted, remove from the microwave and let it cool slightly. Add in your lavender essential oil and any dye you want to use. Stir until fully incorporated.
Incorporate Dried Lavender: If you choose to add dried lavender flowers, sprinkle a small amount into the mixture and stir.
Pour into Molds: Carefully pour the mixture into your soap molds.
Let it Set: Leave the soap to harden at room temperature for about 1-2 hours or in the fridge for faster results.
Pop Them Out: Once solid, gently remove the bars from the molds.
Sound familiar? You might be used to purchasing lavender-scented products, but nothing beats the satisfaction of having made it yourself. Plus, they can make lovely gifts!
Crafting Eucalyptus Respiratory Soap
This revitalizing soap is perfect for those days when you’re feeling a little under the weather or just need an energy boost. Eucalyptus is great for opening up your airways and invigorating your senses.
Ingredients
- 1 pound of goat’s milk soap base
- 10 drops of eucalyptus essential oil
- Sea salt (optional, for exfoliation)
- Green soap dye (optional)
Instructions
Melt the Soap Base: Just like with our lavender soap, cut the goat’s milk soap base into small pieces and microwave it in intervals until completely melted.
Mix in the Eucalyptus: Remove the melted mixture from the microwave and allow it to cool for about a minute. Then, mix in the eucalyptus oil and dye if you want that wonderful green hue.
Add Sea Salt (Optional): For an exfoliating effect, add a tablespoon of sea salt and mix well.
Pour into Molds: Carefully pour this mixture into your soap molds.
Set and Enjoy: Allow your soap to set until hardened, which should take about 1-2 hours.
Reveal Your Creation: Once solid, pop them out and enjoy that fresh scent.
If you’ve ever been in need of relief from a cold or just want to start your day with a burst of freshness, this eucalyptus soap will be a game changer.
Making Mood-Boosting Citrus Bars
Who doesn’t love the uplifting scent of citrus? These bars are perfect for brightening your day and bringing a smile as you wash up. Let’s get into the zesty goodness!
Ingredients
- 1 pound of shea butter soap base
- 15 drops of lemon, orange, or grapefruit essential oil (or a mix!)
- Yellow or orange soap dye (optional)
- Dried citrus peels or zest (for decoration)
Instructions
Melt the Soap Base: Chop the shea butter soap base into cubes. Heat in the microwave until melted, stirring as needed.
Add the Essential Oils: Once melted, let it cool and then mix in your chosen citrus oils. For a pop of color, add the dye and mix well.
Incorporate Dried Citrus: If you’re feeling fancy, add some dried citrus peels or zest for visual appeal and additional citrus aroma.
Pour into Molds: Carefully pour your mixture into your soap molds.
Set for the Perfect Mark: Let the soap cool and harden for 1-2 hours until firm to the touch.
Release and Revel: Remove them from the molds and let the fruity scents take over.
Bonus Self-Care Ideas
Let’s be honest; creating these soaps isn’t just about cleanliness—it’s about wellness and self-love. Pair your soap-making with these simple self-care ideas:
- Create a Spa Night: Light some candles and set the mood with soft music while you enjoy your handmade soap.
- Pamper Yourself with a Soothing Bath: Fill up the tub, add some bath salts, and use your new soap bars for a truly relaxing experience.
- Host a DIY Soap-Making Party: Gather your friends, share the supplies, and turn soap making into a fun bonding experience.
Common Mistakes to Avoid
Of course, every journey comes with a few bumps. Here are some common pitfalls and how to dodge them:
- Rushing the Melting Process: It’s tempting to speed things up, but don’t. Melting slowly ensures a smooth texture.
- Skipping the Testing Phase: Always test a small batch first to avoid disaster and see how the scent blends.
- Ignoring Safety Protocols: Always handle melted soap with care, and ensure you don’t overheat it.
Frequently Asked Questions
How long will my soap last?
- Homemade soap can last quite a while when stored properly in a cool, dry place. However, it’s best to use them within 6 months for optimal freshness.
Can I use any essential oil?
- Absolutely! Just ensure the essential oil you choose is skin-safe. Some oils, like cinnamon and clove, can irritate your skin.
What if I don’t have molds?
- You can use any container (like muffin tins or small cardboard boxes) covered with plastic wrap. Just remember to grease them lightly for easier removal.
Conclusion
Creating DIY soap bars is not just about the end product; it’s about nurturing yourself and sparking creativity. Whether you keep your beautifully crafted soaps for personal use or share them with loved ones, the joy and satisfaction of making something by hand can be profound. Remember that self-care doesn’t have to be a chore—it can be an enjoyable task that transforms your daily routine into an uplifting experience.
So go ahead, gather your supplies, and start your soap-making journey. Enjoy the process, embrace your creativity, and let these natural ingredients nourish your mind and soul. You’ve got this!