
A Journey into Coffee-Infused Cold Process Soap
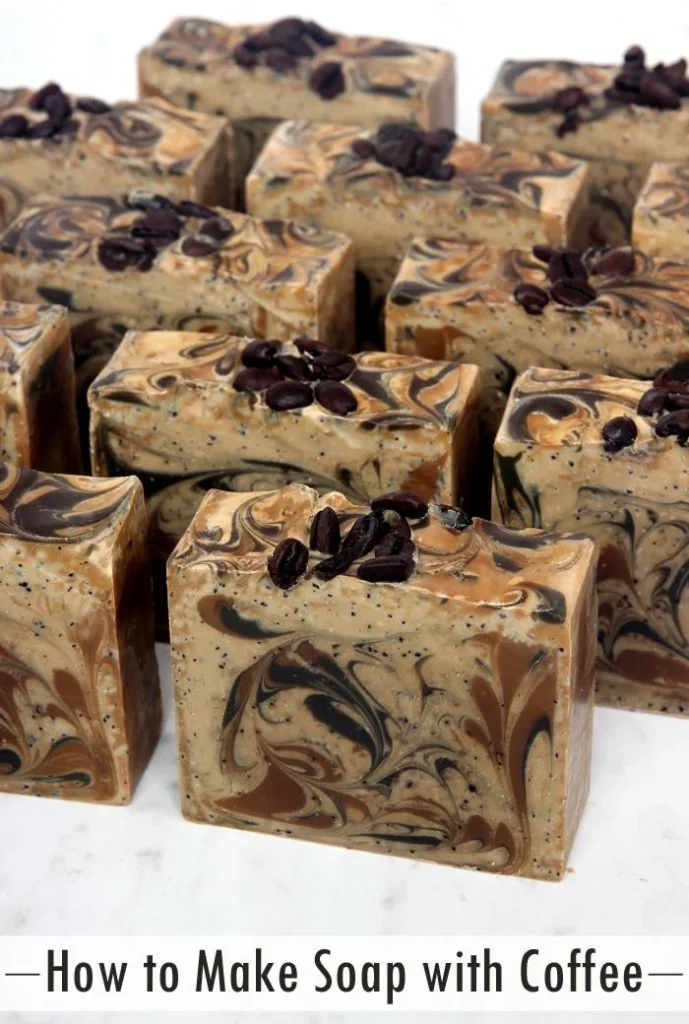
Imagine this: It’s a crisp morning in the Pacific Northwest. The air is rich with the aroma of freshly brewed coffee, mingling with the earthy scent of the trees outside your window. You’re clutching a warm mug, savoring that first sip. Now, what if I told you that you could bring this experience into your skincare routine? Yes, you can create beautiful, luxurious cold process soap using locally-roasted coffee. Let’s dive into how incorporating coffee into your soap-making process can give your skincare a unique twist!
Why Coffee in Cold Process Soap?
You might be wondering why we’re so keen on using coffee in our soap. Here’s the truth: not only does coffee have a rich, inviting look that’s perfect for aesthetics, but it also brings some great benefits for your skin. Coffee grounds act as a natural exfoliant, helping to scrub away dead skin and leave you looking fresh and vibrant. Plus, the antioxidants found in coffee can help to fight free radicals, promoting a youthful glow. Sound familiar?
What You Need to Get Started
Before we jump into the process, let’s gather everything you’ll need. Get ready to unleash your creative side!
- Ingredients:
- Locally roasted coffee (preferably organic)
- Distilled water
- Sodium hydroxide lye
- Triglyceride oils (like coconut or olive oil)
- Fragrance oil (optional)
- Equipment:
- A digital scale
- A heat-safe container for mixing lye
- A stick blender
- A soap mold
- Protective gear (gloves and goggles)
Step-by-Step Guide to Making Coffee-Infused Soap
Step 1: Brewing the Coffee
Let’s kick things off with brewing the coffee! Here’s how to do it:
- Choose Your Coffee: Grab your favorite locally-roasted coffee. Darker roasts tend to work best for soap making, providing a richer color.
- Brew It Right: Use distilled water to brew your coffee to ensure purity. Get your coffee nice and strong – about twice as strong as you usually would for drinking.
- Cool Down: Allow it to cool down to room temperature. This is super important! If your coffee is too hot when you mix it with lye, it can lead to unsafe reactions.
Step 2: Mix the Lye
Next up is the lye. Now, let’s be honest – handling lye can be intimidating, but don’t let that scare you off.
- Protect Yourself: Always wear gloves and goggles when handling lye. Safety first, always!
- Combine Lye and Coffee: Slowly add sodium hydroxide to your cooled brewed coffee. Stir gently to avoid any splashes. This will create a chemical reaction, generating heat and releasing unpleasant odors (trust me, this smell doesn’t last).
- Let It Cool: Set your lye mixture aside. It should be around 110-120°F when we’re ready to combine it with any oils.
Step 3: Prepare the Oils
While the lye mixture cools, let’s work on the oils.
- Measure Your Oils: You can use any blend of oils. Coconut oil gives a great lather, while olive oil offers moisturizing properties. Measure them by weight using a digital scale.
- Melt the Oils: If you’re using solid oils like coconut or shea butter, melt them down gently until they’re completely liquid.
- Combine the Oils: Once your oils are at a similar temperature to the lye mixture (around 110-120°F), it’s time to mix!
Step 4: Combine and Blend
Now comes the exciting part!
- Mix the Two: Carefully pour the lye mixture into your oils. Be gentle – no splashing, please!
- Blend to Trace: Use a stick blender to mix the soap until it reaches “trace.” This means when you lift the blender, the soap will leave a trail on the surface before sinking back in. Think of it like making a cake batter, but a little thicker.
- Add Fragrance (Optional): If you’re using a fragrance oil, now’s the time to mix it in! Just be cautious with your quantities, as some fragrances can discolor or change the soap.
Step 5: Pour and Cure
Almost there!
- Pour Into Molds: Pour the soap batter into your molds, tapping them gently to remove any air bubbles.
- Insulate: Cover the molds with a towel to keep them warm and allow them to saponify. This usually takes about 24-48 hours.
- Unmold: Once the soap has cooled and hardened, carefully remove it from the mold.
Step 6: Cure Your Soap
Now for the TLC part!
- Cure Time: Let your soap cure for 4-6 weeks. This allows excess lye to neutralize and the soap to harden properly.
- Store it Right: Keep your soap somewhere cool, dark, and dry.
Common Mistakes to Avoid
When we’re getting creative, mistakes happen, and that’s okay! Here are a few common pitfalls to avoid:
- Using Coffee that’s Too Hot: This can cause an unfavorable reaction with the lye. Always ensure it’s cooled to room temperature first.
- Skipping Safety Gear: Lye can be dangerous if not handled properly. Always prioritize safety.
- Not Allowing Enough Cure Time: Patience is key in soap making, so don’t rush this part!
Bonus Self-Care Ideas
Now that you’ve made your unique coffee-infused soap, let’s add to your self-care routine. Here are a few ideas:
- Coffee Scrubs: Combine extra coffee grounds with coconut oil for an exfoliating scrub.
- Relaxing Baths: Add a few drops of your favorite essential oil for a serene bathing experience.
- Mindfulness Time: Take a moment each day to enjoy your soap and focus on how you’re caring for your skin.
Final Thoughts
Incorporating coffee into your cold process soap not only showcases your creativity but also elevates your skincare routine naturally. The process is straightforward, and the end result is something truly beautiful. Plus, you’ll be supporting local businesses by using your favorite roasts!
So, the next time you crave that aromatic coffee experience, remember that it can go beyond your mug and into your skincare routine. You’ve got this! You’ll create a skincare staple that’s both earthy and luxurious. Just picture yourself indulging in your homemade coffee soap, feeling nurtured and confident.
Now, go ahead and give it a try. Coffee-infused soap awaits you!