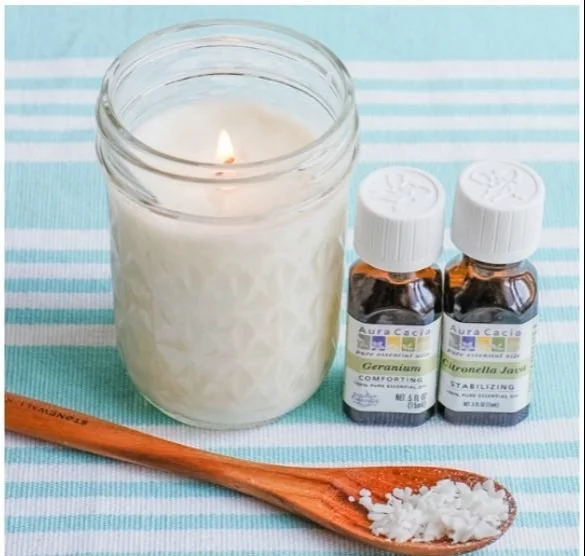

Discovering the Joy of Homemade Citronella Candles
Picture this: you’ve just settled down for a cozy summer evening on your patio, the sun’s setting, and a gentle breeze is blowing. But wait—what’s that? Flies buzzing around your picnic spread and mosquitoes gearing up for dinner. Sound familiar? We’ve all experienced that moment when nature’s little pests crash our outdoor plans, right? What if I told you there’s a sweet, simple solution that not only keeps the bugs at bay but also leaves your space smelling divine?
Let’s talk about homemade citronella candles! Not only will they elevate your summer evenings, but they’ll also add a personal touch to your home. Plus, making them is super easy and fun—you might just find it becomes a regular part of your self-care routine.
The Benefits of Citronella Candles
You might be wondering, why citronella? Well, citronella oil is known for its natural insect-repelling properties. It’s derived from the leaves and stems of different species of lemongrass, making it a plant-based way to deter unwanted guests while enhancing your home’s ambiance. Here are a few reasons to love citronella candles:
- Natural Bug Repellent: Helps keep mosquitoes and other pests away.
- Pleasant Aroma: Offers a light, fresh scent that you’ll love.
- Creative Craft: A chance to express yourself through DIY projects.
- Eco-friendly Option: You can control the ingredients and reduce waste.
Now, let’s dive into the details of how you can easily create your own citronella candles at home. Trust me, once you try this, you’ll likely never go back to store-bought options.
Gather Your Supplies
Before we dive into the process, let’s gather everything you’ll need. It’s nice to have everything ready, isn’t it? Here’s your shopping list:
- Wax: Soy wax or beeswax works great (soy is more eco-friendly and burns longer).
- Citronella essential oil: Most health stores or online retailers carry this.
- Wicks: Choose ones that are appropriate for the candle size you’re making.
- Containers: Glass jars, tea cups, or even muffin tins work beautifully.
- Double boiler: (or a heat-safe bowl over a pot of water) to melt your wax.
- Thermometer: Optional, but handy to get the wax to the right temperature.
- Coloring (optional): If you’d like your candles to have a little extra flair.
Got everything? Perfect, let’s get to the fun part!
Step-by-Step Guide to Making Citronella Candles
Step 1: Melt the Wax
Start by breaking up your wax into small pieces. This helps it melt evenly. Fill your double boiler with water and set it on medium heat. Place the wax in the top part and watch it slowly melt. You can stir occasionally with a wooden spoon.
Tip: Gently heating the wax is essential to avoid burning. If you don’t have a double boiler, you can use a regular pot and a heat-safe bowl.
Step 2: Prepare Your Containers
While your wax is melting, it’s a great time to prepare your containers. If you’re using jars, make sure they’re clean and dry. If you’re feeling creative, you can decorate the outside with twine, paint, or even stickers to make them more personal.
If you’re using wicks, attach them to the bottom of your containers using a dab of melted wax or hot glue. This ensures they stay in place while you pour in the wax.
Step 3: Add Citronella Essential Oil
Once your wax is fully melted (it should be around 170-180°F), it’s time to add the citronella essential oil. The standard ratio is about 1 ounce of oil for every pound of wax—this can vary a bit depending on your preference, so feel free to adjust. Stir the oil into the melted wax thoroughly.
Quick beauty tip: If you want to add color, now’s the time! Just a few drops of candle dye (if you’re using dye specifically designed for candles) can enhance the look of your candles.
Step 4: Pour and Secure the Wick
Carefully pour the wax mixture into your prepared containers, leaving a little space at the top. Make sure the wick is centered before the wax begins to harden. You can use a pencil or chopstick to hold the wick in place across the top of the container.
Step 5: Let It Set
Once poured, let your candles cool and harden completely at room temperature. This usually takes a couple of hours, but it’s worth the wait! You’ll notice the wax will contract a bit as it cools, which might create a small well around the wick—don’t worry about that!
Step 6: Trim the Wick
After the candles have completely cooled and set, trim the wick to about 1/4 inch above the wax surface. This will help the candle burn more evenly.
Step 7: Enjoy Your Candles!
Now, the moment you’ve been waiting for. Light your candles and enjoy the calming effect of the citronella scent as it permeates your space while keeping those pesky bugs away.
How to Make Your Candles Unique
One of my favorite parts about making these candles is the opportunity to mix and match scents. What would happen if you added a few drops of lavender or eucalyptus essential oil? It could create a beautiful, relaxing aroma while still keeping insects at bay!
Feel free to experiment with different combinations:
- Citronella and lemongrass: A strong, citrusy blend.
- Citronella and peppermint: For a refreshing twist.
- Citronella with lavender: To help you unwind on those warm evenings.
Be creative! Your candles are your little masterpieces waiting to shine.
Common Mistakes to Avoid
While crafting homemade citronella candles is relatively easy, here are a few pitfalls to watch for:
- Using too much essential oil: Too much can be overpowering and may cause the candle to burn improperly.
- Not securing the wick: Make sure it’s stable before pouring the wax.
- Pouring too hot: If you pour when it’s too hot, it can crack your containers or create an uneven surface.
- Not letting it cool properly: Rushing the cooling process can result in an uneven burn.
FAQs About Homemade Citronella Candles
Can I use paraffin wax instead of soy?
Absolutely, but soy wax is more eco-friendly and burns cleaner, which is why I recommend it!
How long do they last?
It depends on how big your candles are and how often you use them, but a standard soy candle can last anywhere from 10 to 30 hours.
Can I use them indoors?
While citronella is effective against insects, it’s typically used outdoors. However, they can be used indoors too; just make sure your space is well-ventilated.
Conclusion: Embrace Your Creativity
Creating homemade citronella candles is more than just a project; it’s a meditative experience that can brighten your home and protect your summer nights. Plus, it’s a beautiful way to express your personal style. So the next time you find yourself swatting away pests, remember this DIY approach.
You’ve got this! Now, grab your supplies, gather your friends or family, and make a fun evening out of it. Who knows—this could become a cherished summer ritual that you’ll look forward to every year.
So, let’s keep those bugs away and create a lovely atmosphere with gorgeous, homemade citronella candles that you can be proud of. Enjoy the process, and most importantly, enjoy your summer nights!