
Imagine This Scene
Picture this: It’s a cozy Saturday afternoon, and you’re snuggled up in your favorite corner of the couch, a warm blanket wrapped around you. The sunlight streams through the window, casting soft patterns across the room. You’ve just finished a short book that left you feeling inspired and content. But wait—what’s that missing element? Ah, yes! The soothing aroma of a lovely candle flickering on your coffee table, infusing the air with delightful scents that lift your spirits.
Now, you might be wondering how to create that perfect ambiance without breaking the bank or heading out to the store. Here’s the truth: making homemade candles is not only simpler than you think, but it can also be an incredibly rewarding self-care ritual. Trust me, once you dive into this craft, you’ll likely find it becomes a go-to weekend activity.
If you’ve ever tried to make candles before and felt overwhelmed or disheartened, you’re not alone. We’ve all been there, thinking that it requires advanced skills or a scientist’s laboratory. But I’m here to share the easiest way to master this delightful art, ensuring your space is not just filled with light, but with the warm, inviting scents that soothe your soul.
What You’ll Need for Candle Making
Before diving into the process, let’s talk about what you’ll need. Trust me, you may already have some of these items lying around your home:
Essential Ingredients
- Wax: You can use paraffin, beeswax, or soy wax. Soy is my personal favorite for beginners since it’s eco-friendly and easy to work with.
- Wicks: Choose wicks based on the size of your container—it’s crucial for a smooth burn.
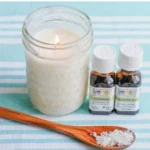
- Fragrance Oils or Essential Oils: This is where the magic happens. Choose scents that you love or that evoke special memories.
- Dyes (optional): Want to add a little color? Wax dyes can make your candles pop visually.
- Containers or Molds: Old mason jars, teacups, or dedicated candle containers all work beautifully.
- Double Boiler or a makeshift one: If you don’t own a double boiler, a heat-safe bowl over a pot of boiling water will do just fine.
- Thermometer: Not absolutely necessary, but helpful to get your wax to the right temperature for adding fragrance.
- Stirring stick: A simple wooden stick or a chopstick works a treat.
Common Tools
- Scissors: For trimming wicks.
- Newspaper or a protective covering: This keeps things tidy in case of spills (which can happen).
Once you’ve gathered everything, we can get started!
The Candle-Making Process
Step 1: Prepare Your Workspace
Let’s be honest—nobody wants to find wax splatters on their favorite tablecloth. Lay down some newspaper or an old towel to catch any drips. This makes cleanup way easier and helps to let you focus on the fun part.
Step 2: Measure the Wax
For a standard-sized candle, about 1 pound of wax will do. If you’re using a container, this is a good rule of thumb: one pound of wax will fill about a 16-ounce container. You might be tempted to eyeball it, but measuring ensures you won’t run out halfway through!
Step 3: Melt the Wax
Using your double boiler, heat the wax slowly on medium-low heat. It can take a bit of time to melt, so show it some patience. If you don’t have a thermometer, just keep an eye on it. When the wax is fully melted and reaches about 170°F (that’s roughly 77°C), you’re good to go!
Step 4: Add Fragrance and Color
Once your wax is melted, it’s time for the fun part—adding fragrance and hues! If you’re adding color, do it when the wax is at around 170°F. Stir gently until the dye dissolves completely. Later, add your fragrance oil (typically around 1 ounce per pound of wax) and stir for about two minutes. This ensures the scent is evenly distributed throughout the wax.
Step 5: Prepare the Wick
While the wax cools a bit, prep your wick. If you’re using a container, secure the wick to the bottom using a bit of melted wax or a wick sticker (these are super handy). Make sure the wick is centered! I’ve learned the hard way that uneven wicks can lead to lopsided candles, which just won’t do.
Step 6: Pour the Wax
When the temperature drops to around 140°F (60°C), carefully pour the melted wax into your container. Here’s a golden tip: pour slowly and directly onto the wick to avoid air bubbles. Fill it to about half an inch below the top edge so it doesn’t overflow.
Step 7: Secure the Wick
To keep your wick centered while the candle solidifies, use a couple of chopsticks or a pencil laid across the top of the container. Poke the wick through, and it should hold itself in place perfectly.
Step 8: Let It Set
Now comes the hardest part: waiting. Let your candle cool completely for several hours. To avoid any cracks forming on the top, it’s helpful to keep the candles in a cool, undisturbed environment while they set.
Step 9: Final Touches
Once cooled, trim the wick to about ¼ inch above the wax so that it burns evenly. You might be excited to light it right away, but I recommend letting the scent cure for about 48 hours before burning. This will deepen the fragrance and make your candle even more delightful.
Step 10: Light and Enjoy
Now it’s time to light your candle and bask in its glow! Enjoy the ambiance and aromas that transform your space into a haven of relaxation.
Quick Candle-Making Tips
- Choose scents that blend well; complementary fragrances create a more sophisticated aroma.
- If you’re experimenting with color, start with a small amount; you can always add more.
- Always label your candles if you’re creating multiple scents, especially if you plan to gift them!
Common Mistakes to Avoid
As easy as candle-making can be, there are a few common pitfalls to sidestep:
- Skipping the Wick Size: Always check the recommended wick size for your chosen container.
- Overheating the Wax: High temperatures can cause the wax to discolor and lose its scent.
- Neglecting to Stir: Stirring is essential for even fragrance throughout the candle.
- Not Testing Burn: Always burn a test candle to see how it performs. It’s a great way to learn and improve your methods for future candles.
FAQs About Candle Making
Can I use any type of wax?
While you can experiment with various wax types, soy wax is the most user-friendly, especially for beginners.
How long does it take for a candle to cure?
A general guideline is 48 hours, but some fragrances benefit from a longer cure. Experience will guide you!
Can you reuse candle jars?
Absolutely! Just clean them out thoroughly, making sure to remove any old wax and wick remnants.
Bonus Self-Care Ideas
Candles are a beautiful addition to your self-care rituals, but why stop there? Here are some bonus ideas for creating your own home spa experience:
- Make a bath salt blend to accompany your candle-lit soak.
- Prepare a herbal tea with calming flavors, like chamomile or lavender.
- Set up a cozy reading nook with your favorite book and your handmade candle glowing softly beside you.
Best Routine for Busy Women
We’ve all been there, rushing through life with barely enough time for ourselves. Here’s a simple routine to sneak in moments of self-care even on your busiest days:
- Set aside one hour each week for a self-care activity—like candle-making.
- Wind down your evenings with illuminated candles; it creates a calming atmosphere.
- Incorporate aromatherapy into your daily routine with your homemade candles lighting your workspace or relaxation zone.
Conclusion
As you can see, making homemade candles is not just a rewarding craft; it’s a wonderful way to infuse your home with love, warmth, and personal touches. With just a few supplies and a little bit of patience, you can create something beautiful.
So, the next time you find yourself yearning for a comforting scent, think of making your own candle instead of buying one. It’s not just about having a nice smell in your home—it’s about crafting moments of joy and self-expression. You’ve got this!
Now go ahead, gather your supplies, and light up your weekend with some creative candle magic. I can’t wait to hear what scents you whip up and watch your self-care journey blossom!