
The Joy of Beeswax Candles and How to Make Them at Home
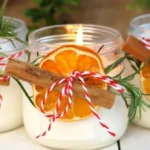
Picture this: it’s a cozy evening, the gentle flicker of candlelight dances across your walls, filling the room with a warm, inviting glow. The sweet, honey-like scent of beeswax wafts through the air, and you can’t help but feel a sense of calm and tranquility wash over you. You might be wondering, “How can I recreate this magical atmosphere at home?”
Well, you’re in luck! Making beeswax candles is not only surprisingly easy but also a delightful way to infuse your space with beauty and essence. Trust me; I’ve been there—trying to find that perfect balance of ambiance, wellness, and a tiny touch of self-indulgence. Let’s dive deep into the enchanting world of DIY beeswax candle-making!
Why Beeswax Candles?
You may ask why I am such a fan of beeswax candles. Here’s the truth: they’re more than just a pretty home accessory. They offer an array of benefits that make them stand out from traditional paraffin candles.
Natural and Non-Toxic: Beeswax candles are free from harmful chemicals, making them a safer choice for you and your loved ones. Unlike paraffin candles, which can release toxins, beeswax cleans the air.
Long Burn Time: If you’ve ever burned a candle that barely lasts an hour, you know the struggle! Beeswax candles have a longer burn time, letting you enjoy their beauty and fragrance for hours.
Air Purification: Yes, these lovely little creations can help purify the air. When burned, they release negative ions that can bind with toxins, helping to clear the air around you.
Natural Honey Scent: Let’s be honest—there’s nothing like the subtle, delightful aroma of beeswax. It’s not overpowering but rather comforting, adding a touch of warmth to any space.
Aesthetic Qualities: Not only do beeswax candles look stunning, but they also add a natural, rustic charm that can complement any home décor.
Isn’t it the best feeling to know you’re bringing something healthy, beautiful, and eco-friendly into your home?
Getting Started: Supplies You’ll Need
Before you dive into the fun of candle-making, let’s gather everything you’ll need.
Essential Supplies
- Beeswax Sheets or Blocks: You can find beeswax in craft stores or online. The sheets are particularly easy to work with for beginners.
- Wicks: Look for cotton or wooden wicks. Make sure they’re the right size for your candle’s diameter.
- Double Boiler: This a must for melting beeswax without burning it. If you don’t have one, you can create your own by placing a smaller pot inside a larger pot filled with water.
- Pouring Pitcher: This will make transferring melted wax into molds much easier.
- Thermometer: It’s not essential, but it helps if you’re particular about temperatures.
- Molds or Containers: You can use candle molds, muffin tins, or any heat-safe container you have laying around.
Optional Supplies
- Essential Oils: If you want to enhance your beeswax candles with lovely fragrances, essential oils like lavender or citrus work beautifully.
- Coloring Dyes: Though beeswax has a natural beautiful golden hue, you can add color if you prefer.
- Decorative Elements: Dried flowers, herbs, or spices can add a charming touch to your candles.
Step-by-Step Guide to Making Beeswax Candles
Let’s get our hands a little sticky! Making beeswax candles can be a therapeutic experience. Here’s how to do it step-by-step.
Preparing the Workspace
- Find a Flat, Clear Surface: You’ll want ample space to work without disrupting anything. Lay down newspaper or an old cloth to catch any drips.
- Set Up Your Double Boiler: Fill the larger pot with water and place it on the stove. Add beeswax to the smaller pot and set it inside the larger one.
Melting the Beeswax
- Heat the Water: Turn your burner to medium heat. The water should simmer, allowing the beeswax to melt without burning.
- Monitor the Temperature: Beeswax typically melts at around 145°F to 150°F (63°C to 66°C). Make sure to check periodically to avoid overheating.
Preparing the Wicks
- Measure the Wicks: Cut your wicks to about twice the height of your container or mold.
- Secure the Wicks: If you’re using a mold, place the wick in position either by using a bit of melted wax at the bottom or a wick holder.
Pouring the Wax
- Add Optional Ingredients: If you want to add essential oils or color, do so when the beeswax is fully melted. Stir gently to combine.
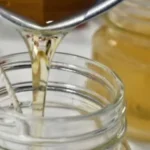
- Carefully Pour Wax: Use your pouring pitcher to transfer melted beeswax into your molds. Leave about half an inch from the top.
- Smooth the Top: If needed, you can use a spoon to smooth over the top of your poured candle.
Setting the Candles
- Allow Cooling: Let your candles cool completely at room temperature. This could take several hours.
- Trim the Wicks: Once set, trim the wicks to about a quarter-inch above the surface of the candle.
Common Mistakes to Avoid
Even the best of us can stumble when trying something new. Here’s what to keep in mind:
- Don’t Rush the Heating Process: Beeswax can burn easily, so take your time melting it gently.
- Overfilling Molds: You might think you can fill to the top, but if the wax sinks while cooling, you may end up with a dipped surface. Leave a little space.
- Wicking Issues: If your candle burns too quickly or too dimly, it might be the wick. Make sure it’s the right size for your candle’s diameter.
Maintenance and Care for Your Candles
Now that you’ve successfully made your own beeswax candles, how do you care for them? Remember, the better you treat them, the longer they will last.
- Keep Away from Direct Sunlight: Beeswax can discolor, so try to store them in a cool, dark place when not in use.
- Trim Your Wicks Regularly: A shorter wick results in a cleaner burn, so keep it trimmed to about a quarter-inch.
- Avoid Drafts: Candles burn best in a calm atmosphere, so keep them away from open windows or vents.
The Beauty of Creating Your Own Candles
There’s something incredibly rewarding about creating your own home essentials. Not only do DIY beeswax candles emit a beautiful, organic glow, but they also connect you to nature in such a lovely way. Plus, they serve as thoughtful gifts or personal treats that you can feel proud of.
Let’s be honest; you might just find yourself feeling inspired to explore other DIY projects. Once you’ve mastered the art of beeswax candles, why not move on to soaps or bath bombs? Imagine how incredible it would be to light one of your candles, run a bath with your homemade products, and enjoy a moment of blissful self-care.
Conclusion
You’ve made it to the end of this delightful journey into beeswax candle-making! It’s not just about crafting candles; it’s about creating a home that embodies warmth, love, and a touch of personal expression.
As you light your handmade beeswax candle and watch the flickering flame, remember that you’ve infused your space with intention, beauty, and a little piece of yourself. You deserve this moment; embrace it! Here’s to a brighter, cozier home, one beeswax candle at a time.
So, are you ready to bring that cozy ambiance into your life? Happy crafting!