
Discovering the Art of Candle Making
Imagine this: you’ve had a long, tiring day and all you want to do is unwind in a cozy, fragrant environment. A flickering candle seems to transform your home into a serene sanctuary, doesn’t it? There’s something so warm and inviting about candlelight, paired with your favorite scents wafting through the air. But what if I told you that you could create that blissful atmosphere yourself?
Yes, that’s right! Candle making is not just for seasoned artisans. If you’re new to the craft, don’t worry! We’re diving into a complete guide for beginners that will have you whipping up beautiful homemade candles in no time. If you’re interested in nurturing your creative side and cultivating a little self-care practice, this is the perfect way to get started.
So, pour yourself a comforting cup of tea (or a nice glass of wine), and let’s light the way to your new favorite hobby.
The Joy of Candle Making
Candle making is more than a simple craft; it’s a delightful form of self-expression and relaxation. You might find it incredibly soothing to mix fragrances, select colors, and watch your creations take shape. It’s a wonderful hobby that can also make thoughtful personalized gifts for friends and loved ones.
Here’s the truth: you’ll find satisfaction in knowing you’ve created something beautiful from scratch. And let’s be honest, nothing beats the feeling of lighting a candle you’ve made yourself and enjoying the ambiance while it fills your space with your favorite scent.
Gathering Your Supplies
Before we jump into the actual candle making, let’s ensure you have everything you need. Don’t worry; getting started doesn’t have to break the bank. Here’s a checklist of basic supplies:
Essential Supplies
- Wax: You can choose from beeswax, paraffin, soy wax, or palm wax. Each has its own benefits, but for beginners, soy wax is often preferred as it’s easy to work with and eco-friendly.
- Wicks: The size and type of wick you choose will depend on the size of your container and the wax type. Cotton and wooden wicks are great options.
- Containers or Molds: Think about what you’d like your candles to look like. You can use jars, tins, or silicone molds.
- Fragrance Oils: Choose scents that bring you joy—lavender for relaxation, citrus for a refreshing vibe, or perhaps a cozy vanilla.
- Color Dyes: Not necessary, but adding a few drops of dye can enhance the aesthetic appeal of your candle.
- Thermometer: You’ll want to keep an eye on the temperature of your wax for optimal pouring.
- Double Boiler: A standard technique for melting wax. If you don’t have one, don’t fret! You can create a makeshift one using a smaller pot inside a larger one.
Optional Supplies
- Stirring Utensils: Wooden or silicone spoons work well.
- Pouring pitcher: Makes it easier to pour wax into containers without making a mess.
- Wick holder: These help to keep the wick centered as the wax sets.
Once you have your supplies ready, you’re one step closer to creating your first candle!
Step-by-Step Candle Making Process
Now that you’ve gathered everything, let’s get into the delightful candle-making process. When following these steps, remember to be patient and have fun!
Step 1: Prepare Your Workspace
Start by laying down newspaper or a disposable tablecloth to catch any wax spills. It can get a bit messy, so a dedicated space for this craft is essential.
Step 2: Measure the Wax
A good rule of thumb is to measure the amount of wax needed based on the container you’re using. As a general guide, 1 pound of wax fills about 20 ounces of a container.
Step 3: Melt the Wax
Using your double boiler, carefully melt your wax. Keep a close eye on the temperature; it shouldn’t exceed 180°F. If you don’t have a thermometer, just watch for the wax to become a clear liquid.
Step 4: Add Fragrance and Color
Once melted, remove the wax from heat and let it cool slightly. This is when you can add in your fragrance oils (typically around 1 ounce of fragrance per pound of wax). If you’re using dye, add that too! Stir gently to combine everything.
Step 5: Secure the Wick
Before pouring the wax, secure the wick to the bottom of your container using a dab of hot glue or adhesive. This prevents the wick from floating when you pour in the wax.
Step 6: Pour the Wax
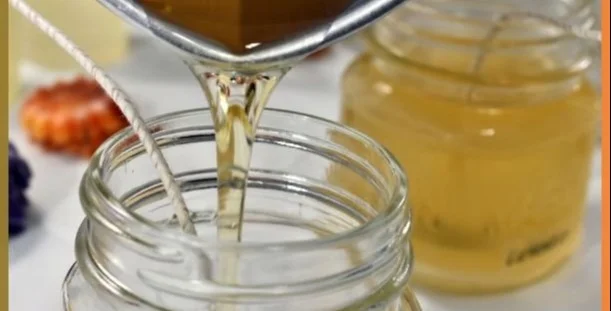
Allow the wax to cool to around 150°F before pouring. Slowly and carefully pour the wax into your container, making sure to keep the wick centered. You can use a wick holder if you have one, or it’s okay to hold it in place as you pour.
Step 7: Set the Candle
Let your candle cool completely—this can take a few hours. Once cooled, trim the wick to about 1/4 inch above the wax surface to ensure a clean burn.
Step 8: Cure the Candle
For the best scent throw, allow your candle to cure for a few days before using it. This step enhances the fragrance when burned.
Step 9: Light the Flame
After your candles have cured, it’s time to treat yourself. Light them up and enjoy the ambiance and fragrance they bring.
Step 10: Share the Love
You might find yourself so proud of your creations that you’ll want to gift them. Wrap them in pretty packaging, and they’ll make gorgeous, personalized presents.
Quick Beauty Tips for Fabulous Candles
- Experiment with Layering Scents: Create unique combinations by blending different fragrances. What about a refreshing eucalyptus lemon for a burst of energy?
- Customize for Occasions: Think about the season or event. Festive scents like cinnamon and clove can elevate your holiday spirit.
- Use Natural Remedies: Scented candles can help with calming anxiety. Lavender, chamomile, and bergamot are perfect for relaxation.
Common Mistakes to Avoid
Like any artistic endeavor, candle making can come with its fair share of pitfalls. To help you navigate your new hobby, here are some common mistakes to steer clear of:
- Not using a wick that matches your container: A wick that’s too small will result in a weak flame while one that’s too large could produce excessive soot.
- Pouring wax that’s too hot: This could create cracks or sinkholes in your candles as they cool.
- Rushing the curing process: All good things take time, and letting your candles cure will improve their scent throw for when you light them.
FAQs About Candle Making
What type of wax is best for beginners?
Soy and beeswax are great choices. Soy is easy to manage, while beeswax is natural and burns longer.
Can I use essential oils instead of fragrance oils?
Yes, but keep in mind that they might not have as strong a scent when burning, and some essential oils could affect how the wax sets.
How do I remove wax spills from surfaces?
Let the wax harden and then gently scrape it off with a plastic putty knife. You can also use heat (like a hairdryer) to soften the wax for easy removal.
Bonus Self-Care Ideas
After enjoying the cozy atmosphere your candles create, try pairing candle making with other soothing activities:
- Take a relaxing bath: Light up your candles for a spa-like experience.
- Meditation: Use your candles to enhance your meditation practice. Their flickering light creates a calming ambiance.
- Mindful Journaling: Write about your day, express gratitude, or dream about your future while surrounded by your beautiful scented candles.
Conclusion
So there you have it—a beginner’s roadmap to the magical world of candle making. Remember, like any new skill, it takes practice. You might encounter a few mishaps along the way (and that’s perfectly okay; we’ve all been there). Each candle you create is a reflection of your personality and creativity.
You’re not alone in this journey, and soon you’ll find pride in lighting candles that you crafted by hand. Picture your home filled with the warm glow and lovely scents of your creations, supporting your journey to wellness and self-care. Who knew that a little wax, some fragrance, and a bit of creativity could spark such joy?
So, grab those supplies, and let’s get crafting! Your candle-making adventure awaits.