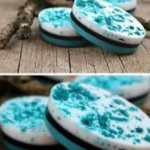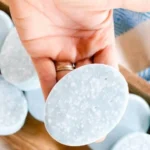

How to Make Pink Himalayan Salt Soap with Natural Clay Colorant and Fragrant Essential Oils
Making your own soap at home can be a rewarding experience, both creatively and practically! One particularly special variation is Pink Himalayan salt soap, which not only adds a lovely texture and mineral benefit but also looks stunning. This guide will take you through the steps of creating these invigorating salt bars using the cold process soap-making method, along with essential oils and a natural clay colorant. Dive in, and let’s create something beautiful together!
Why You Will Love This Recipe
There are numerous reasons to fall in love with this Pink Himalayan salt soap recipe:
- Natural Ingredients: Using natural clay and essential oils means you can customize scents and benefits based on your preferences.
- Skin Benefits: Pink Himalayan salt is known for its minerals that can help hydrate skin.
- Unique Aesthetic: The color from natural clay gives your soap a stunning and unique look.
- Giftable: Homemade soaps make excellent gifts for loved ones or treats for yourself!
Ingredients
Here’s what you’ll need to make your Pink Himalayan salt soap:
For the Soap Base:
- Olive Oil: 12 oz (adds moisture)
- Coconut Oil: 10 oz (great for lather)
- Palm Oil (sustainable): 8 oz (helps with hardness)
- Distilled Water: 12 oz
- Sodium Hydroxide (Lye): 4.5 oz (IMPORTANT: Handle with care)
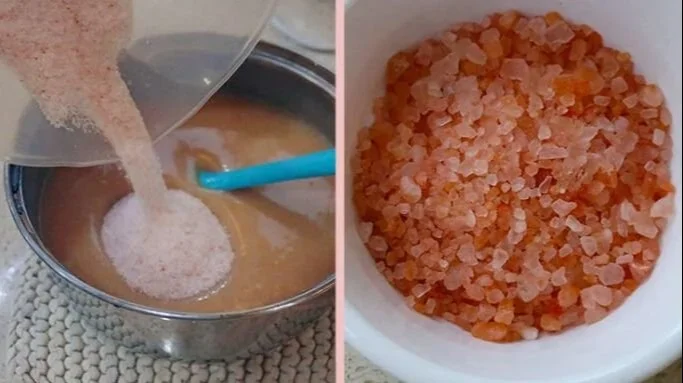
- Pink Himalayan Salt: 10 oz (finely ground for easy incorporation)
- Natural Clay Colorant: 1-2 tsp (color of choice, like rose clay)
- Essential Oils: 1 oz (lavender, peppermint, or your favorite scent)
Note:
Always calculate the exact lye and water amounts using a reliable soap calculator tailored to the oils you are using, as they can vary.
Equipment
To safely and effectively make your soap, gather the following equipment:
- A digital scale
- Heat-safe mixing bowls
- An immersion blender
- Soap mold (silicone works great)
- Safety goggles and gloves
- A thermometer
- A measuring spoon
- An apron (for protection)
Step-by-Step Instructions
Follow these simple steps to create your Pink Himalayan salt soap:
Step 1: Prepare Your Workspace
- Ensure your workspace is clean and organized.
- Put on safety goggles and gloves to protect yourself from lye.
Step 2: Measure Ingredients
- Using a digital scale, accurately weigh your oils, lye, and water.
- Measure out your essential oils and clay separately.
Step 3: Make the Lye Solution
- In a well-ventilated area, carefully add the sodium hydroxide to the distilled water (never the other way around) and stir until dissolved. This solution heats up and emits vapors, so take care.
- Allow it to cool to around 100-110°F.
Step 4: Prepare Oils
- Combine the olive oil, coconut oil, and palm oil in a heat-safe bowl.
- Gently heat the oils until they are melted and fully combined. Let them cool to around 100-110°F.
Step 5: Combine Lye and Oils
- When both the lye solution and oils are at the right temperature, slowly pour the lye solution into the oils.
- Blend with an immersion blender until you reach a light trace (the mixture should slightly thicken and leave a trail on the surface).
Step 6: Add Pink Himalayan Salt and Clay
- Add the ground Pink Himalayan salt and clay colorant to the soap mixture, blending thoroughly.
Step 7: Add Essential Oils
- Stir in your chosen essential oils, ensuring they are well incorporated.
Step 8: Pour into Mold
- Pour the soap mixture into your mold, smoothing the top with a spatula if necessary.
- Sprinkle some salt on top for decoration if you desire.
Step 9: Insulate and Cure
- Cover your mold with a towel to insulate it and allow the soap to saponify for 24-48 hours.
- After this time, carefully unmold the soap and cut it into bars.
Step 10: Cure the Soap
- Place the bars on a drying rack in a cool, dark place for 4-6 weeks. This allows them to harden and become safe for skin use.
Tips for Success
- Temperature is Key: Both the lye and oils should be within a similar temperature range for a successful saponification.
- Blend Carefully: Avoid over-blending; once you reach trace, stop blending.
- Additives Timing: Always add salt and colorants at light trace to avoid clumping.
Common Mistakes to Avoid
- Incorrect Measuring: Always weigh your lye and oils to avoid skin irritation or poor soap quality.
- Skipping Safety Gear: Always wear safety goggles and gloves; lye can cause burns.
- Not Allowing Enough Cure Time: Cutting soap too early can lead to a soft texture.
Variations and Customization Ideas
- Add Other Oils: Consider incorporating oils like sweet almond or avocado for added benefits.
- Change the Essential Oils: Experiment with different essential oil combinations to create your unique scent.
- Try Other Clays: Different clays like spirulina for green hues or turmeric for yellow can create various looks.
Storage and Shelf Life
Once cured, store your Pink Himalayan salt soap in a cool, dry place away from direct sunlight. The soap has a shelf life of about 1-2 years, but for optimal use, try to use it within a year.
Safety Tips
- Always work in a well-ventilated area when making soap.
- Keep lye away from children and pets, and never leave it unattended.
- If you accidentally spill lye, clean it immediately using vinegar, which neutralizes it.
Frequently Asked Questions
1. Is this soap safe for sensitive skin?
Yes, but always perform a patch test first, as everyone’s skin is different.
2. Can I use a different type of salt?
Certainly! You can experiment with sea salt or Epsom salt, but keep the effects on texture and skin benefits in mind.
3. How do I know if my soap is ready?
It should feel hard and dry to the touch. If soft or tacky, allow it to cure longer.
4. Can I adjust the salt quantity?
Yes, you can experiment with varying amounts, but a good rule is to keep it at 5-10% of your oil weight.
5. What if I don’t have an immersion blender?
You can use a regular whisk, but it will take longer and require more effort.
6. How can I tell if I’ve reached trace?
A light trace is when you can see a drizzle or line on the surface of the soap before it disappears. It is a good point to add extras like essential oils.
Conclusion
Making Pink Himalayan salt soap with natural clay and fragrant essential oils is not only enjoyable but also lets you create a product tailored for your skin or to gift to loved ones. The process may seem daunting initially, but with careful attention and proper safety measures, anyone can master the art of soap-making. So grab your ingredients, embrace your creativity, and dive into this delightful DIY project! Happy soaping!