
Transport Yourself to a Paradise Beach: DIY Sea Salt Soap Recipe
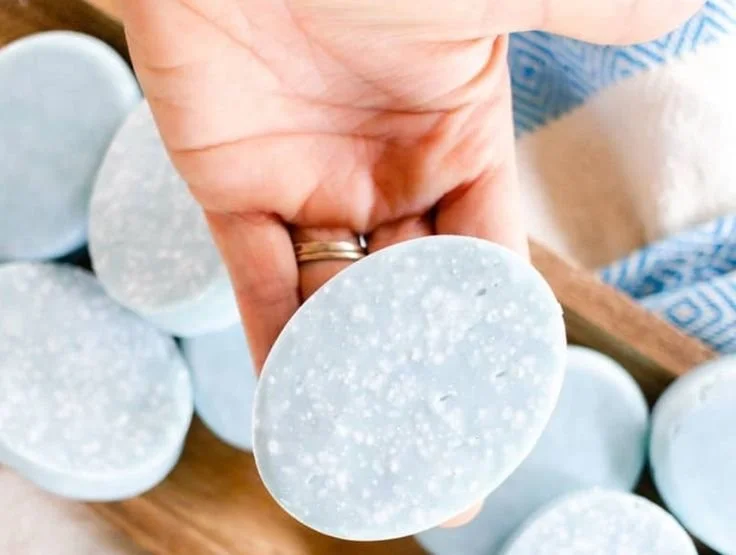
If you’re longing for the soothing sensations of a beach getaway, this homemade sea salt soap can bring a touch of that paradise experience right into your bathroom. With its refreshing scent and exfoliating properties, this sea salt soap bar is not only a treat for your senses but also a fantastic way to pamper your skin. Follow this easy DIY soap recipe, and let each wash transport you to a tranquil beach oasis!
Why You Will Love This Recipe
This DIY sea salt soap recipe is perfect for anyone who wants to indulge in a little self-care. Here’s why you should add this delightful project to your crafting repertoire:
- Exfoliating Benefits: The sea salt in this soap serves as a natural exfoliant that helps slough off dead skin cells, leaving your skin feeling smooth and rejuvenated.
- Delightful Scent: The refreshing fragrance of this soap can invigorate your bathing routine and uplift your spirits.
- Simple to Make: Whether you’re a seasoned soap maker or a complete beginner, this recipe is straightforward and requires minimal ingredients.
- Customization: You can easily adjust the scent and add your favorite essential oils, making each batch unique!
Ingredients
To make your own sea salt soap, you’ll need the following ingredients:
Base Ingredients:
- 1 pound (16 ounces) of melt-and-pour glycerin soap base (clear or opaque)
- 2 tablespoons of sea salt (fine or coarse, depending on your preference)
Fragrance and Coloring (optional):
- 1 teaspoon of seaweed or ocean fragrance oil (or your favorite scent)
- A few drops of blue or green soap colorant (optional, for a beachy vibe)
Additional Ingredients:
- 1 tablespoon of olive oil (for added moisture)
- 1 teaspoon of vitamin E oil (optional, for skin nourishment)
Equipment
Before you start crafting your soap, gather the following equipment:
- Heat-resistant glass measuring cup or a microwave-safe bowl
- Soap mold (silicone molds work best)
- Stick blender or spoon
- Microwave or stovetop for melting
- Measuring spoons
- Safety gloves and goggles (if desired)
Step-by-Step Instructions
Making your own sea salt soap is a delightful experience! Just follow these simple steps:
Prepare Your Work Area:
- Cover your workspace with newspaper or paper towels for easy cleanup, and gather all your ingredients and tools.
Melt the Soap Base:
- Cut your glycerin soap base into small cubes and place them in a microwave-safe bowl. Heat in the microwave in 30-second intervals, stirring between each until fully melted. Alternatively, you can melt it using a double boiler on the stovetop.
Add Oils and Salt:
- Once your soap base is melted, remove it from the heat source. Stir in the olive oil, sea salt, and if using, the vitamin E oil. Mix well to ensure even distribution.
Incorporate Fragrance and Color:
- If you’re adding fragrance and color, now is the time! Stir in your fragrance oil and colorant, being careful not to incorporate too many air bubbles.
Pour into Molds:
- Pour the soap mixture into your soap mold, filling each cavity to the top. Tap the mold gently on the counter to release any trapped air.
Let It Set:
- Allow the soap to cool and harden for about 1-2 hours. You can speed up the process by placing it in the refrigerator.
Unmold and Cut:
- Once fully hardened, gently remove the soap bars from the molds. If using a loaf mold, cut into bars.
Curing:
- Though melt-and-pour soap doesn’t require a long curing time, letting your bars sit for 24 hours helps improve texture.
Tips for Success
- Keep It Cool: Avoid overheating your soap base, as it can get too thin and difficult to work with.
- Minimize Air Bubbles: Stir gently when adding ingredients to your melted soap to reduce air bubbles.
- Clean Tools Promptly: Soap can be hard to remove once it hardens, so clean your equipment immediately after use.
Common Mistakes to Avoid
- Too Much Fragrance: Adding too much fragrance oil can interfere with the soap’s ability to harden. Stick to the recommended amounts.
- Skipping Safety Gear: While this recipe is relatively safe, wearing gloves and goggles can add an extra layer of precaution.
Variations and Customization Ideas
- Essential Oils: Swap out the fragrance oil for essential oils like lavender, eucalyptus, or citrus for a more natural scent.
- Additives: Consider integrating other skin-nourishing ingredients like honey, oatmeal, or dried seaweed to enhance the soap’s texture and benefits.
- Color Variations: Add multiple colors by dividing the mixture and pouring into layers or using swirls.
Storage and Shelf Life
When stored properly, your sea salt soap bars can last for up to 6 months. Keep them in a cool, dry place away from direct sunlight. Ensure they are placed in an airtight container to prevent moisture absorption.
Safety Tips
- While making soap, ensure you work in a well-ventilated area.
- Use gloves if you’re sensitive to fragrances or oils.
- Always keep your workspace clean, and avoid using utensils that may have residual chemicals or contaminants.
Frequently Asked Questions
1. Can I use table salt instead of sea salt?
Yes, you can use table salt; however, sea salt provides better exfoliating properties that many find desirable in soap.
2. How do I know if I’ve used too much fragrance oil?
If your soap base doesn’t set properly or is soft and gooey, you may have added too much fragrance. Stick to recommended limits for best results.
3. Can I remelt and reprocess my soap?
Yes, if you find that your soap didn’t turn out as expected, you can remelt it and adjust the ingredients before pouring again.
4. Is this soap suitable for sensitive skin?
If any of the fragrance or colorants irritate your skin, it’s best to avoid using them. Consider a fragrance-free version for sensitive skin.
5. How can I make the soap more moisturizing?
Additional oils, such as coconut or almond oil, can be added to enhance the moisturizing properties of your soap.
Conclusion
Now that you know how to create your own sea salt soap, it’s time to begin your crafting journey! This DIY project not only allows you to enjoy the benefits of natural exfoliation and delightful fragrance but also provides an opportunity to unleash your creativity. Invite a little slice of paradise into your home any time of year by making your own sea salt soap. Grab your ingredients, gather your tools, and immerse yourself in this enjoyable and rewarding activity. Happy soap making!