
Sweet Peppermint Handmade Bar Soap with Australian Red Reef Clay
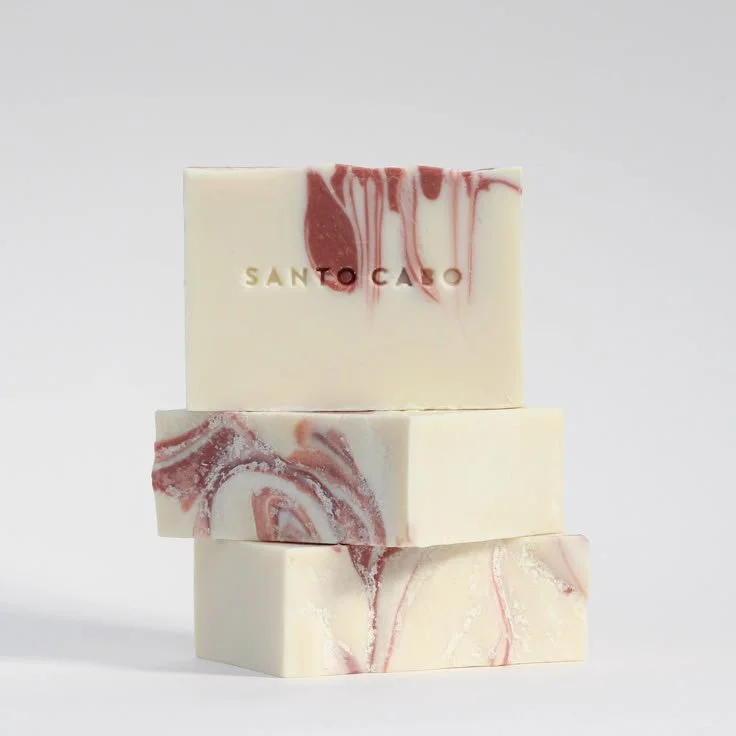
If you’ve ever wanted to awaken your senses during your morning shower, this Sweet Peppermint Handmade Bar Soap might just be your new favorite DIY project. Featuring invigorating peppermint essential oil and the unique properties of Australian Red Reef Clay, this soap not only offers a minty burst of freshness but also a touch of natural beauty. Let’s dive into this delightful recipe perfect for beginners and seasoned soap makers alike!
Why You Will Love This Recipe
Making your own soap allows you to control the ingredients, ensuring that what goes on your skin is pure, natural, and free from unwanted chemicals. The addition of peppermint essential oil provides a refreshing scent that can help shake off morning drowsiness. Meanwhile, the Australian Red Reef Clay gives the soap a beautiful hue and offers gentle exfoliation. To keep your skin beautifully moisturized, pairing this soap with our Peppermint Lemon Body Lotion will ensure a refreshing summer experience!
Ingredients
For this recipe, you will need the following ingredients:
- Olive Oil: 200g
- Purified Water: 100g
- Virgin Coconut Oil (Organic): 150g
- Sustainable Palm Fruit Oil: 150g
- Sodium Hydroxide (Lye): 75g
- Grape Seed Oil: 100g
- Peppermint Essential Oil: 20g
- Australian Red Reef Clay: 10g
- Titanium Dioxide: 5g
Equipment
Make sure you have the following equipment ready before you start:
- Digital scale for accurate measurements
- Heat-resistant glass or stainless steel mixing bowls
- Stick blender
- Soap mold (silicone molds are easy to work with)
- Safety gear: goggles, gloves, and a mask (for lye handling)
- Thermometer
- Spatula
- Measuring spoons for essential oils and clays
- PH strips (optional for testing soap)
Step-by-Step Instructions
Preparation Time: 30 minutes
Making Time: 1-2 hours
Yield: Approximately 10 bars of soap
Prepare Your Workspace: Clean your work area and gather your ingredients. Put on your safety gear (goggles and gloves) to protect yourself from sodium hydroxide.
Measure Your Ingredients: Using the digital scale, measure out the sodium hydroxide and water separately. It’s crucial to do this accurately!
Mix the Lye Solution: In a well-ventilated area, slowly add the sodium hydroxide to the purified water while stirring continuously until dissolved. This mixture will heat up, and it’s critical to let it cool to about 38-43°C (100-110°F).
Heat the Oils: In a separate bowl, measure and combine your olive oil, coconut oil, palm fruit oil, and grape seed oil. Gently heat them until melted. Allow this blend to cool to around the same temperature as your lye solution.
Combine Oils and Lye: Once both mixtures are at the right temperature, carefully pour the lye solution into the oils. Gently stir with the spatula until combined.
Blend to Trace: Using your stick blender, blend the mixture until it reaches trace. This is when the soap mixture is thick enough that you can drizzle a little on top, and it will leave a light trail for a moment before sinking.
Add Clays and Scents: Add the Australian Red Reef Clay, Titanium Dioxide, and peppermint essential oil to the mixture. Blend until everything is evenly distributed.
Pour into Molds: Pour the soap mixture into your prepared molds. Tap the molds gently to remove any air bubbles.
Cure the Soap: Cover the molds with a towel to insulate them and let the soap sit for 24-48 hours until it hardens.
Unmold and Cut: After curing, gently remove the soap from the molds and cut into bars.
Cure Again: Allow the bars to cure for an additional 4-6 weeks. This is crucial for the saponification process to be complete.
Tips for Success
- Temperature Control: Ensure that both your oils and lye are at similar temperatures for the best blending results.
- Stick Blender Use: Don’t over-blend! Stop when you reach trace to prevent the soap from thickening too much.
- Safety First: Always handle lye with caution. It’s caustic and can burn skin and eyes.
Common Mistakes to Avoid
- Incorrect Measurements: Ensure you weigh everything accurately. A small mistake can affect the quality of your soap.
- Skipping Safety Gear: Always wear protective equipment when working with lye.
- Neglecting Cure Time: Don’t rush the curing process. Proper curing not only improves soap quality but also enhances longevity.
Variations and Customization Ideas
- Different Essential Oils: Experiment with other essential oils like lavender or eucalyptus for different scents.
- Additives: Consider adding oatmeal or dried herbs for additional texture and skin benefits.
- Coloring: Use natural colorants or more clay variations to customize the soap’s appearance.
Storage and Shelf Life
Store your finished bars in a cool, dry place away from direct sunlight. Properly cured soap can last up to a year when stored correctly. Ensure they remain dry between uses to prolong their life.
Safety Tips
- Always handle sodium hydroxide with care. Use gloves, goggles, and work in a well-ventilated space.
- Never mix water into lye; always add lye to water. This prevents hazardous splashes.
- Keep soap-making supplies out of reach of children and pets.
Frequently Asked Questions
Q1: How can I tell when my soap is ready to cut?
A1: If your soap is firm to the touch and no longer leaves a dent when pressed lightly, it’s ready for cutting.
Q2: Can I use other oils instead of olive oil?
A2: Yes, you can substitute olive oil with other oils like almond or apricot kernel oil, but remember to adjust the lye calculation accordingly.
Q3: What should I do if my soap feels too soft?
A3: This could be due to insufficient curing time or incorrect lye measurements. Allow it to cure longer and ensure your measurements were precise.
Q4: Can I add color to my soap?
A4: Absolutely! You can use natural colorants like beetroot powder or cocoa powder. Just remember to check safety in case of skin sensitivities.
Q5: How do I know if my soap is safe to use?
A5: Test the pH level of your soap using pH strips after your curing period. Ideally, it should fall between 7 and 10.
Q6: Why does my soap have a strong odor?
A6: If there’s a strong odor, it may be due to an excess of lye or essential oils. Check your measurements and try reducing the essential oil slightly.
Conclusion
Creating your own Sweet Peppermint Handmade Bar Soap with Australian Red Reef Clay can be a joyful and rewarding experience. It’s an opportunity to embrace your creativity while crafting a luxurious product that enhances your daily routine. Remember to follow along with the safety tips and enjoy the process of making your own homemade soap. Happy soap making!