
Make Homemade Candles with Crayons and Soy Wax: Kids Activities
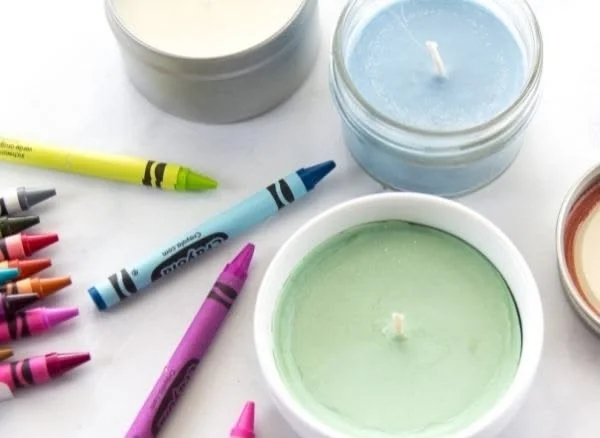
Making homemade candles with crayons and soy wax is a fun, creative activity your kids will love. Not only do you get to bond through crafting, but you also end up with beautiful, colorful candles that can brighten up any room. This simple guide will provide you with everything you need to know about this enjoyable DIY project!
Why You Will Love This Recipe
Creating candles at home is a fantastic way to spark your children’s creativity. Using crayons allows kids to experiment with colors and designs, making each candle one-of-a-kind. Plus, soy wax is an eco-friendly choice that burns cleanly and is easy to work with. This project leaves room for customization in scent, color, and design, making it an engaging experience for parents and kids alike.
Ingredients
- Soy wax flakes: 2 cups (This is a natural wax derived from soybeans and is biodegradable.)
- Crayons: 2-3, any color (These will give your candles vibrant colors.)
- Candle fragrance oil (optional): 1-2 teaspoons (Make sure it’s safe for candles if you’re adding fragrance.)
- Wicks: Pre-waxed candle wicks (Choose wicks according to the size of your container.)
Equipment
To make your homemade candles, you will need:
- Double boiler or a microwave-safe container (for melting the wax)
- Silicone mold or candle containers (small jars, metal tins, etc.)
- Stirring tool (wooden stick or metal spoon)
- Thermometer (optional, but great for precision)
- Scissors (to cut the wicks)
- Pencil or chopstick (to hold the wick in place while the wax sets)
Step-by-Step Instructions
Preparation Time: 10 minutes
Making Time: 30-45 minutes
Approximate Yield: 4-6 small candles
Prepare your workspace. Cover your work surface with old newspaper or a craft mat to catch any drips or spills.
Measure the wax. Using a measuring cup, scoop out 2 cups of soy wax flakes.
Melt the wax.
- Double Boiler Method: Fill the bottom pot with water and bring it to a simmer. Place the soy wax in the top pot and let it melt, stirring occasionally.
- Microwave Method: Place the soy wax in a microwave-safe container and heat in 30-second intervals, stirring in between, until melted completely.
Add Crayons. Once the wax is melted, add 2-3 broken pieces of crayon for color. Stir until the crayon is fully melted and evenly distributed (you can add more crayon if you desire a deeper color).
Add Fragrance. If you want to add a scent, now is the time to stir in 1-2 teaspoons of candle fragrance oil. Make sure it’s suitable for candles to avoid unwanted reactions.
Prepare Containers. While the wax is melting, secure your wick to the bottom of your candle container. You can use a little melted wax to hold it in place or use a dot of hot glue.
Pour the Wax. Slowly pour the melted wax into your prepared containers, leaving about half an inch from the top.
Secure the Wick. Use a pencil or chopstick to hold the wick upright in the center of the candle while the wax cools and hardens.
Cool the Candles. Allow the candles to cool at room temperature for about 30 minutes or until they are completely set.
Trim the Wick. Once the candles are solid, trim the wick to about ¼ inch above the top of the candle.
Label and Decorate. Consider labeling your candles with a date or the flavor/scents used, or decorate the jars to personalize them further.
Tips for Success
- Experiment with Colors: Mix different crayon colors for unique shades. But remember, the color may appear differently when lit.
- Use the Right Wick: Ensure the wick is compatible with your container size. A wick that’s too small may not burn properly, while one that’s too large may burn too fast.
- Control Temperature: If you want to layer colors, let each layer cool slightly before pouring another to achieve a distinct look.
Common Mistakes to Avoid
- Using Low-Quality Wicks: Poor-quality wicks can lead to poor burning or excessive smoke.
- Too Much Crayon: Adding too many crayons can alter the burn quality and scent throw. Stick to a few pieces for optimal results.
- Skipping the Cooling Step: Pouring the wax too hot into the jars can disrupt candle formation.
Variations and Customization Ideas
- Layered Candles: Pour colored wax in layers to create stripes of different colors.
- Scented Options: Explore different fragrance oils like vanilla or lavender for scented candles.
- Decorative Additions: Add dried flowers or herbs into the wax while it’s still liquid for a decorative effect.
Storage and Shelf Life
Store the finished candles in a cool, dry place away from direct sunlight. Homemade candles can last up to a year if kept in optimal conditions. Make sure they’re stored upright to avoid any wax leakage.
Safety Tips
- Always supervise children when making candles, especially during the melting process.
- Ensure that your workspace is well-ventilated to avoid inhalation of any fumes.
- Be cautious when handling hot wax, as burns can occur.
Frequently Asked Questions
1. Can I use any type of crayon?
Yes, standard crayons work well. Wax-based crayons will give you the best color payoff.
2. What’s the best way to remove spills?
Clean spills immediately with warm soapy water. If the wax has hardened, you can use a spoon to gently scrape it off.
3. Can I use a regular pot to melt the wax?
For safety, it’s recommended to use a double boiler. However, you can use a microwave-safe bowl if that’s more convenient.
4. How can I add more fragrance?
You can add more fragrance oil, but start with small amounts to avoid overpowering scents. Always consult your fragrance’s guidelines for recommended usage.
5. What should I do if my candle doesn’t burn evenly?
Here are a few things to check: Ensure the wick is properly centered, the wax is the right type, and you’re using the right size wick for your container.
Conclusion
Making homemade candles with crayons and soy wax is a delightful project that offers both creativity and practicality. It’s a wonderful way to engage your children in crafting while creating personalized gifts or decorative pieces. Remember to have fun with the colors and scents as you go! Whether you choose to create layered candles or add your favorite fragrance, your kids will cherish the memories and the beautiful results. So grab your supplies and get started with this exciting DIY project today!