
Keep Your Outdoor Spaces Mosquito-Free with DIY Mason Jar Candles
As the weather warms up, it’s time to embrace the great outdoors—garden parties, evening barbecues, and serene moments on the patio become central to our summer experience. But what can you do about those pesky mosquitoes that seem intent on ruining your outdoor enjoyment? Fear not! Today, we’ll show you how to create stylish and functional DIY Mason Jar Candles that will keep mosquitoes at bay while adding charm to your outdoor spaces. Best of all, these candles are easy to make, economical, and biodegradable!
Why You Will Love This Recipe
DIY Mason Jar Candles not only serve as effective mosquito repellent but also provide a beautiful ambiance for your outdoor areas. This project is perfect for beginners, using simple materials and straightforward techniques. Once you master this candle-making recipe, you can create various scented candles for your home or give them as thoughtful handmade gifts.
Ingredients
For this DIY project, you’ll need the following ingredients:
- Wax: 1 lb of soy wax (natural and burns cleanly)
- Fragrance Oil: 1 oz (optional but highly recommended for enhanced aroma—use citronella or eucalyptus oil for mosquito-repelling properties)
- Essential Oils: 30 drops (a blend of lemon eucalyptus, lavender, or tea tree oil works well for repelling insects)
- Wicks: Cotton or wood wicks suitable for the size of your jar (preferably 6 inches long)
- Dye: Optional, candle-safe dye for color (if desired)
Equipment
Before you begin, gather the following equipment:
- Mason Jars: 8 oz or 16 oz size depending on your preference
- Double Boiler: For melting the wax safely
- Thermometer: To monitor wax temperature
- Stirring Utensil: A spoon or wooden stick
- Wick Holder: To keep the wick centered while pouring (you can use a pencil or chopstick)
- Heat Resistant Surface: For pouring candle wax
- Safety Gear: Gloves and protective eyewear
Step-by-Step Instructions
Prepare Your Workspace
- Set Up the Area: Cover your work surface with newsprint or parchment paper to catch any spills.
- Gather Materials: Ensure all your materials and equipment are within reach.
Melt the Wax
- Heat the Wax: Fill the bottom pot of your double boiler with water and bring it to a simmer on medium heat. Add the soy wax to the top pot.
- Monitor the Temperature: Use your thermometer to keep an eye on the wax temperature. You want it to melt and reach around 170°F (77°C).
Prepare the Jars
- Wick Placement: While the wax melts, attach the wick to the center of each Mason jar. You can use a drop of melted wax on the bottom or a wick sticker for this purpose.
- Hold the Wick: Use a wick holder to keep the wick in place while you pour the wax.
Add Fragrance and Oils
- Incorporate Fragrance: Once the wax is fully melted (and at approximately 170°F), remove it from heat and add your chosen fragrance oil and essential oils. Stir gently for about 2 minutes to fully combine. If you’re adding dye, now is the time to do so.
Pour the Wax
- Cool the Wax Slightly: Allow the wax to cool to about 150°F (65°C) before pouring to prevent sinking (which can happen if you pour too hot).
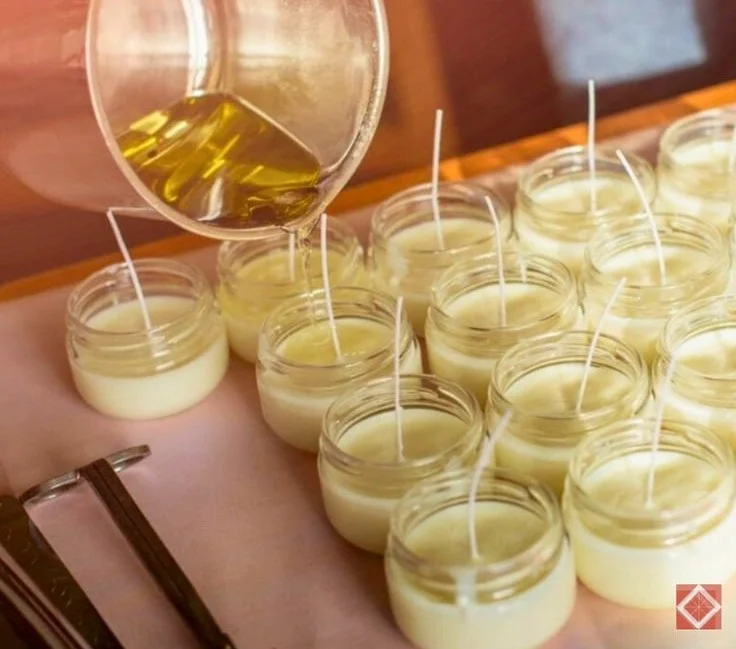
- Pour into Jars: Slowly pour the wax into your prepared Mason jars, leaving about half an inch of space at the top.
- Secure the Wicks: Make sure the wick remains centered while the wax cools and hardens.
Finish and Cure
- Cool Completely: Let the candles cool entirely at room temperature for several hours or overnight to ensure proper setting.
- Trim the Wicks: Once cooled, trim the wick to about ¼ inch above the wax surface.
Tips for Success
- Always monitor the temperature of your wax to prevent overheating.
- Stir gently but thoroughly to avoid creating air bubbles.
- Allow the candles to cure for at least 24 hours before burning to improve scent throw.
Common Mistakes to Avoid
- Pouring too slowly: If you pour the wax too quickly, it can create air bubbles or uneven surfaces.
- Ignoring temperatures: Not monitoring your wax temperatures can lead to poor scent throw or misformed candles.
- Wicks not centered: This can cause uneven burning and pooling of wax on one side.
Variations and Customization Ideas
- Scent Variations: Experiment with different essential oils; try adding peppermint, rosemary, or cedarwood for alternating scents that repel mosquitoes.
- Decorative Touches: You can embellish your jars with twine, labels, or even paint for decorative flair.
- Add Natural Elements: Include dried herbs like lavender or mint in the candle for an authentic, lovely touch.
Storage and Shelf Life
Once your Mason Jar Candles are complete, store them in a cool, dry place away from direct sunlight. The candles can last for up to two years if stored properly.
Safety Tips
- Always work in a well-ventilated area to avoid inhaling fumes from melted wax or fragrances.
- Use heat-resistant gloves when handling melted wax.
- Never leave burning candles unattended and keep them away from flammable materials.
Frequently Asked Questions
1. Can I use different types of wax?
Yes, you can use different waxes like paraffin or beeswax, but soy wax is preferred for clean burning and ease of use.
2. How do I know what wick size to use?
Wick size depends on the diameter of your candle container. A good starting point is to check wick manufacturer’s guidelines or conduct a burn test.
3. Why is my candle not smelling strong enough?
Ensure you are adding enough fragrance oil. The general guideline is 1 oz of fragrance per pound of wax. You can also use stronger fragrance oils for greater potency.
4. Can I use these candles indoors?
Yes, while primarily designed for outdoor use, they can work indoors too, but be mindful of how strong they smell in enclosed spaces.
5. Are these candles safe for kids and pets?
As long as you follow safety guidelines while burning (e.g., don’t leave them unattended), they are generally safe. However, keep candles out of reach of children and pets.
Conclusion
Creating your own DIY Mason Jar Candles is a fulfilling and enjoyable project that not only beautifies your outdoor areas but also helps keep pesky mosquitoes at bay. With just a few ingredients and some simple steps, you can craft beautiful candles tailored to your taste. So gather your supplies, unleash your creativity, and make this summer a mosquito-free one! Happy crafting!