
Learn How to Make Candles at Home with This Simple DIY Guide!
Are you ready to brighten your home with beautiful, homemade candles? Making candles at home is not only a fun and creative activity but also a rewarding way to craft personalized gifts for friends and family. In this step-by-step tutorial, we’ll guide you through the process of making your very own candles from the comfort of your home. Grab your supplies, and let’s get started!
Why You Will Love This Recipe
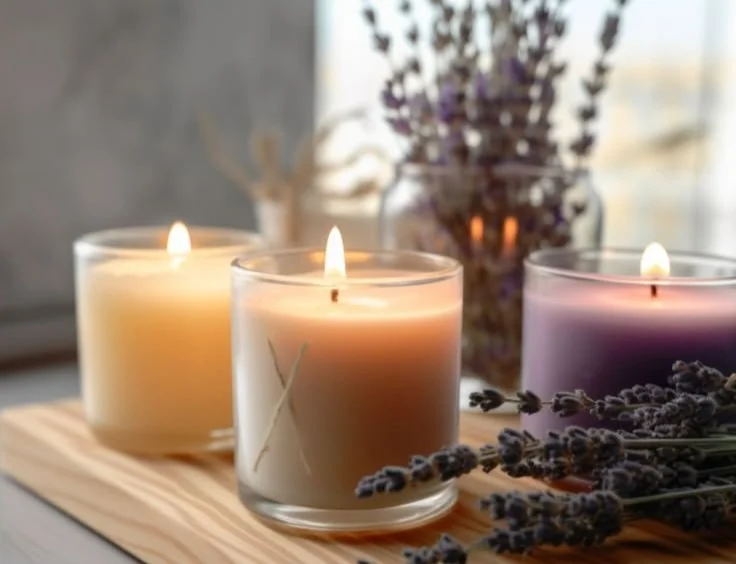
Creating your own candles allows for endless customization; from the scent to the color and shape, the possibilities are as limitless as your imagination. Plus, handmade candles can elevate any space, adding charm and warmth to your home. Whether you’re preparing for a special occasion or just want a cozy night in, this beginner-friendly guide will help you create lovely candles that reflect your personality and style.
Ingredients
To make candles at home, you’ll need the following ingredients:
- Wax: 1 pound (450 grams) of soy wax flakes (ideal for beginners due to its clean burn and ease of use)
- Fragrance Oil: 1 ounce (30 ml) of your choice (make sure it’s specifically rated for candle making for best results)
- Dye (optional): Candle dye chips or liquid dye (choose colors that are specially formulated for candle-making)
- Wick: Pre-tabbed organic cotton or wooden wick (the size depends on the container size)
Equipment
Before you dive into the candle-making process, you’ll need some essential equipment:
- Double boiler: This will help melt the wax evenly. If you don’t have one, a heat-resistant bowl over a pot of simmering water works, too.
- Wick holder: A pencil or skewer can be used to keep your wick centered while the wax sets.
- Pouring pitcher: This will make it easier to transfer the melted wax into your mold or container.
- Thermometer: For checking the wax temperature.
- Containers: Mason jars, metal tins, or any heatproof container of your choice.
- Stirring utensil: A wooden stick or stainless steel spoon works perfectly.
Step-by-Step Instructions
Let’s get into the fun part: making your candles!
Step 1: Prepare Your Work Area
- Lay down newspaper or paper towels to catch any wax spills.
- Gather all your materials and tools for easy access.
Step 2: Measure Your Wax
- Measure 1 pound (450 grams) of soy wax flakes. This will yield approximately 3 medium-sized candles, depending on your container’s size.
Step 3: Melt the Wax
Setup your double boiler. Fill the bottom pot with a few inches of water and bring to a gentle simmer on the stove.
Add the wax. Place the soy wax flakes into the top bowl or the pouring pitcher. Stir occasionally as it melts to ensure even heating.
Monitor the temperature. Use your thermometer to check that the wax reaches around 170-180°F (77-82°C).
Step 4: Add Fragrance and Color
Add fragrance oil. Once the wax is melted, remove it from heat and add 1 ounce (30 ml) of your chosen fragrance oil. Stir thoroughly for about 2 minutes to ensure the fragrance is completely incorporated.
Incorporate color (optional). If you desire a colored candle, add dye chips or liquid dye now. Stir well until the color is evenly distributed.
Step 5: Prepare Your Wick
Attach the wick. Dip the wick tab into the melted wax, then place it at the bottom center of your container. This will help the wick adhere as the wax hardens.
Secure it in place. Use a wick holder (like a pencil or skewer) to keep the wick upright and centered while you pour the wax.
Step 6: Pour the Wax
Temperature check. Wait until the wax cools to about 140-150°F (60-65°C). This temperature helps avoid sinkholes or cracking.
Pour the wax. Carefully pour the melted wax into your prepared container, leaving about a 1/4 inch of space at the top.
Step 7: Let It Cool
- Allow the candles to cool undisturbed for several hours or until fully hardened. This may take anywhere from 4 to 8 hours, depending on the size of your candle.
Step 8: Trim the Wick
- Once cool, trim the wick to about 1/4 inch above the wax surface. This will ensure a clean burn.
Tips for Success
- Use good-quality fragrance oils specifically made for candles to achieve a strong and pleasant scent.
- Preheat your containers slightly. If your containers are warm, it helps the wax to adhere better as it cools.
- Experiment carefully! Try different wicks and fragrance combinations to find what works best.
Common Mistakes to Avoid
- Pouring the wax too hot. This can cause cracking as the candle cools. Always check your temperatures.
- Skipping fragrance testing. Not all fragrances behave the same in wax. Make sure to do a small test to see how your fragrance will perform.
- Using the wrong wick size. An inappropriate wick can lead to poor burning; either too much soot or excessive pooling.
Variations and Customization Ideas
- Scent combinations: Experiment with combining different fragrance oils, such as lavender with vanilla or citrus with mint for unique blends.
- Adding elements: Try embedding dried flowers, herbs, or glitter in the wax for decorative flair.
- Utilize different containers: Customize the candle’s look by using different shapes, like terra cotta pots, glass jars, or even teacups.
Storage and Shelf Life
Store your homemade candles in a cool, dry place away from direct sunlight to prevent soot and melting. Properly stored, these candles can last for over a year while maintaining their scent and color.
Safety Tips
- Always work in a well-ventilated area to minimize inhalation risk.
- Use heat-proof materials throughout the process to avoid burning yourself.
- Never leave melting wax unattended, and be cautious of hot surfaces and liquids.
Frequently Asked Questions
1. How do I know what size wick to use for my candles?
Choosing the right wick size depends on container width and wax type. Generally, consult a wick size chart or guide, available from candle supply retailers.
2. Can I use essential oils instead of fragrance oils?
Yes, but be aware that essential oils may not hold the scent as well in soy wax, leading to a more muted aroma. Always ensure they are suitable for candle-making.
3. Why are my candles pooling at the edge?
This often happens when the wick is too small or the wax is overheated during pouring. Using a wick that is too small can lead to insufficient heat to melt the wax.
4. Can I reuse old candles?
Yes! Simply melt down leftover bits of candle wax, strain for impurities, and pour into a new container, adding a new wick and fragrance if desired.
5. How can I prevent my candles from turning brown?
Brown or discoloration can occur due to overheating or using certain dye colors. To avoid this, always melt wax at the recommended temperatures and use high-quality dyes.
6. How do I make my candles smell stronger?
Increase the amount of fragrance oil carefully. Generally, using between 6-10% of fragrance oil to the weight of wax will yield a stronger scent.
Conclusion
Congratulations! You’ve just learned how to make beautiful, handmade candles at home. With just a few simple ingredients and straightforward steps, you’re well on your way to creating delightful candles customized to your taste. Whether for yourself or as thoughtful gifts, your homemade candles will surely bring joy and warmth to any space. Gather your supplies, and let your creativity shine—happy candle making!