
Discover Delicious Blueberry Candles and Wax Melts
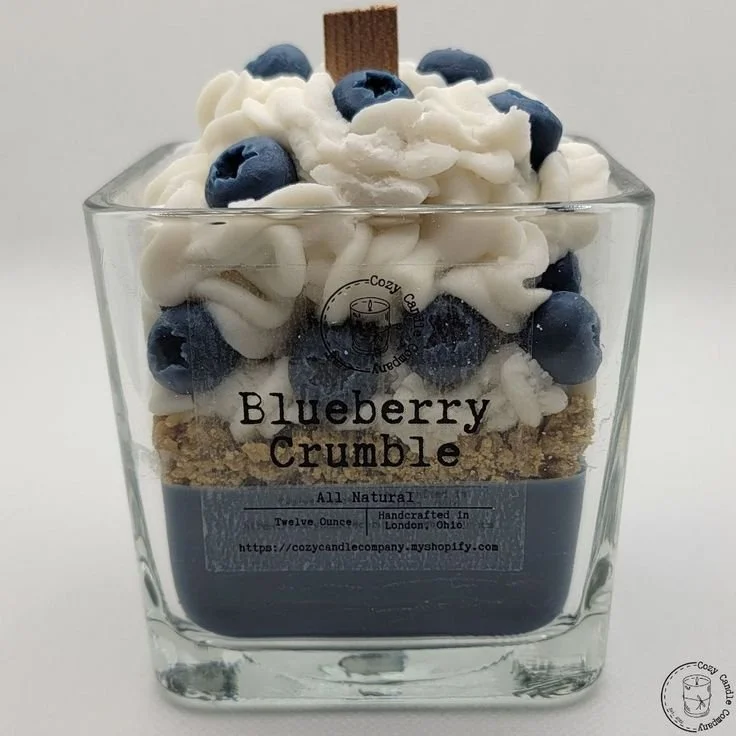
If you’re looking to create a cozy and inviting atmosphere in your home or gift something unique to a loved one, homemade blueberry candles and wax melts are a delightful option! With the sweet, comforting scent of blueberry crumble wafting through your space, you can create a warm ambiance perfect for any occasion. Whether you’re a beginner in candle making or looking to start your own candle business, this guide will take you through the process step by step.
Why You Will Love This Recipe
Crafting your own blueberry-scented candles not only fills your home with a sweet fragrance, but it also allows for creativity in your DIY projects. You’ll learn about different types of wax, wicks, and scents, enabling you to customize your creations. Plus, there’s nothing quite like the satisfaction of lighting up your own handmade candles!
Ingredients
For Blueberry Candles
- Wax: 1 pound (16 oz) of soy wax (recommended for beginners)
- Fragrance Oil: 1 ounce of blueberry crumble fragrance oil
- Wicks: Cotton wicks, size appropriate for your container (typically 14-20 mm)
- Dye: Blue candle dye (optional, for color)
- Additives: 1-2 teaspoons of vybar (optional, for enhanced scent throw and smooth texture)
For Blueberry Wax Melts
- Wax: 1 pound (16 oz) of soy wax or paraffin wax
- Fragrance Oil: 1 ounce of blueberry crumble fragrance oil
- Dye: Blue candle dye (optional)
- Silicone Molds: Heart or flower-shaped silicone molds for melting
Equipment
- Double Boiler: For melting wax
- Thermometer: To monitor wax temperature
- Pouring Pitcher: For easy pouring of melted wax into containers or molds
- Wick Holder: To keep wicks centered while the wax sets
- Stirring Utensil: A wooden or silicone spatula for mixing
- Scale: For accurate measurement of wax and fragrance
Step-by-Step Instructions
Making Blueberry Candles
Prepare Your Workspace: Cover your workspace with newspaper or an old cloth to catch any spills. Gather all your materials and equipment.
Melt the Wax:
- Fill the bottom of your double boiler with water and set it on the stove to heat.
- Place 1 pound of soy wax in the top part of the double boiler and heat it until fully melted, stirring occasionally. This typically takes about 10-15 minutes.
Check the Temperature: Use a thermometer to monitor the wax temperature. The ideal pouring temperature for soy wax is between 170°F and 180°F.
Mix in the Fragrance: Once the wax is melted and at the right temperature, remove it from heat. Add 1 ounce of blueberry crumble fragrance oil and stir gently for 1-2 minutes to ensure the scent is evenly distributed.
Add Color (Optional): If desired, add a small amount of blue dye to the wax and stir until fully incorporated.
Prepare Your Wicks: Secure the cotton wick to the bottom of your candle container using a wick adhesive. Center it using a wick holder.
Pour the Wax: Carefully pour the melted wax into your prepared containers, leaving about half an inch of space at the top.
Cool and Set: Allow the candles to cool completely, which can take several hours. Feel free to move them to a cool area to speed up the process.
Trim the Wick: After the wax has set, trim the wick to about 1/4 inch above the surface of the wax.
Cure: For best scent throw, allow your candles to cure for at least 48 hours before burning.
Making Blueberry Wax Melts
Follow Steps 1-5 Above: Prepare your workspace and melt the wax the same way as described for the candles.
Pour into Molds: Once the wax is melted and scented, pour it into your silicone molds.
Cool and Set: Allow the melts to cool completely in the molds.
Pop Out the Melts: Once set, gently flex the silicone mold to release the wax melts.
Store: Keep your wax melts in a cool, dry place until you’re ready to use them.
Tips for Success
- Wick Size: The size of your wick is crucial. Too large a wick can cause excessive soot; too small may not burn evenly. Test different sizes to find your perfect match.
- Mix Scent: Feel free to blend different fragrance oils for a unique scent.
- Temperature: Be consistent with temperatures; cooling too quickly may cause cracks in your candles.
Common Mistakes to Avoid
- Not Measuring Wax Properly: Always use a scale for accuracy.
- Skipping the Wick Test: Burning a test candle helps ensure even burning and a great scent throw.
- Rushing the Cooling Process: Quick cooling can lead to uneven colors and textures in your candles.
Variations and Customization Ideas
- Essential Oils: Experiment with essential oils instead of synthetic fragrance oils for a more natural approach.
- Color Variations: Use different dyes to create layered candles or themed colors.
- Add Ins: Consider adding dried blueberries or herbs to your candles for visual appeal.
Storage and Shelf Life
Store your finished candles and wax melts in a cool, dry place, away from direct sunlight. Properly stored, your handmade candles can last up to a year, while wax melts may last even longer.
Safety Tips
- Handle molten wax carefully to avoid burns.
- Always use wick holders to ensure wicks stay centered while cooling.
- Ensure your workspace is well-ventilated when working with fragrance oils.
Frequently Asked Questions
1. How do I know what wick size to use?
Wick size varies by the diameter of your container and the type of wax. Refer to a wick size chart for guidance. For beginner projects, using medium-sized cotton wicks usually works well for standard jar dimensions.
2. Can I make candles with other types of wax?
Yes! While soy wax is beginner-friendly, beeswax, paraffin, and palm wax are also popular choices. Each has its unique properties and scent throw.
3. How do I clean up spills?
While the wax is still warm, use paper towels to absorb excess wax. For hardened wax, let it cool and then scrape it off surfaces. A heat gun can help soften wax for easier cleanup.
4. Why did my candle burn unevenly?
Uneven burning can result from wick size, pouring temperature, or air drafts. Always assess and test your wick and pouring methods to ensure a clean burn.
5. How do I get the best scent throw?
Ensure you are mixing the right amount of fragrance oil (usually around 6% of the wax weight) and pouring at the correct temperature. Curing your candles also enhances scent throw.
6. Can I add color to my wax melts too?
Absolutely! Use candle dye to color your wax melts for a fun and visually appealing look.
Conclusion
Creating your own blueberry candles and wax melts is a fun and rewarding DIY project that not only brings a delightful scent to your home but can also make for fantastic handmade gifts. By following this guide, you’ll gain the skills and confidence you need to carve out your path in the world of candle making. So gather your supplies, roll up your sleeves, and ignite your creativity—sweet-smelling adventures await!