
Candle Making Supplies: The Best Candle Making Supplies for Beginners
Candle making is a delightful and fulfilling hobby that allows you to express creativity while creating beautiful, fragrant candles for your home or as handmade gifts. When starting out, having the right candle making supplies is crucial to your success. In this guide, we will explore everything you need to get started with candle making, from supplies to equipment and tips for creating stunning homemade candles.
Why You Will Love This Guide
If you’re a beginner, the thought of starting something new can feel overwhelming. Don’t worry—we’ll simplify it for you! You’ll learn about different types of wax, wicks, molds, and fragrances. We’ll also help you troubleshoot common issues, provide customization ideas, and share important safety tips. By the end of this article, you will be well-equipped and excited to make your first candles!
Ingredients
Essential Candle Making Supplies
Wax: The type of wax you choose depends on the type of candles you want to create. Here are the most common types:
- Paraffin Wax: Affordable and easy to work with, great for beginners. Melts at about 120-150°F.
- Soy Wax: A natural alternative that burns cleanly. It melts at about 120°F and is great for scented candles.
- Beeswax: A natural and fragrant option that can be a bit harder to work with. Melts at about 145-150°F.
Recommended Quantity: Start with 2 pounds of wax.
Wicks: Wicks come in various materials and sizes. The size of the wick should match the size of your candle. A good starting size for smaller candles is a 3-inch wick.
Fragrance Oils: These are essential for adding wonderful scents to your candles. Choose high-quality fragrance oils specifically designed for candle making.
Recommended Quantity: Approximately 1 ounce of fragrance oil per pound of wax.
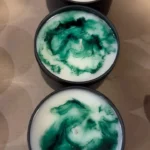
Color Dyes (Optional): If you want colored candles, use candle dyes that are specially formulated for candle making.
Additives (Optional): These include stearin for hardness and vybar for smoothing out the texture.
Equipment
Essential Equipment for Candle Making
Double Boiler or Melting Pot: This is necessary for melting your wax safely. You can create a double boiler by placing a heat-safe bowl over a pot of simmering water.
Thermometer: A kitchen thermometer helps monitor the wax temperature accurately.
Stirring Utensil: Use a wooden spoon or metal stirrer for mixing.
Containers or Molds: Choose heat-resistant containers such as glass jars or metal tins. If you prefer specific shapes, buy silicone molds.
Scale: A digital scale ensures you measure your wax and fragrance oils accurately.
Safety Gear: Avoid burns or injuries by using gloves and protective eyewear.
Step-by-Step Instructions
Making Your First Candle
Preparation Time: 15 minutes
Making Time: 1 hour
Yield: Approximately two 8-ounce candles
Prepare Your Work Area: Cover surfaces with newspaper or an old cloth to protect them from spills.
Measure the Wax: Use your scale to measure out 1 pound of wax for two candles.
Setup Your Double Boiler: Fill the bottom pot with water and place it on the stove over medium heat. Put the wax in the top pot or bowl.
Melt the Wax:
- Monitor the temperature with your thermometer.
- Melt until it reaches 170-180°F for most wax types.
Add Color and Fragrance (if desired):
- If you’re using dye, add it now and stir thoroughly until fully dissolved.
- Add fragrance oil once the wax has reached around 160°F. Stir for about 2 minutes to ensure it’s evenly distributed.
Prepare the Wick:
- While the wax is cooling to around 140°F, attach your wick to the bottom of the container using wick stickers or hot glue.
- Use a wick holder to position the wick upright at the center.
Pour the Wax: Once the wax has cooled to around 140°F, carefully pour it into your prepared container, leaving approximately half an inch at the top.
Secure the Wick: If necessary, adjust the wick to ensure it remains centered.
Cool the Candle: Allow the candle to cool completely at room temperature undisturbed for several hours.
Trim the Wick: Once the candle has set, trim the wick to about 1/4 inch above the wax.
Tips for Success
- Use a Wick Guide: Refer to a wick sizing chart to ensure you are using the correct wick size for your container.
- Experiment with Scents: Don’t hesitate to adjust fragrance amounts; some scents are stronger than others.
- Test Your Candles: Always burn test your candles to see how well they burn and how the scent throws in a safe environment.
Common Mistakes to Avoid
- Skipping Wick Testing: Failing to test your wick can result in poor burning performance.
- Not Using Enough Fragrance: Ensure you add enough fragrance oil—too little won’t produce a sufficient scent throw.
- Not Monitoring Temperature: Improper temperatures can affect the wax’s texture and scent throw.
Variations and Customization Ideas
- Mixing Scents: Combine different fragrance oils to create unique scents (e.g., vanilla with cinnamon).
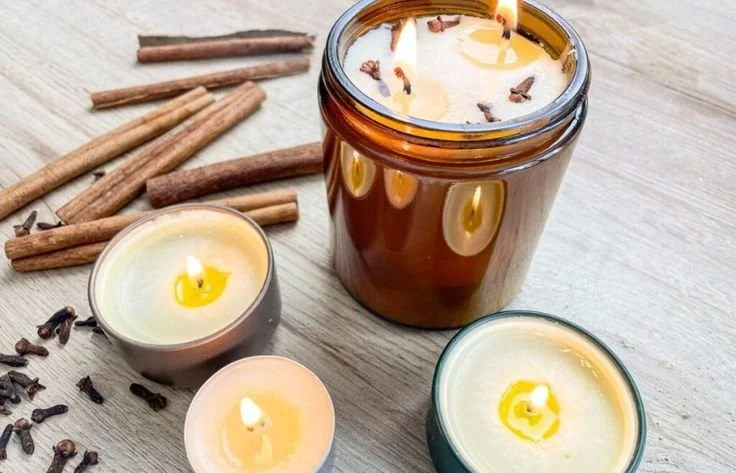
- Adding Natural Elements: You can add dried herbs, spices, or flower petals to your candles for a decorative touch.
- Layered Candles: Create a layered effect by pouring layers of different colored wax at different temperatures.
Storage and Shelf Life
Store your finished candles in a cool, dry place away from direct sunlight. When stored properly, homemade candles can last up to a year without losing scent or quality.
Safety Tips
- Always use your melting pot in a well-ventilated area to avoid inhaling any fumes.
- Keep wax away from any open flames and flammable materials.
- Wear protective eyewear and gloves if necessary, especially when working with hot wax.
Frequently Asked Questions
1. What kind of wax should I use for beginners?
Paraffin and soy wax are both great options for beginners. They are easy to work with and widely available.
2. How do I know if my candle wick is the right size?
After burning the candle, if the flame is too large or too small, adjust your wick size accordingly. A properly sized wick should produce a steady flame without excessive flickering.
3. Can I reuse old candle wax?
Yes! You can remelt leftover wax from used candles. Just be sure to remove any old wick pieces or contaminants before remelting.
4. How can I reduce soot in my candles?
Ensure the wick is trimmed to about 1/4 inch and that the candle has proper ventilation while burning. Also, using the right wick size can minimize soot.
5. Can I use essential oils instead of fragrance oils?
While some essential oils can be used, ensure they are suitable for candle making and check usage rates for safety and effectiveness. Fragrance oils are made specifically for this purpose and typically provide a better scent throw.
Conclusion
Now that you’re equipped with the best candle making supplies and a simple guide to get started, it’s time to unleash your creativity. Candle making is not just about crafting; it’s an artistic expression, a therapeutic activity, and an opportunity to create personalized gifts. So gather your supplies, follow the steps, and enjoy the warm, inviting glow of homemade candles in your home. Happy candle making!