
Learn to Make Easy DIY Lavender Beeswax Candle
Creating your own DIY lavender beeswax candle is a delightful experience that brings a warm ambiance to your home while filling the air with soothing fragrances. This step-by-step guide is designed for beginners and teaches you everything you need to know about crafting this beautiful and practical candle.
Why You Will Love This Recipe
- Natural Materials: Beeswax is a natural, non-toxic wax that burns cleanly.
- Aromatherapy Benefits: Lavender is known for its calming effects, making your space feel peaceful.
- Customizable: You can easily adjust the ingredients to match your personal preferences.
- Perfect Gift: Handmade candles make thoughtful gifts for any occasion.
Ingredients
For this DIY lavender beeswax candle, you will need the following ingredients:
- Beeswax: 1 cup (approximately 8 ounces)
- Lavender Essential Oil: 1 ounce (adjust based on scent strength preference)
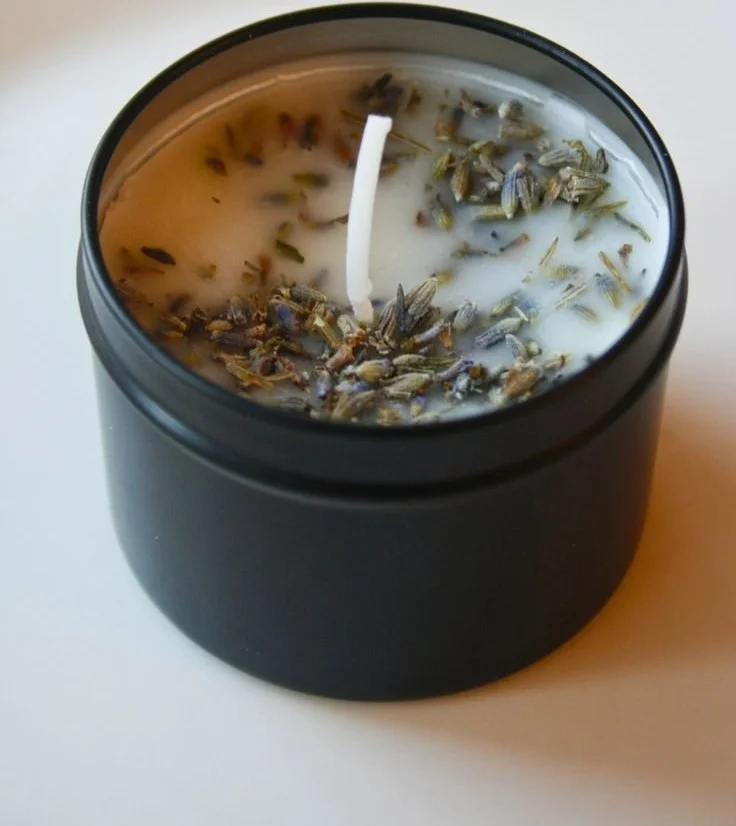
- Dried Lavender Flowers: 2 tablespoons (optional for aesthetics)
- Coconut Oil: 2 tablespoons (helps soften the beeswax)
Equipment
Before starting, make sure you have the following equipment:
- Double boiler or a pot and a heat-safe bowl
- Candle wick (preferably cotton or wood, about 6 inches in length)
- Candle container (like glass or metal jars)
- Stirring utensil (wooden or silicone spoon)
- Thermometer (optional)
- Scale (optional for precise measurements)
- Old newspapers or a tablecloth (to protect your workspace)
Step-by-Step Instructions
Prepare Your Work Area: Lay down newspapers or a tablecloth to catch any spills. Set up your candle containers and wicks.
Measure and Melt the Beeswax:
- Use the double boiler method: fill the lower pot with water and place it on medium heat.
- Measure 1 cup of beeswax and place it in the heat-safe bowl over the pot. Stir gently until fully melted, about 10 minutes.
Add Coconut Oil:
- Once the beeswax is melted, add 2 tablespoons of coconut oil to the mixture. Stir until incorporated.
Introduce Lavender:
- Remove the bowl from heat. Allow the beeswax to cool slightly (around 150°F/65°C) before adding the lavender essential oil. Add 1 ounce and stir thoroughly. If using dried lavender flowers, add them now.
Prepare the Wick:
- Secure the wick in the center of the candle container using a bit of melted wax or a wick holder.
Pour the Mixture:
- Carefully pour the melted beeswax into your candle container, leaving about half an inch from the top.
Secure the Wick:
- Make sure the wick stays centered while the wax cools and hardens. You can use chopsticks or a skewer to stabilize it.
Let It Cool:
- Allow the candle to cool completely at room temperature, which may take a few hours.
Trim the Wick:
- Once the candle is fully set, trim the wick to about 1/4 inch above the wax.
Tips for Success
- Temperature Control: Avoid overheating the beeswax, as it may cause it to lose its natural properties.
- Scent Strength: Adjust the amount of essential oil based on your preferred fragrance strength.
- Dried Flowers: Adding dried lavender flowers enhances the aesthetic but can also sometimes clog the wick. Ensure they’re well dispersed.
Common Mistakes to Avoid
- Not Measuring Accurately: Use a scale for precise measurements to get the perfect candle consistency.
- Pouring Too Hot: Let the melted beeswax cool slightly before pouring to avoid cracking.
- Ignoring Wick Types: Use wicks that are compatible with beeswax for optimal burning.
Variations and Customization Ideas
- Different Scents: Substitute lavender essential oil with other essential oils like eucalyptus, mint, or chamomile for a unique aroma.
- Colored Candles: Use candle dyes or natural coloring agents like turmeric or beet powder for a pop of color.
- Container Choices: Experiment with various container types, such as tin cans, teacups, or decorative jars for a personalized touch.
Storage and Shelf Life
Store your lavender beeswax candles in a cool, dry place away from direct sunlight. When properly stored, they can last up to 1-2 years without losing scent or quality.
Safety Tips
- Candle Burning Practices: Always place your candle on a heat-resistant surface and away from flammable materials. Never leave a burning candle unattended.
- Handling Beeswax: After melting, beeswax can be hot; ensure you handle it carefully to prevent burns.
Frequently Asked Questions
Q: Can I use a different type of wax?
A: Yes, you can substitute beeswax with soy or paraffin wax, but the final product’s characteristics will vary.
Q: How can I adjust the scent of the candle?
A: You can increase or decrease the amount of lavender essential oil based on your preference, but ensure to stay within 1 ounce to prevent overwhelm.
Q: Will dried lavender flowers affect the burn quality?
A: Dried lavender can add visual appeal but ensure they are evenly spread to avoid clogging the wick and resulting in a poor burn.
Q: How do I clean the wax spills?
A: Use a paper towel while the wax is still warm or wipe with a cloth soaked in hot soapy water afterward.
Q: Can I use a fragrance oil instead of essential oil?
A: Yes, but remember that fragrance oils are synthetic, and the candle’s properties might change. Ensure they are candle-safe.
Q: Can I make multiple candles at once?
A: Absolutely! Just multiply the ingredients and follow the same steps for each additional candle.
Conclusion
Making your DIY lavender beeswax candle is a rewarding project that allows you to blend creativity with relaxation. With its natural materials and calming scent, it’s perfect for enhancing your living space or giving as a heartfelt gift. So gather your ingredients, set aside some time, and enjoy the wonderful process of candle making. Happy crafting!