
DIY Beeswax Candle Tutorial: A Budget-Friendly Way to Create Healthy Candles
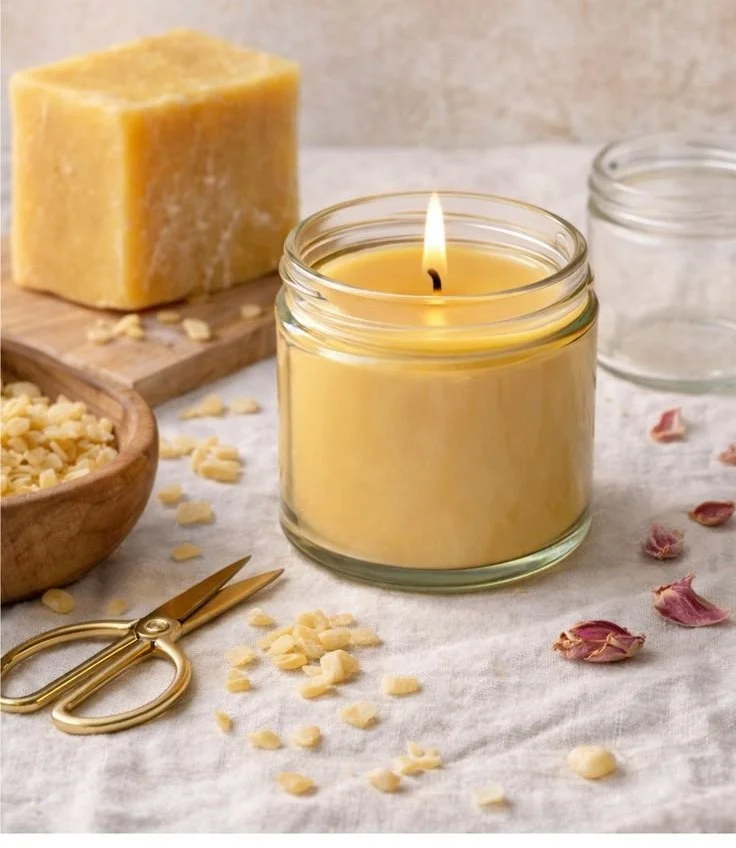
If you’re seeking a budget-friendly and eco-conscious way to add warmth and charm to your home, look no further than this DIY beeswax candle tutorial. Making your own candles is not only a creative outlet but also a fantastic way to ensure that your home is filled with non-toxic, healthy scents. This beginner-friendly guide will walk you through everything you need to know to craft beautiful, aromatic candles that are perfect as gifts or cozy decor.
Why You Will Love This Recipe
- Non-Toxic Ingredients: Beeswax candles are natural and release negative ions that help purify the air.
- Customizable Scents: You can add essential oils for a personalized fragrance that suits your mood or occasion.
- Budget-Friendly: Crafting your own candles is an excellent way to save money while enjoying luxurious décor.
Ingredients
For this beeswax candle recipe, you will need:
- 100% Beeswax: Approximately 1 pound (16 ounces)
- Candle Wick: Size depends on your container (typically, a medium wick for a standard glass jar)
- Essential Oils (optional): About 1 ounce for fragrance
- Dye (optional): Natural dyes if you’d like to color your candles
Equipment
Gather the following supplies before you begin:
- Double Boiler: For melting the beeswax safely
- Heat-Resistant Container: Glass jars or tin containers for your candles
- Wick Stabilizer or Wick Holder: To keep the wick centered while the wax sets
- Thermometer: To monitor the temperature of the wax
- Mixing Spoon: For stirring in fragrances or dyes
- Scale: To measure your wax and oils accurately
Step-by-Step Instructions
Follow these straightforward steps to create your beeswax candles:
Set Up Your Workspace: Cover your workspace with newspaper or a drop cloth to catch any spills. Ensure you have all your ingredients and tools nearby.
Melt the Beeswax: In your double boiler, add the beeswax and heat it over low-medium heat until fully melted (approximately 145°F or 63°C). Stir occasionally for even melting.
Prepare the Containers: While the wax is melting, set up your containers. Attach the wick to the bottom of the container using a wick stabilizer or hot glue. Ensure the wick is centered.
Add Fragrance: Once the beeswax has melted completely, remove it from the heat. If you’re adding essential oils, now is the time. Stir well to ensure even distribution. A standard ratio is 1 ounce of essential oil per pound of wax.
Pour the Wax: Carefully pour the melted wax into your prepared containers, being cautious not to disturb the wick. Leave about half an inch of space at the top.
Secure the Wick: Place a pencil or chopstick across the top of your container to keep the wick centered as the wax cools.
Allow to Cool: Let the candles cool at room temperature for several hours. After they are completely solid, trim the wick to about ¼ inch above the wax.
Tips for Success
- Use Temperature Checks: Keeping the wax at the recommended temperature helps avoid issues like cracking or uneven burning.
- Don’t Overheat the Wax: Beeswax can become discolored or lose its natural scent if overheated. Stick to the recommended temperature for melting.
Common Mistakes to Avoid
- Using the Wrong Wick Size: Make sure to match your wick size to your container for the best burn. Too small, and the candle won’t burn properly; too large, and it can burn too quickly.
- Not Letting It Cool Properly: Be patient! Let the wax cool completely before moving or lighting your candle.
Variations and Customization Ideas
- Scent Combinations: Experiment with different essential oil blends. Some popular combinations include lavender and chamomile or citrus with eucalyptus.
- Coloring Your Candles: Use natural colorants like annatto or beetroot powder to tint your candles, or leave them pure for a classic look.
- Mixing Wax Types: Consider blending beeswax with other natural waxes like coconut or palm wax for unique properties.
Storage and Shelf Life
Once your candles have cured for at least 24 hours, store them in a cool, dry place away from direct sunlight. Properly stored beeswax candles can last for months, providing you with an ongoing source of cozy ambiance.
Safety Tips
- Fire Safety: Always keep candles away from flammable materials and never leave burning candles unattended.
- Ventilation: Ensure your workspace is well-ventilated when melting wax to avoid inhaling fumes.
- Protective Gear: Consider wearing gloves and safety goggles while working with hot wax or essential oils to prevent any irritation.
Frequently Asked Questions
1. Can I use other types of wax?
Yes, though beeswax has unique properties, you can combine it with other natural waxes like soy or palm to achieve different burn times and scents.
2. How do I know what wick size to use?
Wick sizing depends on the diameter of your container. Refer to wick size charts that most wick suppliers provide to find the best match for your container.
3. What should I do if the candle has bubbles?
If you notice air bubbles during pouring, you can use a heat gun or hairdryer on low to carefully melt the top surface to smooth it out after the candle has cooled.
4. Can I reuse candle containers?
Absolutely! Clean out old wax with warm, soapy water and ensure the container is clean before adding new wax.
5. How can I extend the burn time of my candles?
Avoid drafting areas when burning candles, and trim the wick to the correct length to promote even burning.
Conclusion
Making your own beeswax candles is both an enjoyable crafting project and an excellent way to create a warm, inviting atmosphere in your home. With just a few ingredients and some simple tools, you can easily create beautiful, non-toxic candles that are perfect for any occasion or season. Whether you keep them for your own home or give them as thoughtful handmade gifts, these beeswax candles are sure to impress. So gather your materials and get started on this fulfilling DIY project today!