
Learn How to Make Whipped Soap: Ten Wonderful Ideas to Try
If you’re looking for a fun, creative, and satisfying DIY project, making whipped soap is a fantastic option! This fluffy, creamy soap can cleanse your skin while leaving it feeling soft and moisturized. In this article, I’ll share ten delightful whipped soap recipes that you can try throughout the year. Perfect for summer scrubs, autumn scents, or winter gift ideas, these recipes will surely delight your friends and family. Let’s dive into the world of DIY whipped soap!
Why You Will Love This Recipe
Whipped soap is not only easy to make, but it also allows for a lot of creativity. You can experiment with different colorations, fragrances, and textures to craft a product that reflects your personality or the season. Plus, homemade whipped soap makes for thoughtful gifts that show you care. Whether you’re a seasoned DIY maker or a beginner, this project is an enjoyable and rewarding experience.
Ingredients
Each whipped soap recipe may vary slightly, but generally, you will need the following base ingredients:
- Liquid Soap Base: 1 cup (can use a clear glycerin soap)
- Coconut Oil: ½ cup
- Vegetable Shortening: ½ cup
- Sugar: ¾ cup (optional for exfoliating properties)
- Fragrance Oil: 1 tablespoon (scent of your choice)
- Colorants: Optional, a few drops of soap-safe coloring
- Essential Oils: Optional, for added scent and benefits
Equipment
To make whipped soap, you will need the following tools:
- Mixing Bowl: Large enough to hold all your ingredients
- Hand Mixer or Stand Mixer: For whipping the soap
- Spatula: For scraping down the sides of the bowl
- Whipping Container: Jars or pots for storing your whipped soap
- Measuring Cups and Spoons: To accurately measure your ingredients
- Double Boiler or Microwave: For melting the coconut oil
Step-by-Step Instructions
Let’s make a basic whipped soap that you can customize! This recipe will yield approximately two jars of whipped soap.
- Melt the Coconut Oil: In a double boiler or microwave, melt ½ cup of coconut oil until it’s in a liquid state. Make sure not to overheat it; it should just be melted, not boiling.
- Combine the Base Ingredients: In a mixing bowl, combine 1 cup of your liquid soap base with the melted coconut oil and ½ cup of vegetable shortening.
- Whip It Up: Using your hand mixer or stand mixer, whip the mixture on medium speed for about 5–7 minutes. The mixture should become fluffy and light.
- Add Sugar: If you’re using sugar for exfoliation, add ¾ cup and mix well. This step is optional if you prefer a smoother texture.
- Scent and Color: Add 1 tablespoon of fragrance oil and any optional colorants. Blend until evenly mixed.
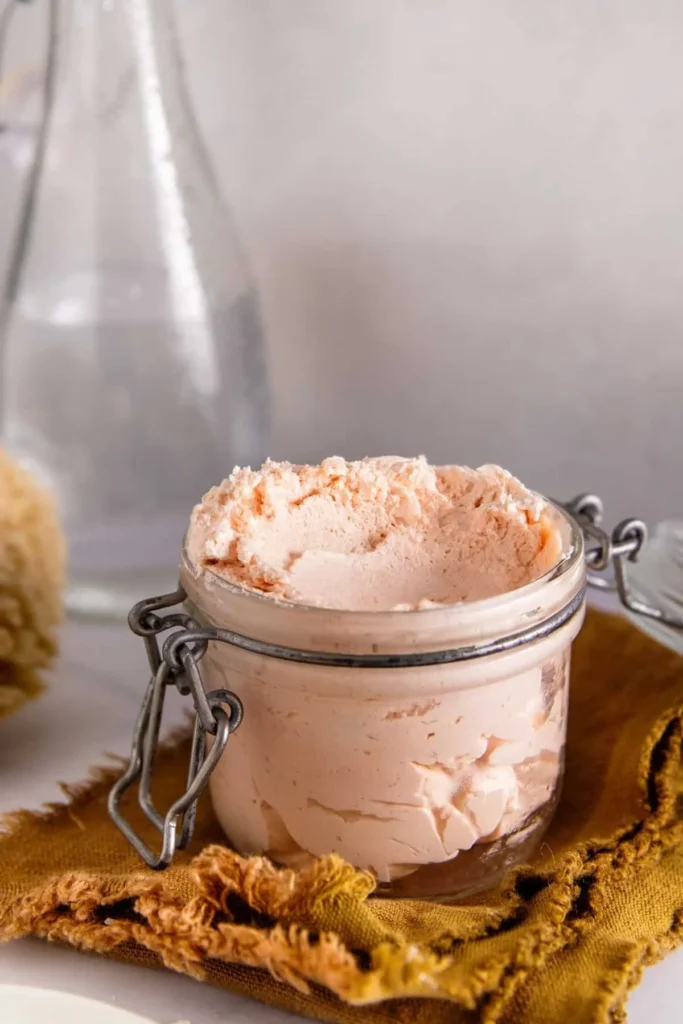
- Transfer to Jars: Scoop the whipped soap into jars using a spatula. You can create swirls or layers for a beautiful effect!
- Let It Set: Allow the whipped soap to sit at room temperature until it firms up slightly.
Tips for Success
- Room Temperature: Ensure all ingredients are at room temperature before starting.
- Mix Gradually: Start your mixer at a lower speed to prevent splatter, gradually increasing it as the mixture thickens.
- Experiment: Try different combinations of fragrances and colors to create your unique whipped soap!
Common Mistakes to Avoid
- Overheating the Coconut Oil: This can result in a greasy soap. Heat just until melted.
- Not Whipping Long Enough: The longer you whip, the airier your soap will be.
- Skipping the Cleaning: Ensure your mixing tools are thoroughly clean before starting to avoid contamination.
Variations and Customization Ideas
- Seasonal Scents: Try peppermint or vanilla for winter, pumpkin spice for fall, and floral scents for spring.
- Color Combinations: Use natural colorants like beet powder or turmeric for a more natural approach.
- Additives: Incorporate ingredients like vitamin E oil for added skin benefits or oatmeal for extra exfoliation.
Storage and Shelf Life
Store your whipped soap in airtight containers in a cool, dry place. Keep it out of direct sunlight to preserve the fragrance and color. When stored correctly, it should last for 6-12 months.
Safety Tips
- Allergies: Always check for allergies to oils or fragrances.
- Clean Workspace: Maintain a clean and sanitized workspace to ensure no contamination.
- Ventilation: If using strong fragrances, make sure to work in a well-ventilated area.
Frequently Asked Questions
- Can I sell my whipped soap?
- If you plan to sell, ensure you comply with local regulations and labeling requirements, especially concerning ingredients.
- What if my whipped soap is too hard?
- This can happen if there is too much oil or not enough soap base. You can whip it again with a bit of water to soften it.
- Can I customize the color?
- Yes! Just make sure to use skin-safe colorants for soap to maintain safety.
- What types of fragrances work best?
- Use skin-safe fragrance oils designed for soaps, and avoid essential oils that can be too strong or irritating for the skin.
Conclusion
Making whipped soap is a delightful DIY project that allows for creativity and personalization. With these ten wonderful ideas, you can craft unique whipped soaps for yourself or as gifts for loved ones. Enjoy experimenting with different scents and colors as you create your very own homemade soaps, perfect for any season. Don’t forget to share your creations and spread the joy of whipping your own soap!