
Make Your Own Coffee Soap: A Step-by-Step Guide
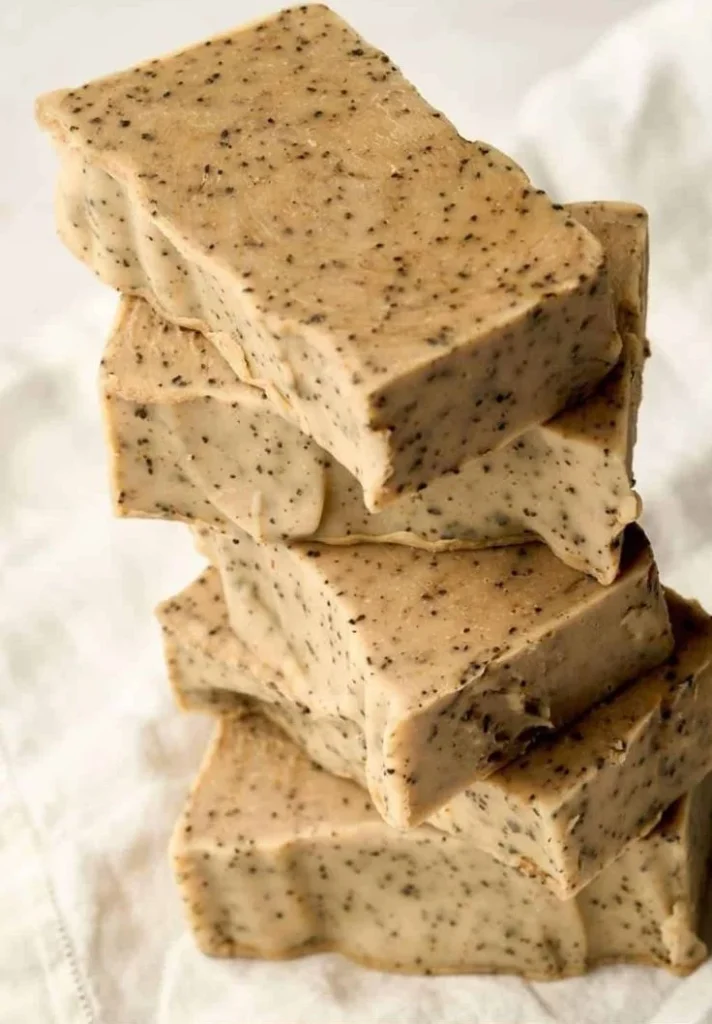
Making your own soap is a fulfilling and creative hobby that allows you to control every aspect of the ingredients. Best of all, this coffee soap recipe incorporates coffee grounds for gentle exfoliation and brewed coffee for a rich, dark hue that can brighten your morning routine. Coupled with moisturizing oils, this project is not only easy to follow but results in beautiful, functional bars of homemade soap. Let’s dive into how to make this delightful coffee soap!
Why You Will Love This Recipe
- Natural Ingredients: Creating your own soap means you avoid the unwanted additives and synthetic ingredients often found in commercial products.
- Exfoliation: Coffee grounds provide a natural scrubbing power, perfect for removing dead skin cells.
- Aromatherapy Benefits: The smell of coffee is energizing and inviting, making your bathroom feel like a spa.
- Beautiful Gift Idea: Handmade soap makes a thoughtful, personal gift for friends and family.
Ingredients
To get started with this coffee soap recipe, you’ll need the following ingredients:
- Coffee Grounds: 1/4 cup (for exfoliation)
- Brewed Coffee: 1 cup (as the liquid for the soap base)
- Coconut Oil: 1/2 cup (moisturizing properties)
- Olive Oil: 1/2 cup (nourishing and gentle on skin)
- Lye (Sodium Hydroxide): 2.7 oz (handle with care; see safety tips below)
- Distilled Water: 3.5 oz (to dissolve lye)
- Essential Oil (optional): 1/2 oz (for fragrance; coffee or vanilla works well)
Equipment
Gather the following equipment before you begin:
- Safety goggles and gloves
- Scale (for precise measurements)
- Measuring cups and spoons
- Heat-resistant mixing bowl (glass or stainless steel)
- Stick blender
- Soap molds (silicone works best)
- A thermometer (to monitor temperatures)
- Mixing spoons
- Old newspapers or towels (for clean-up)
Step-by-Step Instructions
Making cold-process coffee soap requires some safety precautions, especially concerning the handling of lye. Here’s how to create your own batch:
1. Prepare your Work Area
Ensure your workspace is well-ventilated and protected with newspaper or towels. Put on your safety goggles and gloves.
2. Measure the Water and Lye
In a well-ventilated area, carefully measure 3.5 oz of distilled water into a heat-resistant container. Slowly add 2.7 oz of lye to the water (never the other way around as it can cause a violent reaction). Stir gently until fully dissolved. Set it aside to cool.
3. Brew Coffee
Brew 1 cup of strong coffee, then allow it to cool to room temperature.
4. Measure and Melt Oils
In a separate heat-resistant bowl, measure 1/2 cup each of coconut oil and olive oil. Melt the coconut oil until it’s liquid, then combine with the olive oil.
5. Combine Oils and Lye
When the lye solution and oils reach a temperature of about 100°F, carefully blend the lye solution into the oils using a stick blender. Mix until it reaches "trace"—this means the mixture thickens slightly and leaves a trail when drizzled from the blender.
6. Add Coffee and Grounds
Stir in the brewed coffee and coffee grounds. If using, also add any essential oils at this stage. Continuously blend until well incorporated.
7. Pour Into Molds
Carefully pour the soap mixture into your prepared molds. Tap gently to remove any air bubbles.
8. Insulate & Cure
Cover the molds with a towel for insulation and let them sit undisturbed for 24 to 48 hours until they harden.
9. Unmold and Cure
Once solidified, remove the soap from the molds and cut into bars. Allow them to cure in a cool, dry place for 4 to 6 weeks. This ensures the soap is safe and lye-free.
Tips for Success
- Work with Care: Always wear gloves and goggles when handling lye. It’s caustic and can cause burns.
- Use a Scale: Accurate measurements are crucial, especially for lye as incorrect amounts can harm the final product’s quality.
- Patience is Key: Allow the soap to cure fully before using to ensure a safe and effective bar.
Common Mistakes to Avoid
- Incorrect Measurements: Double-check that your measurements for lye and oils are correct.
- Ignoring Safety: Don’t skip protective gear—lye can be very harmful.
- Skipping the Cure: Ensure you allow adequate curing time; otherwise, the soap can be harsh or irritate the skin.
Variations and Customization Ideas
- Additives: You can incorporate other natural exfoliants, such as oatmeal or ground almonds.
- Colorants: For visual appeal, add natural colorants like cocoa powder for a deeper shade.
- Scents: Experiment with other scents like vanilla, peppermint, or cedarwood essential oils for different aromatherapy benefits.
Storage and Shelf Life
Store your finished soap in a cool, dry place away from direct sunlight. The shelf life typically ranges from 6 months to 1 year, depending on the ingredients’ quality. Always check for unusual smells or signs of deterioration before use.
Safety Tips
- Always wear gloves and goggles when working with lye.
- Use a well-ventilated area while mixing lye and water.
- Keep all materials out of reach of children and pets.
- Dispose of any leftover lye and materials safely.
Frequently Asked Questions
1. Can I skip the lye in soap-making?
No, lye is essential in the cold process as it reacts with oils to create soap. It cannot be omitted without substituting another process.
2. Why did my soap turn out too soft?
This may be due to incorrect lye measurements or not allowing sufficient curing time. Ensure accuracy and patience with drying.
3. Can I use other types of oil?
Yes, you can customize the oils based on your preferences, but keep a good balance of hard and soft oils for best results.
4. Is it possible to add color to my soap?
Absolutely! Natural colorants like clays, activated charcoal, or spices can be added for visual appeal.
5. Can I make this soap recipe in larger quantities?
Yes, just ensure you scale your ingredients accurately. Always recalculate lye using a soap calculator.
Conclusion
Now that you have everything you need to create your own coffee soap, why not give it a try? Not only is it a fantastic way to indulge in DIY creativity, but it also results in a wonderfully fragrant and exfoliating bar of soap. Remember to take your time, follow the safety precautions, and soon you’ll be enjoying the fruits of your labor, or gifting your unique handmade soap to loved ones. Happy soap making!