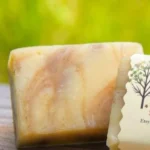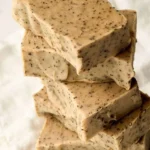

Homemade Soap and Candle Making: A Beginner’s Guide
Making homemade soap and candles can be a delightful and fulfilling craft that not only enhances your living space but also allows you to unleash your creativity. Whether you’re looking to create beautiful artisanal gifts, pamper yourself, or simply explore a new hobby, this guide will help you understand the ins and outs of DIY soap and candles.
Why You Will Love This Recipe
Creating your own soaps and candles is not just about the end product. It’s the process of blending unique fragrances, experimenting with colors, and customizing recipes that makes this craft incredibly satisfying. Plus, the final products will add a personal touch to your home or make thoughtful gifts.
Ingredients
For Homemade Soap (Using Melt and Pour Method):
- Melt and Pour Soap Base: 1 lb (choose clear, white, or goat milk base)
- Essential Oils or Fragrance: 1 oz (your choice; lavender, eucalyptus, or vanilla work well)
- Natural Colorants: 1 teaspoon (optional; consider mica powders or clays)
- Additions:
- Dried herbs or flowers: 2 tablespoons (e.g., lavender, calendula)
- Exfoliants: 1 tablespoon (e.g., oatmeal, coffee grounds)
For Homemade Candles:
- Wax: 1 lb (choose either soy wax, beeswax, or paraffin)
- Fragrance Oil: 1 oz (ensure it is suitable for candle making)
- Candle Wicks: Choose based on your container size and wax type
- Containers: 1 or more heat-resistant vessels (glass, metal, or silicone)
Equipment
Soap Making Equipment:
- Heat-resistant container for melting soap base
- Silicone mold or soap mold
- Stirring spoon or stick
- Measuring cups and spoons
- Digital scale (for precision)
- Spray bottle with rubbing alcohol (to eliminate bubbles)
Candle Making Equipment:
- Double boiler or wax melter
- Thermometer (candy thermometer is suitable)
- Stirring stick
- Wick holder (to keep wicks centered while pouring)
- Pouring pot (a metal pitcher works well)
- Safety gloves and goggles
Step-by-Step Instructions
Soap Making Steps:
Prepare Your Workspace: Cover your surfaces and gather all your materials.
Melt the Soap Base:
- Cut the soap base into small cubes.
- Place them in your heat-resistant container.
- Use a microwave in short intervals (30 seconds) or a double boiler until fully melted.
Add Color and Fragrance:
- Once melted, let it cool slightly.
- Add your fragrance or essential oils and stir.
- If using colorants, add them and stir until blended.
Incorporate Optional Additions: Add any dried flowers, herbs, or exfoliants to the mixture.
Pour into Molds: Carefully pour the mixture into your molds.
Spritz with Alcohol: Use a spray bottle to spritz the tops to eliminate bubbles.
Let It Set: Allow the soap to cool and harden for 2-4 hours.
Unmold and Store: Carefully remove the soap from the molds. Store in a cool, dry place.
Candle Making Steps:
Prepare Your Workspace: Lay down newspapers or an old cloth to catch spills.
Measure Wax and Fragrance: Weigh out your wax. Measure 1 oz of fragrance oil for every pound of wax.
Melt the Wax:
- Set up your double boiler, adding water to the bottom pot.
- Heat the wax slowly, stirring occasionally, until fully melted.
- Monitor the temperature with a thermometer (ideally around 170-180°F).
Add Fragrance: Once melted, remove from heat. Let the temperature drop to about 160°F, then add your fragrance oil and stir for a couple of minutes.
Prepare Containers: Secure wicks to the bottom of your containers, using hot glue or a wick sticker.
Pour the Wax: Carefully pour the wax into your containers, leaving a small space at the top.
Stabilize the Wick: Use a couple of chopsticks or a wick holder to keep the wick centered while the wax hardens.
Cool and Cure: Let the candles cool completely (at least 4 hours) before trimming the wick to about ¼ inch.
Tips for Success
- For soap, experiment with different colorants and fragrances to customize your creations. A little goes a long way!
- When making candles, using a thermometer can prevent overheating, which may degrade the fragrance.
- Both soaps and candles benefit from long curing times—wait at least 2 weeks before using soaps for the best results and 1-2 weeks for candles.
Common Mistakes to Avoid
- In Soap: Avoid overheating the base, as it can burn or bubble improperly.
- In Candles: Not measuring the fragrance correctly can result in candles that don’t smell strong enough or too overpowering.
Variations and Customization Ideas
- Soap: Try layering different colors, or experiment by embedding small soap pieces into a clear soap base.
- Candles: Use multiple fragrances for a complex scent profile or add natural dyes for color.
Storage and Shelf Life
- Soap: Store in a cool, dry place away from moisture. Properly made melt-and-pour soap typically lasts up to 1 year.
- Candles: Keep in a cool, dark place. Well-made candles can last up to 2 years if stored properly.
Safety Tips
- Always wear gloves and goggles when handling hot materials or lye (if using cold or hot process soap).
- Ensure your workspace is well-ventilated, especially when working with fragrance oils.
- Never leave melting wax unattended and avoid using candles near flammable items.
Frequently Asked Questions
1. Can I use any oils for soap?
You should primarily use oils suitable for skin use. Essential oils are great choices, while fragrance oils need to be specifically formulated for soap making.
2. How can I test my candle for scent throw?
Light your candle and observe its scent diffusion in an enclosed space after burning it for a few hours. Adjust fragrance levels as needed for future batches.
3. Can I use leftovers from previous projects?
Yes! If you have leftover candle wax, you can melt and mix it with new wax. Just ensure it’s compatible in terms of wax type.
4. How can I prevent bubbles in my soap?
Working at a lower temperature and spritzing the top with rubbing alcohol immediately after pouring can help eliminate bubbles.
5. What’s the best container for candles?
Choose heat-safe materials like glass or metal. If using glass containers, ensure they are thick enough to withstand heat without cracking.
6. Is it necessary to cure homemade soap?
Yes, curing allows the soap to harden fully and allows excess moisture to evaporate, resulting in a longer-lasting bar.
Conclusion
Enter the world of DIY soap and candle making to experience the joy of creating something beautiful and functional! With a little patience and creativity, you will develop beautiful homemade products that are perfect for personal use or as handmade gifts. Enjoy the process, embrace your artistic flair, and don’t hesitate to experiment with different ingredients. Now that you have this guide, it’s time to gather your tools and ingredients and get crafting. Happy making!