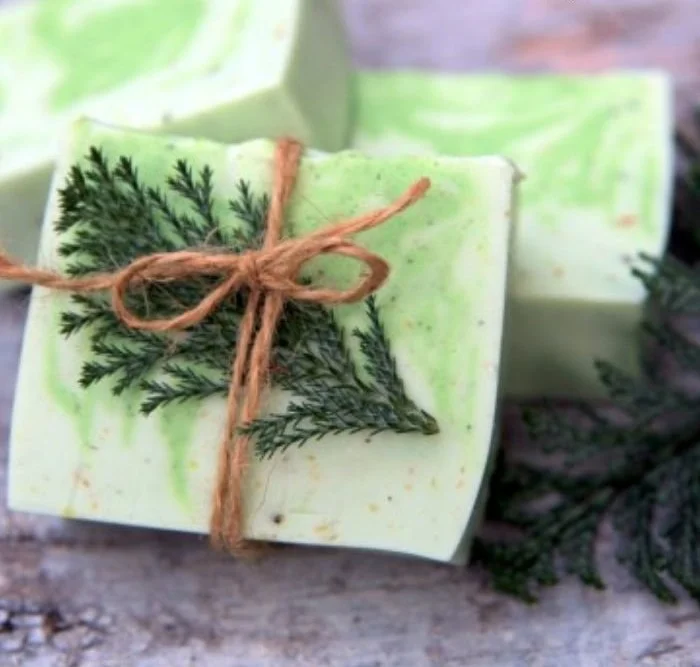

This Winter Forest Soap Recipe: A Fresh and Woodsy Delight
Stepping into a winter forest is an experience that envelops you in crisp, fresh air, the scent of pine, cedar, and a hint of earthiness. Imagine bringing that invigorating essence to your morning shower with this delightful DIY winter forest soap recipe. Not only does it smell incredible, but it also nourishes and cares for your skin. Let’s embark on this homemade soap-making adventure together!
Why You Will Love This Recipe
This winter forest soap is a perfect blend of essential oils from forest trees, creating a woodsy and refreshing scent. You’ll love how easy it is to make, even if you’re a complete beginner. Plus, crafting your own soap allows you to control the ingredients, ensuring it’s free from synthetic additives. This soap also makes for a thoughtful handmade gift during the holiday season or any special occasion.
Ingredients
To whip up a batch of this aromatic winter forest soap, you will need the following:
- 16 ounces (1 lb) of melt-and-pour soap base (shea butter or glycerin)
- 1 teaspoon of cedarwood essential oil
- 1 teaspoon of pine essential oil
- 1/2 teaspoon of fir essential oil
- 1 tablespoon of olive oil (optional, for added skin nourishment)
- Natural colorants (like green mica or clay) – optional
- 1-2 teaspoons of dried herbs (optional, such as dried pine needles for texture)
Equipment
Before you dive into making your soap, gather the following equipment:
- Double boiler or microwave-safe container
- Soap mold (silicone molds work great)
- Rubber spatula
- Measuring spoons
- Digital scale (if you’re weighing ingredients)
- Safety goggles and gloves (if using lye in a different recipe)
- A stirring stick or wooden stick
Step-by-Step Instructions
Preparation Time: 10 Minutes
Making Time: 30 Minutes
Yield: Approximately 4-6 bars of soap
Now, let’s get started!
Prepare Your Mold: If you’re using a silicone mold, lightly grease it with olive oil to help with the removal of the soap once it’s set.
Melt the Soap Base: Using the double boiler method, fill the bottom pot with water and bring it to a gentle simmer. Add the soap base to the top pot. If you’re using a microwave, place the soap base in a microwave-safe container and heat it in 30-second intervals, stirring between each interval until completely melted.
Mix in the Oils: Once the soap base is melted, remove it from the heat and let it cool slightly (but don’t let it solidify). Add the cedarwood, pine, and fir essential oils. Stir thoroughly to evenly combine the scents.
Add Color and Texture: If you’re using colorants, add them now along with any dried herbs for texture. Stir well to ensure an even distribution.
Pour into the Mold: Carefully pour the soap mixture into the prepared molds, avoiding spills.
Let it Set: Allow the soap to sit at room temperature until solid (about 3-4 hours). For quicker results, you can place the mold in the refrigerator for about 30 minutes.
Remove the Soap: Once completely set, gently pop the soap out of the mold.
Cure (Optional): While melt-and-pour soaps can be used immediately, allowing them to cure for a day or two improves their longevity.
Tips for Success
- Stir Well: Make sure that the essential oils and any added colorants are fully incorporated into the soap base for a consistent scent and color.
- Temperature Matters: If your soap mixture begins to cool too much before pouring, gently reheat it. However, be cautious not to overheat and boil the base.
- Use Isopropyl Alcohol: Spraying the surface of the poured soap with isopropyl alcohol can help eliminate bubbles that may form.
Common Mistakes to Avoid
- Overheating: Always melt your soap base gently. Overheating can cause the base to lose its moisturizing properties.
- Adding Too Much Fragrance: Stick to the recommended essential oil amounts to prevent the soap from becoming irritating to the skin.
- Not Working Quickly Enough: Melt-and-pour soap can begin to solidify quickly, so be prepared to work within a reasonable timeframe once it’s melted.
Variations and Customization Ideas
- Explore Different Scents: Swap out the essential oils for other fragrances like rosemary, juniper, or even citrus for a different aromatic experience.
- Add Exfoliants: Incorporate oatmeal, coffee grounds, or poppy seeds for a gentle exfoliating bar.
- Create a Layered Effect: Pour the soap in layers for a visually striking effect. Allow each layer to set slightly before pouring the next.
Storage and Shelf Life
Store your finished winter forest soap bars in a cool, dry place away from direct sunlight. When properly made and stored, they can last up to six months.
Safety Tips
- Essential Oil Safety: Ensure you’re using skin-safe essential oils and always do a patch test when using any new ingredient.
- Keep Workspace Clean: Clean your workspace and tools thoroughly after making soap to avoid contamination.
- Child Safety: Keep all equipment and ingredients out of reach of children and pets.
Frequently Asked Questions
1. Can I adjust the essential oil amounts?
Yes, you can adjust the essential oil quantities to cater to your scent preference. However, it’s advisable to keep them within safe limits (generally not exceeding 3% of the total weight).
2. Can I use this recipe with another soap base?
Absolutely! This recipe works well with any melt-and-pour soap base, such as goat’s milk, olive oil, or coconut oil bases.
3. How can I color my soap naturally?
You can use natural colorants such as turmeric for yellow, spirulina for green, or activated charcoal for a dark hue.
4. Can I add other ingredients like honey or yogurt?
Yes, both honey and yogurt can be added for extra nourishment; however, keep in mind that extra moisture may affect the texture and shelf life of your soap.
5. Is lye used in this recipe?
No, this recipe is based on a melt-and-pour method, which doesn’t require lye. If exploring cold or hot process methods, remember to use sodium hydroxide safely.
6. How long should I cure melt-and-pour soap?
Melt-and-pour soap can typically be used immediately after it has set, but allowing it to cure for a day can enhance its durability.
Conclusion
Making your own winter forest soap is not only a fun and creative project but also a rewarding way to engage with natural ingredients. You’ll not only enjoy crafting this wonderful bar of soap but also benefit from the refreshing and soothing properties of the essential oils. So gather your ingredients, invite some friends or family to join you, and enjoy this winter-inspired DIY experience! Whether for personal use or as thoughtful gifts, your handmade soap is sure to impress. Happy crafting!