
Berry Blossom Bloom Body Soap: Create Your Own Luxurious Cleansing Experience
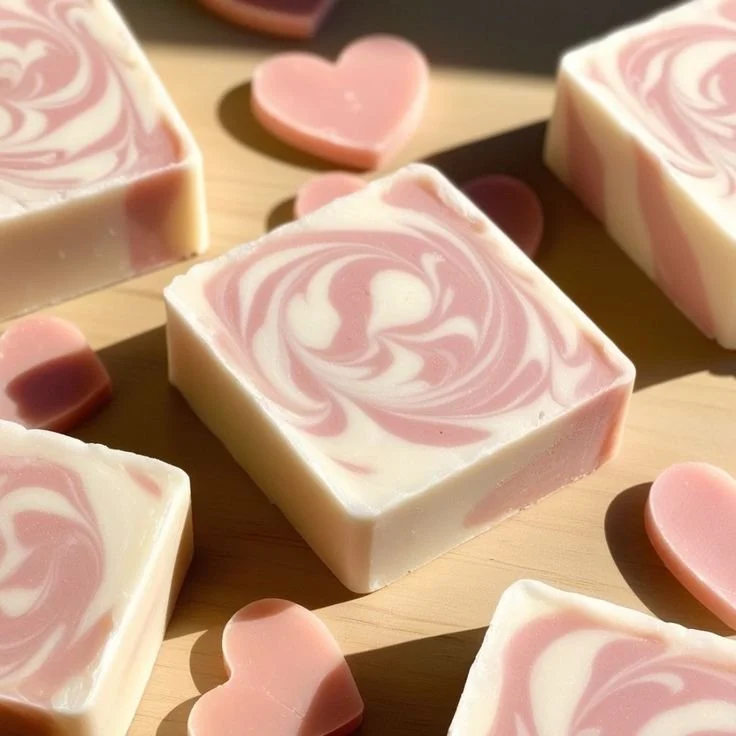
Making your own body soap can be an incredibly rewarding DIY project that brings a touch of luxury into your daily routine. In this article, I will guide you through creating a beautiful Berry Blossom Bloom Body Soap that not only looks delightful but also nourishes and hydrates your skin. With its sweet, floral fruity scent and moisturizing properties, you’ll love treating yourself or giving it as a thoughtful handmade gift.
Why You Will Love This Recipe
This Berry Blossom Bloom Body Soap recipe is designed for beginners, so don’t worry if you’re new to soap-making. It is a melt and pour soap, which means that you won’t have to deal with lye or complex processes. You’ll enjoy the quick results and the immediate gratification of using your freshly made soap. Here’s what makes this soap special:
- Moisturizing: Rich in antioxidants and essential fatty acids, this soap will hydrate and soften dry skin.
- Age-Defying Properties: It helps reduce the appearance of fine lines and wrinkles, promoting a youthful glow.
- Gentle Cleansing: Cleanses without stripping your skin’s natural moisture barrier, leaving it soft and supple.
Ingredients
For this recipe, you will need the following ingredients:
- 1 lb (16 oz) of glycerin-based melt-and-pour soap base (clear or white)
- 2-3 teaspoons of rhubarb and raspberry fragrance oil (adjust to your scent preference)
- 1-2 teaspoons of pink and white colorants (micas or soap dyes)
- 1 tablespoon of vitamin E oil (to nourish the skin)
- Optional: Dried flower petals for decoration (like hibiscus or rose petals)
Equipment
Before starting, gather the following supplies:
- Microwave-safe bowl or double boiler
- Stirring utensils (silicone spatula)
- Soap mold (silicone molds are recommended for easy release)
- Measuring spoons
- Safety gear (gloves and protective eyewear if handling hot materials)
- A thermometer (optional)
- Cutting board and knife (for cutting the soap base)
Step-by-Step Instructions
Follow these easy steps to create your Berry Blossom Bloom Body Soap:
Prepare Your Workspace:
Ensure you have a clean, flat workspace. Lay down newspaper or paper towels to catch any spills.Cut the Soap Base:
If you’re using a block of glycerin soap base, cut it into small cubes to help it melt evenly. About 1-inch cubes are ideal.Melt the Soap Base:
- Place the soap cubes in a microwave-safe bowl or double boiler.
- If using a microwave, heat for 30 seconds at a time. Stir after each interval until fully melted.
- If using a double boiler, place the bowl on top of a pot of simmering water, stirring until melted.
- Ensure the soap doesn’t exceed 145°F (63°C) to avoid bubbles.
Add Color and Fragrance:
While the soap is still warm, add your colorants and fragrance oil. Start with the smaller amounts listed and stir well. Adjust as necessary until you achieve your desired shade and scent.Incorporate Vitamin E and Add-ins:
Add the vitamin E oil for skin nourishment. If you want to add dried flower petals, stir them in gently so they distribute evenly.Pour into Molds:
Carefully pour the soap mixture into your molds. If using silicone molds, you can pour directly; for harder molds, you may want to lightly spray them with rubbing alcohol to help with air bubbles.Let It Sit:
Allow the soap to cool and harden for 2-4 hours at room temperature. Avoid moving the molds during this time to prevent imperfect shapes.Unmold the Soap:
Once completely hardened, gently remove the soap from the molds. If it sticks, briefly place the mold in the freezer to help release it.
Tips for Success
- Temperature Check: Keep an eye on the temperature when melting your soap base to avoid overheating.
- Stirring: Stir well to combine all ingredients, as some fragrance oils can separate if not mixed thoroughly.
- Adding Colors: Start with a small amount of colorant, as it’s easier to add more to achieve your desired hue.
Common Mistakes to Avoid
- Overheating the Soap Base: This can lead to burn smells and can affect the quality of the final product.
- Using Too Much Fragrance: Overly strong scents can be overpowering. Always start with less and adjust to your liking.
- Not Allowing Enough Cooling Time: Patience is key! Rushing this process may cause your soap to deform.
Variations and Customization Ideas
- Change the Fragrance: Experiment with different fragrance oils like lavender or citrus for a completely different experience.
- Incorporate Exfoliants: Add a tablespoon of natural exfoliants, such as oatmeal or coffee grounds for added texture.
- Layering: For a more decorative soap, make a layer of one color or scent, let it set partially, then pour another on top.
Storage and Shelf Life
- Storage: Store your body soap in a cool, dry place away from direct sunlight to maintain its fragrance and texture.
- Shelf Life: Homemade soaps should last for about 6-12 months, depending on the ingredients used.
Safety Tips
- Wear gloves and protective eyewear while handling hot soap materials.
- Work in a well-ventilated area, especially if you are using strong fragrance oils.
Frequently Asked Questions
Can I use regular soap bases instead of glycerin-based?
Yes, but glycerin is favorite for melt and pour due to its moisturizing properties.
How do I package my homemade soap for gifting?
Use cellophane wrap or decorative paper, and consider adding a personal tag with ingredients and fragrance notes.
What if my soap exploded in the microwave?
If this happens, it’s likely due to overheating. Check the temperature next time.
Can I use essential oils instead of fragrance oils?
Absolutely! Just remember that essential oils may have different scent strengths, so adjust the amount used accordingly.
What type of molds work best for beginners?
Silicone molds are perfect for beginners as they allow for easy removal and are available in various shapes and sizes.
Conclusion
Creating your Berry Blossom Bloom Body Soap is a delightful way to indulge in self-care or share a personal touch with loved ones. With easy-to-follow steps, you’ll be amazed at how simple and satisfying DIY soap-making can be. Remember to experiment and customize this recipe to suit your taste and preferences. So, get started today, and bring a piece of springtime sweetness to your bathroom with this lovely homemade soap!