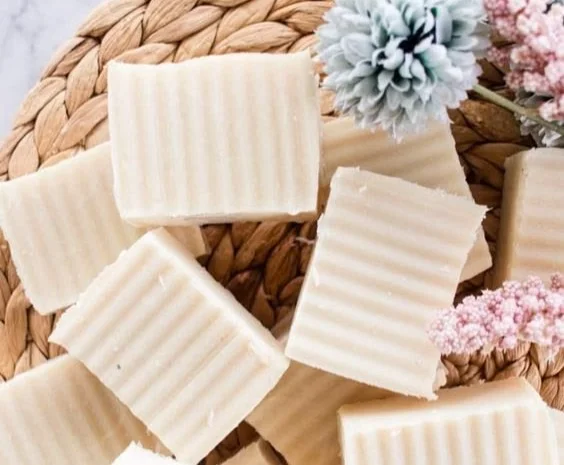

Discover How to Make Homemade, DIY Beeswax Soap
Making your own soap at home can be an incredibly rewarding experience. Not only do you get to enjoy a lovely, moisturizing product, but you also have the creativity to customize it to your taste. One of the best materials for soap-making is beeswax. With its natural skin-loving properties, beeswax can give your soap a delightful texture and a wonderful, subtle scent. In this article, I’ll guide you step-by-step on how to make homemade beeswax soap, complete with all the instructions and supplies you’ll need.
Why You Will Love This Recipe
- Moisturizing Properties: Beeswax helps create a protective barrier on the skin while allowing it to breathe, locking in moisture without clogging pores.
- Natural Ingredients: This soap is made without harmful chemicals, ideal for sensitive skin.
- Eco-Friendly: Making DIY beeswax soap is a sustainable practice that helps reduce waste and supports local beekeepers.
- Perfect for Gifting: Handmade soap makes an excellent gift for friends and family, especially when wrapped beautifully!
Ingredients
To make your homemade beeswax soap, you’ll need:
- 1 cup of beeswax pellets (approximately 5 oz)
- 1 cup of coconut oil (8 oz)
- 1 cup of olive oil (8 oz)
- 1/2 cup of shea butter (4 oz)
- 1 tablespoon of essential oil (optional, for fragrance) – e.g., lavender or peppermint
- Colorants (optional) – natural colorants like turmeric (for yellow) or activated charcoal (for black)
Equipment
Here’s a list of the equipment you’ll need:
- Double boiler or a microwave-safe bowl for melting the oils
- Soap mold (silicone molds work best)
- Stirring utensil (a spoon or spatula)
- Thermometer (optional, but helpful for checking temperature)
- Measuring cups and spoons
- Safety goggles and gloves (to protect your skin and eyes)
Step-by-Step Instructions
Follow these easy steps to make your beeswax soap:
Prepare Your Workspace: Start by cleaning your area and laying out all your ingredients and equipment. Put on your safety goggles and gloves to protect yourself while handling the materials.
Melt the Beeswax: In a double boiler, add the beeswax pellets and gently heat until melted. Stir occasionally to ensure it doesn’t burn. If using a microwave, melt in 30-second intervals, stirring in between until fully melted.
Add Oils: Once the beeswax is melted, add the coconut oil, olive oil, and shea butter to the pot. Stir well until all the oils are combined and melted.
Check Temperature: If you have a thermometer, check to ensure the mixture is around 140°F (60°C). This temperature is ideal for adding essential oils without degrading their quality.
Add Fragrance and Color: If you’re using essential oils or colorants, now is the time to add them. Stir well to combine.
Pour into Molds: Carefully pour the melted soap mixture into your soap molds. Be cautious as the mixture will be hot. Leave some space at the top for potential expansion.
Cool Down: Allow the soap to cool and harden at room temperature for 24 hours. If you’re in a hurry, you can place the molds in the fridge for a quicker cooling process, but don’t freeze them.
Unmold: Once hardened, gently remove the soap from the molds. If it’s difficult to remove, let it sit for a bit longer.
Cure the Soap: While it’s safe to use immediately, letting the soap cure for an additional 24-48 hours in a cool, dry place can improve its hardness.
Tips for Success
- Measure Accurately: Accurate measurements are crucial in soap-making. Use a kitchen scale if possible.
- Choose Quality Ingredients: Opt for high-quality oils and beeswax to ensure your soap is effective and gentle on the skin.
- Experiment with Scents: Feel free to mix different essential oils for a unique scent blend that suits you.
Common Mistakes to Avoid
- Not Melting Ingredients Properly: Ensure all ingredients are completely melted and well combined before pouring into molds.
- Skipping Safety Gear: Always wear goggles and gloves to protect yourself from hot oils and irritants.
- Rushing the Cooling Process: Allow the soap to cool and harden fully in its mold for the best results.
Variations and Customization Ideas
- Add Exfoliants: Incorporate natural exfoliants like oatmeal or ground coffee for a gentle scrub.
- Color: Use natural colorants, such as spirulina powder or beet powder, for a variety of soap hues.
- Herbs and Botanicals: Dried lavender or chamomile can make lovely additions for texture and a subtle scent.
Storage and Shelf Life
Store your homemade beeswax soap in a cool, dry place away from direct sunlight. When stored properly, the soap should last for up to 1 year. To maintain its quality, keep it in an airtight container if you’re not using it immediately.
Safety Tips
- Handle Hot Materials Carefully: Be cautious when melting ingredients, as hot oils can cause burns.
- Ventilate the Area: Always work in a well-ventilated area, especially when using essential oils.
- Keep Away from Children: Store all soap-making materials out of reach of children and pets.
Frequently Asked Questions
1. Can I use different oils instead of coconut or olive oil?
Yes! You can substitute these oils with others, such as sweet almond oil or avocado oil, as long as they are skin-safe.
2. Is this soap safe for sensitive skin?
Yes, this soap is made with natural ingredients, making it gentle for most skin types. However, always do a patch test first.
3. How do I prevent my soap from turning brown?
Keep your soap out of direct sunlight and store it in an airtight container. Additionally, adding titanium dioxide can help maintain the color.
4. Can I use wax blocks instead of pellets?
Yes, but wax blocks may take longer to melt. Make sure to chop them into small pieces for quicker melting.
5. How do I customize the scent of the soap?
Experiment with different essential oils—start with a few drops and adjust to find your desired scent strength.
Conclusion
Making homemade, DIY beeswax soap is not only fun but also a fantastic way to create something nourishing for your skin. With the right ingredients and a bit of practice, you can enjoy soap that smells great and feels wonderful. Whether you’re treating yourself or crafting thoughtful gifts for loved ones, this beeswax soap recipe is sure to impress. So gather your supplies, follow the steps above, and start your soapy adventure today! Happy crafting!