
Pumpkin Coffee Soap: A Delightful DIY
There’s something incredibly soothing about the rich blend of pumpkin and coffee! This delightful combination not only makes for a warm, inviting scent perfect for fall, but the benefits of using pumpkin and coffee in soap are truly year-round. Whether you’re a seasoned soap maker or just starting your DIY journey, crafting your own Pumpkin Coffee Soap is a rewarding project that you can easily achieve at home.
Why You Will Love This Recipe
Creating Pumpkin Coffee Soap offers multiple advantages. First, the natural ingredients can nourish your skin, as both pumpkin and coffee have beneficial properties. Pumpkin is rich in vitamins A, C, and E, providing moisture and antioxidant benefits, while coffee grounds can offer gentle exfoliation and stimulate circulation. Plus, the aroma of coffee combined with the warmth of pumpkin spices is not just appealing; it creates a cozy atmosphere!
Ingredients
To make your Pumpkin Coffee Soap, you’ll need the following ingredients:
For the Soap Base:
- 1 pound of melt-and-pour soap base (goat milk or shea butter are excellent choices)
- 1/4 cup of pure pumpkin puree (canned or fresh)
- 2 tablespoons of coffee grounds (finely ground)
- 1 teaspoon of pumpkin pie spice (optional, for a more pronounced scent)
- 2 teaspoons of fragrance oil (coffee or pumpkin spice scent recommended; ensure it’s soap-safe)
For Color (Optional):
- A few drops of orange soap colorant (if desired)
Equipment
Before starting your soap-making adventure, gather the following equipment:
- Microwave-safe bowl or double boiling pot
- Soap mold (silicone molds work great for easy removal)
- A mixing spoon or stick blender
- Measuring spoons and cups
- Gloves and safety goggles (if needed)
- A clean, flat surface for working
Step-by-Step Instructions
Prepare Your Workspace: Ensure your workspace is clean, and cover any surfaces to catch spills. Gather your equipment and ingredients to have them within reach.
Melt the Soap Base: Cut the melt-and-pour soap base into small cubes (about 1-inch pieces) for even melting. Place the cubes in a microwave-safe bowl, and microwave in 30-second intervals, stirring in between until fully melted. Alternatively, use a double boiler for a gentler melting process.
Mix in the Pumpkin and Coffee: Once the soap base is fully melted, remove it from the heat. Using a mixing spoon or stick blender, add the pumpkin puree, coffee grounds, and optional pumpkin pie spice to the melted soap. Stir until fully combined and smooth.
Add Fragrance and Color: If using, add the fragrance oil and a few drops of orange soap colorant to the mixture. Mix thoroughly to distribute the fragrance and color evenly.
Pour into Molds: Carefully pour the soap mixture into your soap molds, filling them to the desired level. If bubbles form on the surface, you can gently spritz with rubbing alcohol to eliminate them.
Let It Set: Allow the soap to cool and harden for 1-2 hours at room temperature. If you’re in a hurry, placing them in the refrigerator can speed up the process.
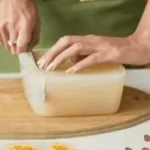
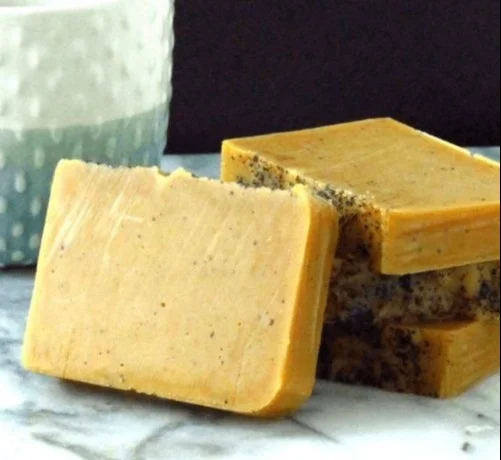
Unmold and Cut: Once completely set, pop the soaps out of the molds. If you used a loaf mold, cut into individual bars using a sharp knife.
Tips for Success
- Use Fresh Ingredients: If using homemade pumpkin puree, ensure it’s not too watery, or it could affect the soap’s consistency.
- Stir Gently: Avoid vigorous stirring after adding fragrance to prevent excessive bubbles from forming in the soap.
- Experiment with Add-Ins: Try adding honey, oats, or essential oils to customize your soap further.
Common Mistakes to Avoid
- Overheating the Soap Base: Microwaving for too long can cause the soap base to scorch. Always microwave in short intervals.
- Not Mixing Enough: Ensure that all ingredients are properly mixed to avoid clumps of pumpkin or coffee grounds.
- Skipping the Safety Gear: Although melt-and-pour is safer than cold-process soap making with lye, always protect your eyes and hands if you’re sensitive.
Variations and Customization Ideas
- Add Essential Oils: Consider adding a few drops of cinnamon or nutmeg essential oil for enhanced fragrance.
- Color Variants: Use different colors by incorporating natural colorants like turmeric or cocoa powder to give your soap a unique appearance.
- Hemp or Coconut Oil: Substitute a portion of the soap base with natural oils for added moisturizing properties.
Storage and Shelf Life
Store your finished Pumpkin Coffee Soap in a cool, dry place, away from direct sunlight. Wrap them individually in plastic wrap to keep moisture out and to maintain freshness. Properly stored, your soap can last for up to 6 months.
Safety Tips
- Always work in a well-ventilated area.
- If you have sensitive skin, consider doing a patch test to ensure no adverse reactions before using any new ingredients.
Frequently Asked Questions
1. Can I use fresh pumpkin instead of canned?
Yes, but ensure it’s thoroughly cooked and pureed to avoid adding extra moisture to your soap.
2. Will coffee grounds scratch my skin?
Finely ground coffee is generally gentle enough for exfoliation. However, if you have sensitive skin, you might want to reduce the amount or skip it entirely.
3. How can I make my soap last longer?
Store it in a dry area, and keep it out of direct water when not in use to extend its lifespan.
4. Can I use a cold-process method instead of melt-and-pour?
While this recipe is designed for melt-and-pour, cold process can also be used. Just keep in mind that you’ll need to handle lye carefully and calculate your lye and water amounts correctly.
5. Is this recipe suitable for gifting?
Absolutely! Homemade soap makes a wonderful, personal gift. Just be sure to package it nicely for presentation.
Conclusion
Crafting your own Pumpkin Coffee Soap is an enjoyable and fulfilling project that brings a touch of autumn into your daily routine all year round. With its beneficial properties and delightful aroma, this DIY soap is sure to become a favorite, whether for personal use or as a thoughtful gift. So gather your ingredients and equipment today, and start creating your very own batch of Pumpkin Coffee Soap! With the simple steps outlined above, you’ll find that making homemade soap is not only manageable but incredibly fun. Enjoy the process, and happy soap making!