
The Joy of Homemade Soap: A Beginner’s Guide to DIY Soap Making
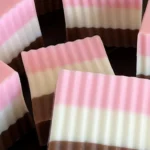
Making homemade soap is a delightful and rewarding project that not only allows you to customize your own scents and ingredients but also results in lovely gifts for family and friends. Whether you’re drawn to the artistic aspect of creating beautiful bars of soap or the practicality of crafting something useful, this guide will help you master the art of soap-making with ease.
Why You Will Love This Recipe
Homemade soap is not just a crafting activity; it’s a way to pamper yourself and your loved ones with natural ingredients. You’ll enjoy:
- The ability to choose your own scents with essential oils.
- Customization options for skin types and preferences.
- A sense of accomplishment from creating something beautiful.
- The satisfaction of giving a handmade gift that everyone will appreciate.
Ingredients
This recipe will focus on the cold process method of soap-making, which involves using lye (sodium hydroxide). Always be careful when handling lye, and make sure to work in a well-ventilated area.
- Olive Oil: 400g (for moisture)
- Coconut Oil: 300g (for lather)
- Palm Oil: 300g (for hardness)
- Lye (Sodium Hydroxide): 125g
- Distilled Water: 300g (for dissolving lye)
- Essential Oils: 30g (your choice, e.g., lavender, peppermint)
- Optional Add-ins: Oatmeal, dried herbs, or colorants for customization.
Equipment
Before starting, gather the following tools and materials:
- Scale (for precise measurements)
- Mixing bowls (stainless steel or heat-resistant glass)
- Safety goggles and gloves (for lye handling)
- Stick blender
- Soap mold (silicone molds work well)
- Thermometer
- Measuring spoons
- Spatula
- A well-ventilated area
Step-by-Step Instructions
Here’s your DIY soap recipe broken down into easy-to-follow steps:
1. Prepare Your Workspace
- Make sure your workspace is clean and free of disruptions. Wear gloves and safety goggles, as lye can cause burns.
2. Measure Ingredients Accurately
- Weigh your oils and lye separately. Ensure the scale is calibrated for accuracy.
3. Mix the Lye Solution
- In a heat-resistant bowl, slowly add the lye to distilled water (never the other way around), and stir gently until dissolved. This mixture will heat up and emit fumes, so do this in a ventilated area. Let it cool to around 100°F (38°C).
4. Heat Your Oils
- In a separate bowl, combine the oils and gently heat until they are around 100°F (38°C) as well. Then, take them off the heat.
5. Combine Lye with Oils
- Once both the lye solution and oils are roughly the same temperature, slowly pour the lye solution into the oils. Blend with a stick blender until you reach "trace," which means the mixture thickens to a pudding-like consistency.
6. Add Fragrance and Optional Add-ins
- Stir in your essential oils and any optional ingredients like oatmeal or colors, mixing thoroughly.
7. Pour into Molds
- Carefully pour the soap mixture into the molds. Tap gently to release any air bubbles.
8. Cover and Insulate
- Cover the molds with a towel or blanket to maintain warmth during the saponification process, which typically lasts 24-48 hours.
9. Unmold and Cut
- After 1-2 days, once the soap hardens sufficiently, remove it from the mold and cut it into bars with a sharp knife.
10. Cure Your Soap
- Place the bars on a drying rack in a cool, dry location and let them cure for 4-6 weeks to ensure the lye is completely neutralized and the soap is safe to use.
Tips for Success
- Always respect lye’s hazardous nature. Keep it away from children and pets.
- Be patient and allow the soap to cure fully before using it to ensure quality.
- Remember to mix oils properly to ensure smooth texture.
Common Mistakes to Avoid
- Not Wearing Protective Gear: Always wear gloves and goggles when handling lye.
- Incorrect Measurements: Be accurate with your measurements to avoid uneven saponification.
- Skipping Cure Time: Don’t rush to use the soap before it has cured adequately.
Variations and Customization Ideas
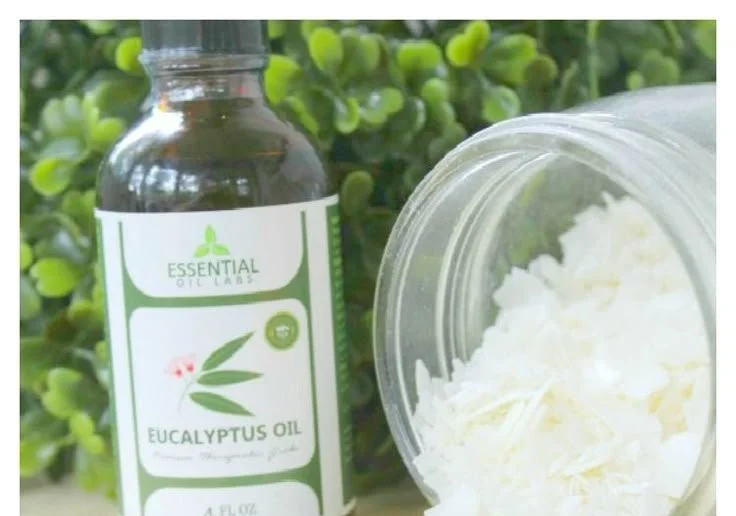
- Scents: Experiment with different essential oils like eucalyptus, tea tree, or citrus blends for varying aromas.
- Additives: Consider incorporating natural exfoliants like coffee grounds, poppy seeds, or dried flowers.
- Colorants: Use natural sources like turmeric for yellow, spirulina for green, or clays for different hues.
Storage and Shelf Life
Store your soap in a cool, dry place away from direct sunlight. Properly made and cured soap can last for about 1-2 years. Keep it in a well-ventilated area, and avoid plastic wrapping, which can lead to moisture retention and spoilage.
Safety Tips
- Always add lye to water, never the reverse.
- Wear gloves and goggles, and work in a ventilated area when mixing lye.
- Keep the workspace clear of any children or pets during the process.
Frequently Asked Questions
Q1: Can I use essential oils in place of fragrance oils?
A: Yes, essential oils are a great natural alternative to synthetic fragrance oils. Just be aware that some essential oils can accelerate trace or affect lathering.
Q2: What if my soap doesn’t harden?
A: If your soap remains soft after a few days, it may not have gone through the saponification process correctly. This could be due to incorrect lye/oil ratios; check your measurements.
Q3: How can I salvage a failed batch?
A: If the soap batter is too thick, you can add a bit of extra oil and blend it again. If it’s a complete failure, sometimes it’s best to use it as a laundry soap!
Q4: Can I add food coloring to my soap?
A: Yes, but do so sparingly. Some food colorings can react negatively with lye, so make sure to check for soap-safe options.
Q5: How should I store the finished soap?
A: Let the soap harden and cure completely before storage. Then, keep it in a cool, dry place wrapped in paper or in a cardboard box.
Q6: How do I know when my soap has cured enough?
A: Soap is ready to use when it no longer feels slippery or tacky and has a firm texture.
Conclusion
Homemade soap crafting is an enriching adventure that invites creativity and care. The cold process method allows a wonderful range of customization, ensuring that your soap is as unique as you are. By following this guide, you can create beautiful, aromatic soaps that not only enhance your skin but make for fantastic handmade gifts. So gather your ingredients and equipment, and dive into the world of DIY soap-making—your skin will thank you! Happy crafting!