
How To Make a Butter Candle for Sourdough Bread
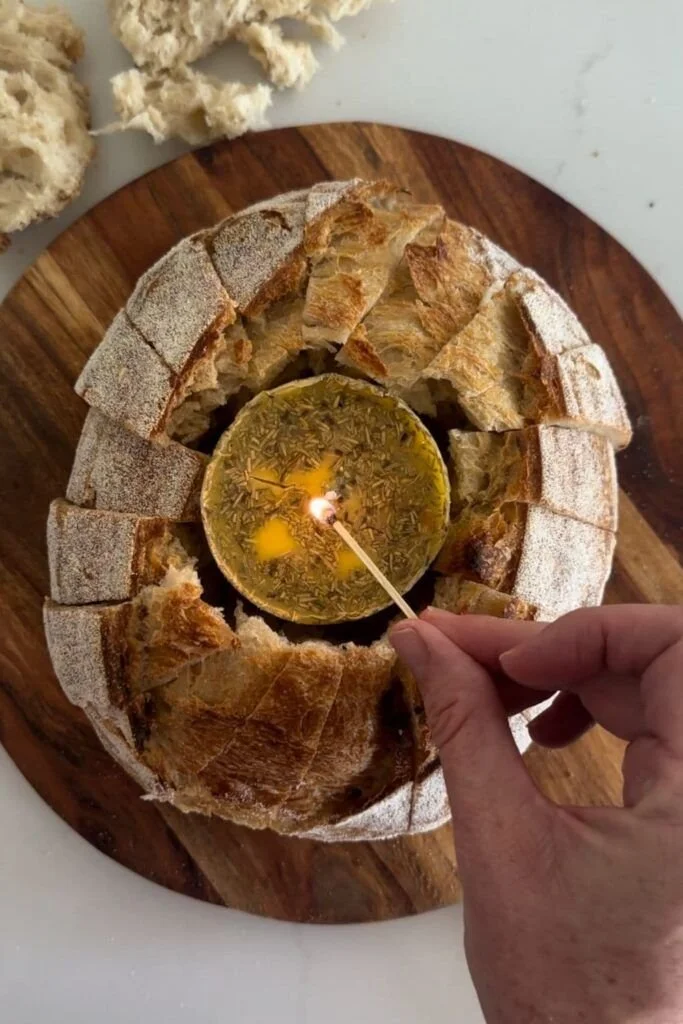
Making a butter candle is a delightful and simple DIY project that serves a special purpose—enhancing your sourdough bread experience! Imagine lighting a deliciously scented candle made from butter base, adding a distinct and warming aroma to your baking space. This article will guide you through the process of creating your very own butter candle, perfect for setting a cozy atmosphere while you bake. So, roll up your sleeves, and let’s get started!
Why You Will Love This Recipe
Creating a butter candle is not only a fun DIY activity but also a unique way to infuse your kitchen with the rich, comforting scent of butter. This candle is perfect for those who appreciate homemade gifts or want to add a personal touch to their cooking space. Plus, it’s a great conversation starter!
Ingredients
To make your butter candle, you will need the following ingredients:
- 1 cup (226g) of unsalted butter – The main ingredient that gives the candle its delightful scent.
- 2 tablespoons (30ml) of essential oils (optional) – For added fragrance. Try vanilla, cinnamon, or rosemary.
- 1 wick – A cotton candle wick that’s appropriate for the diameter of your container.
- Container – A heat-proof jar or silicone mold (muffin tin works too).
Equipment
Gather the following tools for this project:
- Double boiler or microwave-safe bowl
- Mixing spoon
- Thermometer (optional but recommended)
- Scissors
- Safety gloves (optional)
- A flat surface protected with newspaper or an old cloth
Step-by-Step Instructions
Preparation Time
- Prep Time: 10 minutes
- Making Time: 30 minutes
- Yield: 1 butter candle
Instructions
Melt the Butter:
- Using a double boiler, melt 1 cup of unsalted butter over medium heat, ensuring it does not boil. If using a microwave, heat in 30-second intervals, stirring in between, until fully melted.
Add Essential Oils (If Desired):
- Once the butter is melted, remove it from the heat. If you’re adding essential oils, mix in 2 tablespoons of your chosen scents. Stir well to combine.
Prepare Your Container:
- Place the wick in the center of your heat-proof container or mold. You can secure it with a bit of melted butter or tape at the bottom.
Pour the Butter:
- Carefully pour the melted butter mixture into your container, leaving a small gap at the top for expansion as it cools.
Secure the Wick:
- Use a stabilization method (like crossing two chopsticks over the top of the container) to keep the wick centered while the butter solidifies.
Cool Down:
- Allow the butter to cool and solidify at room temperature for about 30 minutes. If you’re in a hurry, you can place it in the refrigerator for about 15 minutes, but ensure the candle isn’t too cold to solidify completely.
Trim the Wick:
- Once the candle has set fully, trim the wick to about 1/4 inch above the surface of the candle.
Tips for Success
- Choose Quality Ingredients: Use high-quality butter for a better scent and clean burn.
- Wick Sizing: Make sure your wick is appropriate for the size of your container to ensure an even burn.
- Test Fragrances: Test a small amount of essential oil before adding to the entire batch, making sure the scent isn’t too overpowering.
Common Mistakes to Avoid
- Overheating Butter: Ensure the butter doesn’t burn. Keep the heat low and stir regularly.
- Improper Wick Placement: Make sure your wick is straight and centered to avoid uneven burning.
- Skipping Cooling Time: Be patient and let the candle cool completely. Rushing this step can affect the structure.
Variations and Customization Ideas
- Different Oils: Experiment with other essential oils or fragrances. Citrus oils can provide an uplifting vibe, while spices add warmth.
- Coloring the Candle: Add natural coloring agents, such as beet juice for pink or turmeric for yellow, to personalize your candle visually.
- Layering Scents: Pour different scented layers by waiting for each to set partially before adding another layer.
Storage and Shelf Life
Store your butter candle in a cool, dry place away from direct sunlight. When properly stored, your candle can last for about 1-2 months. If you notice any changes in smell or color, it’s best to discard it.
Safety Tips
- Use Caution with Hot Ingredients: Always handle melted butter with care. A spill can cause burns.
- Burning: Use your butter candle in a safe, heat-resistant container away from flammable materials, and never leave it unattended while lit.
Frequently Asked Questions
Can I use salted butter instead of unsalted?
Yes, you can, but unsalted butter is generally preferred for a cleaner scent, especially when adding essential oils.
What kind of wick should I use?
Use a cotton wick that matches your container’s diameter. For larger containers, consider using a wood wick for a rustic feel.
How do I make my candle last longer?
Trim the wick regularly to reduce soot and ensure a cleaner burn. Additionally, keep your candle away from drafts while burning.
Can I add colors to my candle?
Absolutely! You can use natural colorants like beet juice or even candle dye to add a personalized touch.
How do I prevent the wick from sinking?
Make sure the wick is secured in place and consider using a crossbar (like chopsticks) to hold the wick steady while the candle sets.
Can I reuse the container?
Yes! Just clean it thoroughly after use and ensure it’s free of any residue before making a new candle.
Conclusion
Making a butter candle for your sourdough bread is a rewarding and straightforward DIY project that can elevate your baking experience. Not only does it provide a wonderful aroma, but it also serves as a unique decoration for your kitchen. So gather your ingredients and equipment, follow the steps, and relish the joy of candle-making. Happy crafting and baking!