
Have You Ever Tried Hand Dipping Candles with Beeswax?
Have you ever considered the joy and satisfaction of crafting something beautiful and functional with your own hands? Hand dipping candles with beeswax is an age-old craft that not only allows you to express your creativity but also results in stunning, homemade candles that emit a warm glow and a subtle, natural honey scent. If you’re looking for a delightful DIY project to fill your afternoon, you’ve come to the right place. Let’s dive into the delightful world of candle making!
Why You Will Love This Recipe
Beeswax candles have a wonderful reputation for their clean-burning properties and natural aromatic qualities. They produce negative ions that help purify the air, making them a favorite for many households. Hand dipping candles is an enjoyable, meditative process that provides a sense of accomplishment. Plus, they make exceptional handmade gifts!
Benefits of Hand Dipped Beeswax Candles
- Natural Ingredients: Using pure beeswax means you are avoiding potentially harmful additives found in many commercial candles.
- Customizable: You can create a variety of colors and sizes.
- Sustainable: Beeswax is a renewable resource, making it a fantastic eco-friendly choice.
- Fragrant: Beeswax has a subtle, naturally sweet scent that enhances the ambiance of any space.
Ingredients
For this project, you’ll need the following ingredients:
- Beeswax: About 2 lbs. of pure beeswax pellets or blocks.
- Coloring (optional): Special candle dyes meant specifically for beeswax, if desired.
- Essential Oils (optional): For added fragrance, ensure they are safe for candle use.
Equipment
Gather these supplies before starting:
- Double Boiler: For melting the beeswax safely.
- Dipping Vat: A container (like a deep pot) to dip your candle wicks.
- Wicks: Pre-waxed, cotton wicks, available at craft stores.
- Thermometer: To monitor the wax temperature.
- Crafting Tool: A wooden stick for manipulating the wick.
- Heatproof Surface: To rest candles while they cool.
- Old Towels or Cloths: To protect your work surface.
Step-by-Step Instructions
Preparation Time: 30 minutes
Making Time: 1-2 hours (depends on how many candles you want to dip)
Approximate Yield: 10-15 candles (depending on size)
Prepare Your Workspace: Cover your work surface with newspaper or an old tablecloth. Ensure you have a clear area to allow the candles to cool.
Melt the Beeswax:
- Fill the bottom part of your double boiler with water and bring to a gentle simmer.
- Place the beeswax in the upper part of the double boiler, stirring occasionally with a wooden spoon until melted. The ideal melting temperature is around 145°F to 160°F.
Prepare the Wicks:
- Cut your wicks to the desired length, leaving extra for dipping. Attach them to the bottom of your dipping vat with a small amount of melted beeswax or a secured weight.
Begin Dipping:
- Dip the wick into the melted beeswax slowly, holding it vertically. Ensure it’s completely submerged for a few seconds before pulling it out.
- Let the excess wax drip off for a moment before repeating the process.
Build Up Wax Layers:
- Continue dipping your candles in the melted beeswax, allowing each layer to cool slightly (several seconds) before dipping again. Aim for 10-15 dips for optimal candle thickness.
Cool Your Candles:
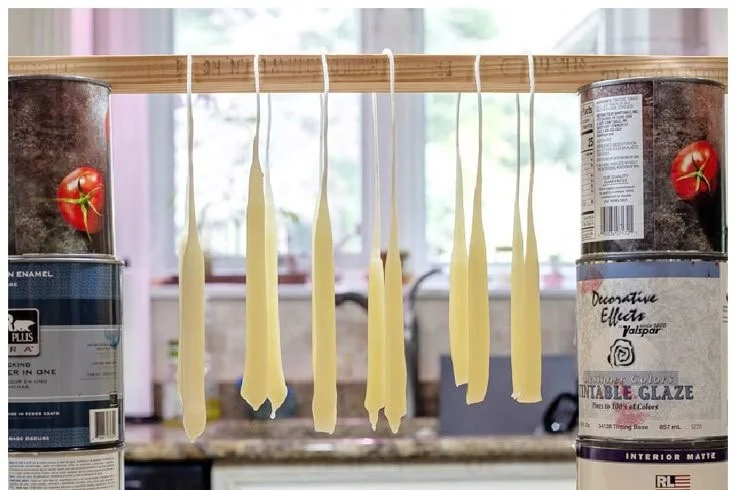
- Once you are happy with the thickness, hang your candles or lay them on a heatproof surface to cool entirely.
Trim the Wicks:
- After the candles are fully cooled, trim the wicks to about ¼ inch above the surface of the candle.
Tips for Success
- Temperature Control: Always keep an eye on your wax temperature; overheating can alter the quality of the wax.
- Practice Patience: Allow ample time for each layer to cool slightly to prevent drips or uneven candle dimensions.
- Work in a Well-Ventilated Area: For your safety, ensure you are in a space with good air circulation, especially if you are adding scents.
Common Mistakes to Avoid
- Dipping Too Quickly: Rushing can result in dripping candle layers or uneven shapes.
- Overheating Wax: Too high temperatures can make the wax undesirable for dipping.
- Skipping Wick Preparation: Ensure your wicks are secured and positioned properly before you start dipping.
Variations and Customization Ideas
- Colors: Experiment by adding small shavings of candle dye when melting your beeswax for colorful candles.
- Fragrances: Blend a few drops of essential oils into your melted beeswax before you start dipping.
- Size Variations: Change the length of your wicks for different candle heights or shapes.
Storage and Shelf Life
Store your beeswax candles in a cool, dry place away from direct sunlight. Properly stored, these candles can last for several years. Be mindful of temperature fluctuations as they can cause the wax to warp or lose shape.
Safety Tips
- Work on a stable surface, keeping all tools away from open flames or heat sources.
- Ensure your work area is clear of flammable materials.
- Always supervise the melting process to prevent overheating and potential fire hazards.
Frequently Asked Questions
Can I use other types of wax for dipping candles?
While beeswax is ideal for dipping candles due to its superior properties, you can use paraffin wax or soy wax. However, the melting and dipping process will differ.
How do I ensure my candles burn evenly?
Wick size is crucial. If your candles are burning too quickly or not at all, test different wick sizes to find the optimal one for your candle diameter.
What do I do if my candles droop or lose shape?
If this occurs, ensure that your candles cool evenly and are not exposed to excessive heat after dipping.
Can I repurpose old candles for dipping?
Yes! You can melt down old candles and mix them with fresh beeswax for new creations, although it’s best to use pure beeswax for the best burning quality.
How can I control the scent of my candles?
The more essential oils you add, the stronger the scent. Start with a small amount and increase gradually until you achieve your desired fragrance.
Conclusion
Creating homemade beeswax candles by hand dipping is a rewarding project that combines craftsmanship and creativity. As you try your hand at this delightful DIY activity, you’ll not only enjoy the process but also delight in the warm ambiance and natural charm every candle brings to your home. So gather your materials, invite a friend or family member, and let the candle-making magic begin! Happy dipping!