
Relaxation Candle Making: Create Your Own Scented Candles for Ultimate Relaxation
Making your own scented relaxation candles is not only a fun DIY project but also a fantastic way to create a calming atmosphere in your home. With natural aromatherapy benefits, a homemade candle can enhance your bubble baths or help you unwind after a long day. This guide is perfect for beginners, giving you step-by-step instructions, essential oil blends, and packaging tips for a truly personal touch. Let’s dive into the world of candle making!
Why You Will Love This Recipe
Creating your own candles allows you to customize scent profiles, control the ingredients, and create unique decorations. Not only are these pretty hand-poured candles a wonderful addition to your home, but they also make thoughtful, personalized gifts. Plus, candle making is a rewarding craft that can even serve as a budding candle-making business!
Ingredients
For making these lovely relaxation candles, you will need:
- Wax: 2 pounds of soy wax flakes (natural, sustainable, and easy to work with)
- Essential Oils: Choose from the following blends (25-30 ml total):
- Lavender and Chamomile: Calming and soothing
- Eucalyptus and Mint: Refreshing and uplifting
- Cedarwood and Sandalwood: Grounding and warm
- Ylang Ylang and Bergamot: Sweet and floral
- Jasmine and Clary Sage: Romantic and soothing
- Lemon and Rosemary: Invigorating and bright
- Grapefruit and Frankincense: Energizing and comforting
- Vanilla and Cinnamon: Warm and cozy
- Wicks: Cotton or wood wicks suitable for soy wax
- Containers: Heat-resistant containers (glass jars or metal tins)
Equipment
To make your candles, you will need the following equipment:
- Double boiler or microwave-safe bowl
- Stirring utensil (silicone or wooden)
- Thermometer
- Scale (for measuring wax and fragrance)
- Wick holder (or popsicle stick for securing wicks)
- Safety gear (gloves and goggles)
Step-by-Step Instructions
Preparation
- Prepare Your Work Area: Clean and organize your workspace. Ensure that it is well-ventilated and protected from any spills.
Melting the Wax
Measure the Wax: Weigh out 2 pounds of soy wax flakes. This will yield approximately 4 medium-sized candles.
Melt the Wax: If using a double boiler, fill the bottom pot with water and bring it to a gentle boil. Place the wax in the top pot and stir occasionally until fully melted. If using a microwave, heat the wax in short bursts, stirring in between until completely melted.
Monitor Temperature: Use a thermometer to ensure the wax reaches about 170°F (77°C) for optimal fragrance attachment.
Adding Fragrance
- Add Essential Oils: Once the wax is melted, remove it from heat. Add your chosen essential oil blend (around 25-30 ml). Stir thoroughly for even distribution.
Preparing the Containers
- Secure the Wicks: Attach your wick to the bottom of the container using a bit of melted wax or a wick sticker. Hold the wick upright with a wick holder or a popsicle stick laid across the top of the container.
Pouring the Wax
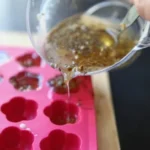
Pour the Wax: Carefully pour the scented wax into your prepared containers, leaving about 1/2 inch of space from the top.
Cool and Set: Allow the candles to cool undisturbed for several hours or overnight.
Finishing Touches
- Trim the Wick: Once the candles are completely set, trim the wick to about 1/4 inch above the wax surface.
Tips for Success
Choose Quality Ingredients: High-quality soy wax and essential oils make a big difference in the final scent and performance.
Temperature Matters: Adding fragrance at the right temperature is crucial for scent retention.
Experiment with Blends: Don’t hesitate to mix different essential oils to find your perfect scent!
Common Mistakes to Avoid
Overheating the Wax: Avoid exceeding the temperature of 185°F (85°C) as it may degrade the wax or fragrance.
Pouring Too Quickly: Pour the wax slowly and steadily to prevent air bubbles.
Not Securing Wicks: Ensure wicks are properly secured before pouring wax to prevent them from sinking.
Variations and Customization Ideas
Coloring Your Candles: You can add colorants specifically meant for candles to create visually appealing designs.
Using Different Types of Wicks: Experiment with wooden wicks for a unique crackling ambiance.
Layered Scents: Pour wax in layers to create candles with multiple fragrances.
Storage and Shelf Life
Once your candles are made, store them in a cool, dry place away from direct sunlight. Properly stored, your homemade candles can last up to a year, maintaining their fragrance and appearance.
Safety Tips
Always practice candle safety: Burn candles in a safe environment, away from flammable materials, and don’t leave them unattended.
Use protective gear: While working with hot wax, gloves and goggles can protect against potential splashes.
Frequently Asked Questions
1. Can I use other types of wax?
Yes! While soy wax is preferred for beginners due to its ease of use and eco-friendly properties, you can also explore paraffin, beeswax, or palm wax.
2. How do I clean up spills?
If wax spills occur, allow it to harden, then scrape off the excess with a butter knife. For residue, use warm soapy water to clean surfaces.
3. What containers work best for homemade candles?
Glass jars, tins, and ceramic containers that are heat-resistant work wonderfully for candle pouring.
4. How can I enhance the scent throw of my candles?
Increase the amount of essential oils used, but ensure it does not exceed the wax’s capacity for fragrance retention.
Conclusion
Making your own scented relaxation candles is a delightful and rewarding project that not only beautifies your home but also enhances your wellness routine. With the natural aromatherapy benefits of essential oils and the warmth of candlelight, your DIY candles will serve as perfect companions for relaxation. So gather your materials, get creative with scents, and start crafting your calming oasis today! Happy candle making!