
Making homemade soap or candles is not only a fun and rewarding hobby but also an opportunity to create personalized gifts that can brighten anyone’s day. Whether you want to enjoy a nice bath or light up your home with delightful scents, this guide will walk you through the steps, ingredients, and tips you need to get started. So grab your supplies and let’s dive into the wonderful world of DIY soap and candle making!
Why You Will Love This Recipe
Creating your own soap or candles allows for complete customization. You can choose scents, colors, and even textures that suit your personal taste. Plus, both homemade soap and candles make thoughtful, handmade gifts. By the end of this article, you’ll be ready to create your very own beautiful, aromatic treasures!
Ingredients
For Homemade Soap (Melt and Pour Method)
- Melt and Pour Soap Base: 1 lb (such as glycerin or shea butter)
- Fragrance Oil: 1 oz (essential oils can be a natural alternative)
- Soap Colorant: as desired (optional)
- Additives: such as oatmeal, dried flowers, or herbs (optional)
For Homemade Candles
- Wax: 1 lb (soy wax, beeswax, or paraffin wax)
- Fragrance Oil: 1 oz (for scented candles)
- Wicks: select suitable wicks based on your container size
- Containers/Molds: jars or molds that can withstand heat
Equipment
For Soap Making
- Microwave-safe bowl or double boiler
- Stirring utensil (silicone spatula or spoon)
- Soap molds (silicone molds work best)
- Scale (for precise measurements)
- Rubbing alcohol in a spray bottle (to eliminate bubbles)
For Candle Making
- Double boiler or wax melter
- Thermometer (to check wax temperature)
- Wick holder (or chopsticks)
- Pouring pitcher
- Scale (for accurate measurements)
Step-by-Step Instructions
Homemade Soap (Melt and Pour)
- Prepare Your Space: Ensure a clean, dry workspace. Gather all your supplies.
- Melt the Soap Base: Cut the soap base into cubes and place in a microwave-safe bowl. Heat in short bursts (20-30 seconds), stirring in between until completely melted.
- Add Color and Fragrance: Once melted, add your chosen colorant and fragrance oil, stirring well to combine.
- Incorporate Additives: If using any additives, gently mix them into the soap base.
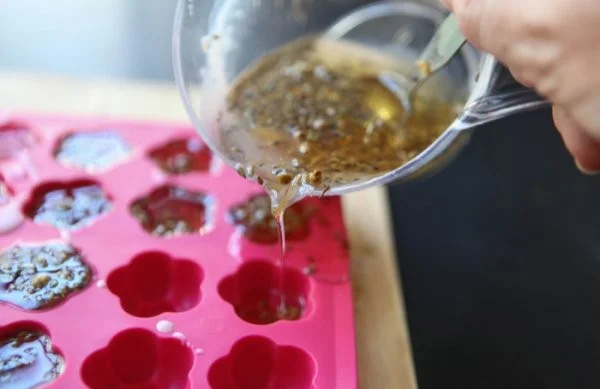
- Pour Your Soap: Carefully pour the mixture into your molds.
- Spritz for Bubbles: Lightly spray the top with rubbing alcohol to remove any bubbles.
- Cure: Allow the soap to cool completely (approximately 1-2 hours) before removing from molds.
- Store: Wrap soap in plastic wrap and store in a cool, dry place.
Homemade Candles
- Prepare Your Workspace: Clear and protect your workspace with newspaper or a tarp.
- Measure Your Wax: Use a scale to measure the appropriate amount of wax for your container.
- Melt the Wax: Place the wax in a double boiler over low heat. Use the thermometer to monitor the temperature; it should reach around 170-180°F (77-82°C).
- Add Fragrance: Remove from heat and add your fragrance oil. Stir well to combine.
- Attach the Wick: Secure the wick at the bottom of your container with a glue dot and use a wick holder to keep it centered while pouring.
- Pour the Wax: Let the wax cool to about 150°F (65°C) before pouring into containers. Fill to your desired level.
- Let It Cool: Allow the candles to cool completely. This can take a few hours.
- Trim the Wick: Once cool, trim the wick to about ¼ inch above the wax.
- Store Properly: Store candles in a cool, dry place, away from direct sunlight.
Tips for Success
- Use Quality Ingredients: Quality wax and oils will greatly impact scent throw and burn quality in candles, while soap base quality will reflect in the final soap feel and appearance.
- Temperature Matters: For both soap and candles, sticking to recommended temperatures can lead to better results.
- Experiment: Don’t hesitate to try different scents, colors, and additives to see what you prefer!
Common Mistakes to Avoid
- Not Measuring Accurately: Always use a scale when measuring ingredients for accuracy.
- Overheating Ingredients: Always monitor the heat to prevent burning or degrading the wax or soap base.
- Using Unsuitable Containers: Always use heat-safe containers for candles to prevent cracking or melting.
Variations and Customization Ideas
- Soap: Experiment with different essential oils, color combinations, or natural additives like honey, coconut milk, or activated charcoal for unique effects.
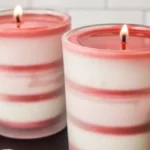
- Candles: Try different wax blends such as paraffin mixed with soy or beeswax. You can also layer different colors or create swirls for visual interest.
Storage and Shelf Life
- Soap: Homemade soap can last up to a year when stored properly wrapped in a cool, dry place.
- Candles: Store candles in a cool, dark place. If light affects fragrance, keep them covered. They can last for several years if stored properly.
Safety Tips
- Soap Making: If using lye in soap (cold or hot process), always wear gloves, goggles, and a mask. Work in a well-ventilated area.
- Candle Making: Be careful when pouring hot wax. Use protective gloves if necessary and keep flammable materials away from your workspace.
Frequently Asked Questions
Q1: Can I use any container for candles?
A1: No, ensure the container is heat-resistant. Avoid using plastic as it may melt.
Q2: How do I know how much fragrance to use in candles?
A2: A typical guideline is to use up to 1 oz of fragrance oil per pound of wax for optimal scent throw.
Q3: What if my soap didn’t harden?
A3: It may need more time to cool. If you suspect an issue, try checking your measurements or the soap base itself.
Q4: How can I make my candle burn longer?
A4: Use a thicker wick and ensure your candle has enough wax to burn longer. Trim the wick regularly during use.
Q5: What if my soap has bubbles?
A5: Spritz with rubbing alcohol after pouring to eliminate surface bubbles.
Q6: Can I adjust the colors in my soap or candles?
A6: Yes! You can blend different colorants for custom shades.
Conclusion
Now that you’ve learned how to make your own homemade soap and candles, it’s time to get creative! These projects are fun, rewarding, and perfect for creating meaningful gifts. Don’t forget to keep experimenting with different scents and styles, and most importantly, have fun! Embrace your DIY journey, and you might just find a new favorite pastime. Happy crafting!