
Discover Original Projects to Make Your Own Handmade Candles Using Granulated Wax
Creating your own handmade candles is not just a rewarding DIY project; it’s a fantastic way to fill your space with inviting scents and warm ambiance. In this guide, we will explore how to make beautiful candles using granulated wax, while also emphasizing recycling old containers. Whether you’re a beginner or have some crafting experience, this article will equip you with everything you need to know to dive into the art of candle-making.
Why You Will Love This Recipe
Handmade candles can transform your home, making it cozier while adding a personal touch. Beyond aesthetics, making candles is eco-friendly, especially when you repurpose old containers. By doing so, you’re not only saving money but also conserving resources—what’s not to love? Plus, you get to customize scents, colors, and styles, tailoring the candle to fit your taste perfectly.
Ingredients
- Granulated Wax: 1 pound (choose paraffin, soy, or beeswax based on your preference)
- Fragrance Oil: 1–2 ounces (if you enjoy scented candles; adjust to your preference)
- Dye (optional): 1-2 drops of candle dye or crayon shavings for color
- Wicks: Pre-tabbed wicks (matching the size of your container)
- Container: Old jars, teacups, or any heatproof holder (make sure they can withstand heat)
Equipment
- Double boiler or microwave-safe container
- Thermometer (preferably a digital one)
- Mixing spoon or chopstick
- Pouring pitcher or a heat-resistant container with a spout
- Wick holder (can be a pencil or chopstick)
Step-by-Step Instructions
Prepare Your Workspace
- Ensure your work area is clean and have all your supplies ready. Use a newspaper to protect surfaces from spills.
Melt the Wax
- If using a double boiler, fill the bottom pot with water and place the granulated wax in the upper pot. Heat on medium, stirring occasionally until melted.
- If using a microwave, place the wax in a microwave-safe container and heat in 30-second bursts, stirring between intervals until completely melted.
Add Color and Fragrance
- Once melted, check the temperature. For most waxes, it should be around 170-180°F. If you’re adding color, add it now and stir until fully dissolved.
- Add your fragrance oil (1–2 ounces) and stir for about 2-3 minutes to evenly disperse the scent.
Attach the Wick
- Secure the wick to the bottom of your container using a little wax or a wick sticker. If you don’t have either, use a bit of melted wax.
Pour the Wax
- Carefully pour the melted wax into your prepared container, leaving about half an inch from the top.
- Use a wick holder to keep the wick centered as the wax solidifies.
Cool and Set
- Allow the candle to cool completely at room temperature. This can take several hours. Avoid placing it in the fridge, as this can cause cracking.
Trim the Wick
- Once fully cooled, trim the wick to about 1/4 inch.
Tips for Success
- Temperature Control: Checking wax temperature is crucial. If wax is too hot when pouring, it may burn off the fragrance.
- Scent Strength: Start with a small amount of fragrance oil and increase if desired, as some waxes absorb scents better than others.
- Testing Your Wick: Test different wick sizes in small batches to find the perfect wick for your container size.
Common Mistakes to Avoid
- Overheating the Wax: This can cause the wax to break down and affect the scent throw.
- Not Securing the Wick: If the wick is not held in place when pouring, it can become off-center, ruining the candle’s aesthetic and burning quality.
- Pouring Too Fast: A gentle, steady pour helps prevent air bubbles from forming in the candle.
Variations and Customization Ideas
- Scent Combinations: Experiment with mixing different essential oils and fragrance oils to create unique scents.
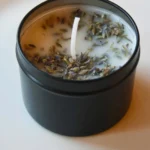
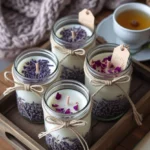
- Adding Visuals: Consider adding dried flowers, herbs, or glitter to your wax for decorative flair.
- Layered Candles: Pouring different colored wax in layers can create a beautiful effect.
Storage and Shelf Life
Store your handmade candles in a cool, dark place away from direct sunlight. Properly stored, candles can last for several months. Ensure containers are sealed tightly to preserve scent.
Safety Tips
- Always work in a well-ventilated area to avoid fumes.
- Use heat-resistant containers to prevent breaking.
- Keep a fire extinguisher nearby and never leave melting wax unattended.
Frequently Asked Questions
1. Can I use any container for my candles?
Yes, as long as the container is heatproof and can withstand the heat of the melted wax, you can use various containers, including jars and old teacups.
2. How do I choose the right wick size?
The wick size depends on the diameter of your container. It’s best to look at wick size charts provided by suppliers or do a burn test to determine the best fit.
3. Why is my candle burning unevenly?
This can happen if the wick is too small for the container or if it hasn’t been centered properly. Conduct a wick test beforehand to avoid this issue.
4. What should I do if my candle has cracks?
Cracks occur when the wax cools too quickly. To fix this, you can use a heat gun to slightly melt the surface and smooth it out.
Conclusion
Making your own handmade candles is a fulfilling and fun project that not only beautifies your space but also allows you to express your creativity. By following the steps in this guide, you can easily craft delightful candles using granulated wax and recycled containers. Don’t hesitate to experiment with scents and colors to make your candles truly unique. So gather your supplies and get started on your candle-making journey today! Happy crafting!