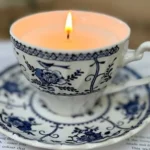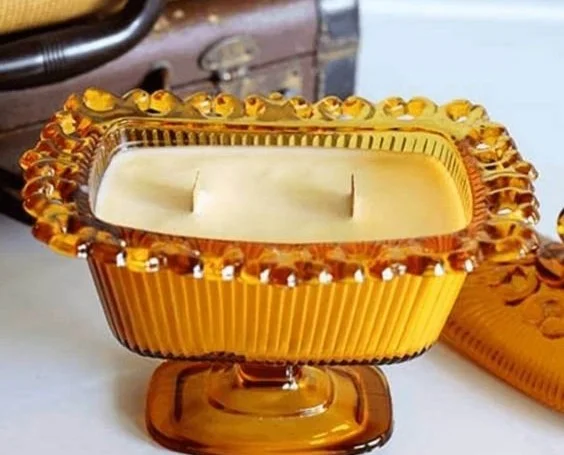

Making a DIY candle at home has never been easier. Whether you’re looking to create a relaxing atmosphere, add a personal touch to your decor, or simply enjoy a fun craft project, making homemade candles provides the perfect opportunity. Plus, it’s a mindful process that allows you to use your creativity and choose scents that resonate with you. In this guide, I will walk you through the steps of crafting your very own DIY candles. Together, we’ll cover materials, techniques, safety protocols, and tips for success.
Why You Will Love This Recipe
Making your own candles can be a rewarding experience. Here are a few reasons to love this DIY project:
- Customization: You can choose your own colors, fragrances, and container designs to suit your style.
- Cost-Effective: Candle-making is a budget-friendly way to create beautiful gifts or home decor.
- Mindfulness: The act of pouring and mixing ingredients can be therapeutic, offering a moment of calm in your day.
- Sustainable Choices: Use natural waxes and eco-friendly materials to make environmentally conscious choices.
Ingredients
To get started with your DIY candle project, you will need the following ingredients:
- Wax: 1 pound (16 oz) of soy wax or beeswax (soy is an easy option for beginners)
- Fragrance oil (optional): 1 oz (you can adjust based on how strong you want the scent)
- Dye (optional): Candle dye chips or liquid dye
- Wick: Appropriate size for your container (check manufacturer’s sizing guide)
Equipment
Gather the following equipment for your candle-making project:
- Double boiler or a microwave-safe container
- Heat-resistant thermometer
- Pouring pitcher or spouted container
- Candle containers (glass jars or metal tins)
- Wick holders or chopsticks
- Stirring utensil (e.g., wooden spoon)
Step-by-Step Instructions
Follow these steps to create your DIY candle:
1. Prepare Your Containers
- Clean and dry the containers you’ll be using.
- Secure the wick in the center of the container using adhesive or a wick holder.
2. Measure Your Wax
- Weigh 1 pound of wax using a kitchen scale. This will yield approximately two 8-ounce candles.
3. Melt the Wax
- Double Boiler Method: Fill the bottom pot with water and bring it to a simmer. Place the wax in the top pot, stirring occasionally until melted.
- Microwave Method: Place the wax in a microwave-safe container and heat in 30-second intervals, stirring in between until fully melted.
4. Temperature Check
- Use a heat-resistant thermometer to check the temperature. Ideally, the wax should be between 170°F to 180°F (77°C to 82°C) for adding fragrance.
5. Add Fragrance and Dye
- Once the wax is melted, remove it from heat and add your fragrance oil (1 oz) and dye if desired. Stir gently to combine.
6. Pour the Wax
- Allow the wax to cool slightly (about 150°F/65°C) before pouring it into your prepared containers. Slowly pour the wax into the center of the container to avoid air bubbles.
7. Secure the Wick
- As the wax begins to set, use a wick holder or chopstick to keep the wick centered.
8. Allow to Cool
- Leave the candle to cool at room temperature until solid. Avoid moving it during this period.
9. Trim the Wick
- Once fully cooled, trim the wick to about ¼ inch above the surface of the wax.
Tips for Success
- Temperature Monitoring: Accurate temperature control is essential for proper bonding between wax and fragrance.
- Testing Wick Size: If making multiple candles, test different wick sizes and materials (wooden or cotton) to find what works best for your specific wax type and container size.
Common Mistakes to Avoid
- Overheating Wax: This can degrade the quality and scent throw of your candles. Always monitor your temperatures carefully.
- Using Too Much Fragrance: Stick to the recommended amounts; excess fragrance can interfere with proper candle performance.
- Not Allowing to Cure: Allow your candles to cure for at least 48 hours before burning to achieve optimal scent throw.
Variations and Customization Ideas
- Scents: Experiment with essential oils or combine fragrances for unique scent blends.
- Layers: Pour different colors or scents in layers to create visually stunning multi-layer candles.
- Additives: Incorporate botanicals, glitter, or other embellishments for added texture and visual appeal.
Storage and Shelf Life
Store your finished candles in a cool, dry place away from direct sunlight. Properly stored, homemade candles can last up to a year before degradation in scent and quality begins.
Safety Tips
- Always work in a well-ventilated area.
- Never leave melting wax unattended.
- Keep flammable materials away from the work area.
- Use heat-resistant gloves if necessary to protect your hands.
Frequently Asked Questions
1. Can I use other types of wax besides soy?
Absolutely! Beeswax, palm wax, and paraffin wax are excellent alternatives. Each offers unique qualities and scents.
2. How do I fix a candle with sinkholes?
You can fill sinkholes with additional melted wax to create a smooth finish.
3. What should I do if my candle won’t light?
Check if the wick is trimmed properly (¼ inch is ideal) and ensure it wasn’t extinguished while pouring.
4. How can I make my candles smell stronger?
Increase the amount of fragrance oil slightly or allow your candle to cure longer before burning.
Conclusion
There you have it! Making DIY candles at home is a fun, creative process that anyone can learn. With a few simple ingredients and equipment, you can craft beautiful, personalized candles that light up your space and make wonderful gifts. So gather your materials, follow the steps, and embark on this rewarding DIY journey. Don’t forget to enjoy the process and experiment with your own unique touch! Happy candle making!