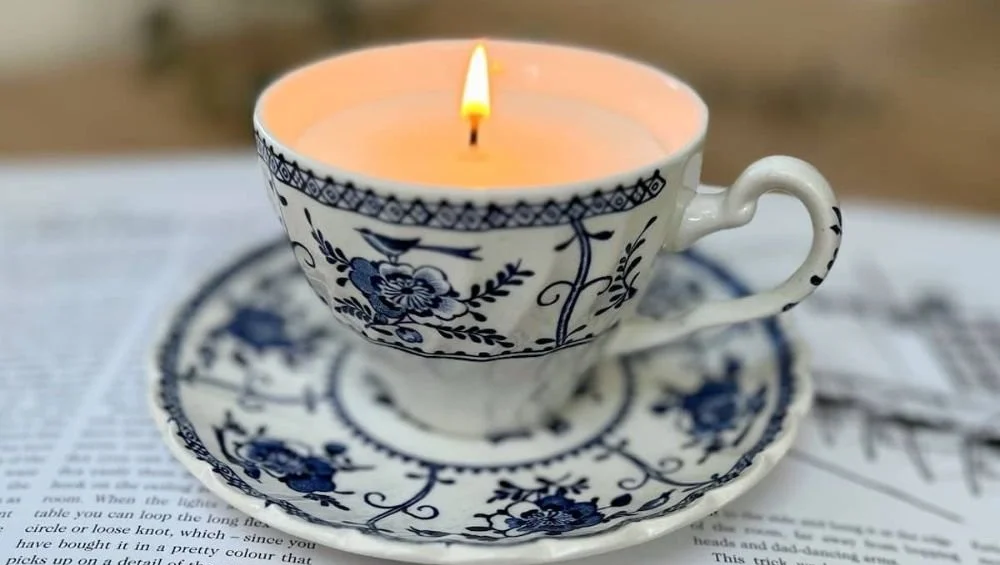

Create Your Own Unique Soy Candles: A Fun DIY Guide
Why settle for ordinary candles when you can create something truly unique? Making your own soy candles using cute upcycled containers is a delightful and creative hobby. Not only does this project allow you to personalize your home or gift to someone special, but it’s also an eco-friendly and budget-friendly way to express your artistic side. In this article, you’ll find everything you need to know about crafting your own candles, from materials to methods, ensuring your first attempt will be a success.
Why You Will Love This DIY Candle Recipe
Creating your own soy candles provides a sense of accomplishment, and they make fantastic gifts for any occasion. By using upcycled containers, not only do you reduce waste, but you also add a personal touch to each candle. This hands-on project allows you to incorporate your favorite scents and colors, as well as control the materials you use. Plus, candle-making can serve as a meditative practice—light your candles after a session to enjoy the soothing ambiance.
Ingredients
To make your own soy candles, gather the following ingredients:
- Soy wax flakes: 1 pound (approximately 4 cups)
- Fragrance oil (optional): 1 ounce (or up to 10% of wax weight for stronger scent)
- Dye (optional): use candle dye or crayon shavings for color
- Wicks: select based on the size of your container (e.g., 6-inch cotton wicks for small containers)
Equipment
You’ll need the following tools and equipment:
- Double boiler or a makeshift one (a heatproof bowl over a pot of simmering water)
- Stirring utensil: a wooden spoon or spatula
- Thermometer: about 200°F (93°C)
- Pouring pitcher: for easier pouring into containers
- Containers: glass jars, teacups, or any upcycled item that can hold wax
- Wick stickers or hot glue to secure wicks to the bottom of the container
Step-by-Step Instructions
Preparation Time: 15 minutes
Making Time: 1 hour
Yield: Approximately 4 candles (depending on container size)
Prep Your Containers: Clean and dry your upcycled containers. Secure the wick at the bottom of each container using a wick sticker or hot glue.
Melt the Wax: Fill your double boiler with water and bring it to a simmer. Place soy wax flakes in the top portion. Stir occasionally until fully melted (about 10-15 minutes).
Add Fragrance and Dye: Once the wax is melted, let it cool briefly, then add fragrance oil (if desired) and dye. The ideal pouring temperature for soy wax is between 130°F-150°F (54°C-65°C). Stir well to ensure the fragrance is evenly distributed.
Pour the Wax: Carefully pour the wax into your prepared containers, leaving about half an inch from the top. Ensure the wick stays centered as you pour.
Cool and Set: Allow candles to cool completely at room temperature. This may take a few hours. Avoid moving them during this time.
Trim the Wick: Once the candles are set, trim the wick to about 1/4 inch above the wax surface.
Cure Your Candles: For best results, let your candles cure for at least 48 hours before burning to allow the fragrance to fully develop.
Tips for Success
- Temperature Control: Keep an eye on the temperature of the wax throughout the process. Pour at the right temp, or you risk improper curing or cracking.
- Experiment with Scents: Different fragrance oils can react differently in wax. Don’t be afraid to try combinations or adjust amounts for lighter/darker scents.
- Test Wicks: If you’re unsure about wick size, test a few different options to determine which one burns most effectively for your container size.
Common Mistakes to Avoid
- Skipping Wick Testing: Always ensure your wick is the right size for your container to avoid poor burning quality.
- Pouring Temperature: Pouring the wax too hot can create sinkholes; pouring too cool may lead to uneven surfaces.
- Using Low-Quality Waxes: Using inferior wax may lead to poor scent throw and high soot production. Always opt for high-quality soy wax.
Variations and Customization Ideas
- Layering Colors: Pour different colors in layers to create a striped effect. Allow each layer to set before adding the next.
- Add-ins: Consider adding dried flowers or herbs to your candles for an added decorative touch.
- Different Scents: Experiment with essential oils to create unique aromatherapy blends.
Storage and Shelf Life
Store your finished candles in a cool, dry place away from direct sunlight. Properly sealed and stored, soy candles can last up to a year without degradation.
Safety Tips
- Handle with Care: Always use heat-resistant containers, and keep your workspace free of flammable materials.
- Ventilation: Ensure your workspace is well-ventilated during the melting process to dissolve any wax fumes.
- Keep Children and Pets Away: Always supervise if kids or pets are around while crafting.
Frequently Asked Questions
Can I use paraffin wax instead of soy wax?
- While paraffin wax is an option, soy wax is more eco-friendly and burns cleaner.
What if my wick keeps sinking into the wax?
- Ensure that you secure it well before pouring wax and allow enough time for the wax to set around it as it cools.
Are there food-safe containers for candles?
- While many food-safe containers can be used, it’s best to dedicate containers specifically for candle-making to avoid contamination.
Can I re-use old candles?
- Yes! Melt down old candle stubs and mix them with fresh wax, but be cautious as scent and dye may vary.
How can I make my candles smell stronger?
- You can increase the amount of fragrance oil added within safe limits (typically up to 10% of the wax weight) for a stronger scent.
Conclusion
Creating your own soy candles using upcycled containers is an enjoyable and fulfilling project that allows for creativity and personalization. Plus, your homemade candles make heartfelt gifts, adding warmth to any space. Whether you opt for calming lavender or invigorating citrus, the process is straightforward and deeply satisfying. So gather your materials, follow these instructions, and let your creativity shine!