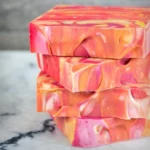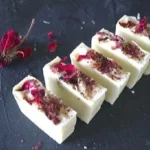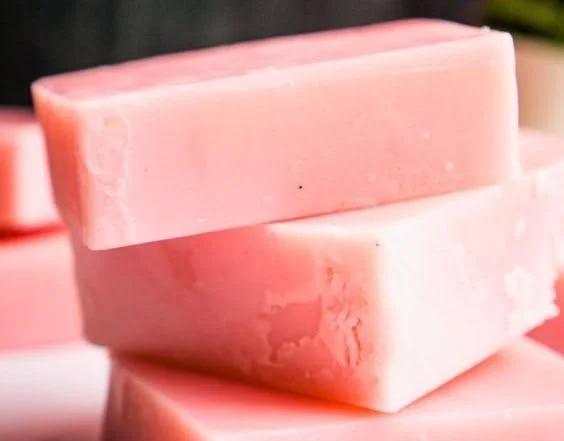

The Best Cold Process Soap Recipe You’ve Been Searching For
Imagine this: You’ve just carved out a precious moment for yourself, standing in your cozy kitchen, the aroma of essential oils wafting through the air. It’s not just another day of hustling and bustling; it’s time for a little self-care. You’re about to embark on a creative adventure of making your very own cold process soap. If this sounds like a dream come true, you’re not alone!
We all want to pamper ourselves, and what better way to do it than with a lush, beautifully crafted bar of soap? Here’s the truth: the quest for the perfect soap can feel never-ending. You might have tried countless recipes only to find bars that crumble or lack the luxurious lather you crave. Sound familiar? Don’t worry, I’ve been there too. Thankfully, I stumbled upon a brilliant cold process soap recipe that delivers the perfect balance between hardness and a rich, fluffy lather.
Let’s dive into this step-by-step guide, where I’ll share the details of this game-changing recipe, along with tips to enhance your soap-making experience. Get ready to unleash your inner artisan!
Why Choose Cold Process Soap?
Cold process soap-making is a wonderfully satisfying hobby that allows you to customize ingredients to suit your skin’s needs. Unlike commercial soap, which often contains harsh chemicals (hello, skin irritations!), cold process soap retains the natural glycerin produced during saponification. This makes your soap not just a cleansing agent but also a nourishing treat for your skin.
Here are just a few reasons why you might fall in love with cold process soap:
- Customizable Ingredients: Tailor your soap to fit your skin type. Need extra nourishment? Add avocado oil. Looking for a refreshing scent? Essential oils are your friends here.
- Eco-Friendly: When you make your own soap, you’re reducing waste from packaging and choosing natural ingredients.
- Creative Expression: Every batch can be a masterpiece! From colors to molds, the sky’s the limit.
The Ultimate Cold Process Soap Recipe
Let’s not delay the inevitable! Here’s the master recipe I swear by. Not only does it create a hard, long-lasting bar, but it also produces big, fluffy bubbles. Trust me; your daily shower will thank you!
Ingredients List
- Olive Oil: 16 oz (provides moisturizing properties)
- Coconut Oil: 16 oz (adds hardness and great lather)
- Palm Oil: 16 oz (helps create a stable bar)
- Lye (Sodium Hydroxide): 7.3 oz (necessary for the saponification process)
- Distilled Water: 16 oz (to mix with lye)
- Essential Oils: Your choice (for fragrance)
- Colorants: Optional (e.g., mica powders for adding a pop of color)
Equipment You’ll Need
- Safety Gear: Goggles and gloves (more on safety later)
- Digital Scale: For precise measurements
- Stick Blender: For mixing (trust me; you’ll love how efficient this is)
- Soap Molds: Silicone or wooden molds work great
- Thermometer: To check your temperatures
- Measuring Cups and Spoons: For accurate ingredient ratios
Step-by-Step Instructions
Prepare Your Workspace: Clear off a sturdy surface and lay down some newspaper or a plastic sheet. Soap-making can get messy, and you’ll want everything neat and tidy.
Measure Ingredients: Wearing your safety gear, carefully weigh out the lye and water. Always add the lye to the water (never the other way around) in a well-ventilated area.
Mix Lye and Water: Stir the lye mixture until it’s dissolved. The solution will heat up and give off fumes initially, so be cautious. Set it aside to cool to around 100-110°F.
Melt Oils: In a large pot, combine the coconut oil and palm oil. Use gentle heat until they’re completely melted. Once melted, add olive oil and mix well.
Combine Oils and Lye: When both mixtures are between 100-110°F, slowly pour the lye solution into the oils. Using the stick blender, blend until you reach trace (it should look like thin pudding).
Add Color and Fragrance: If you’re using colorants or essential oils, gently fold them in. You’ll love the burst of scents!
Pour into Molds: Carefully pour the soap batter into molds, smoothing the top if necessary. You can add extra swirls or layers if you’re feeling artistic!
Cure the Soap: Cover the molds with a towel and let them sit for 24-48 hours. Once firm, unmold your creations and cut them into bars.
Let the Bars Cure: Place your bars on a drying rack in a cool, dry area and let them cure for 4-6 weeks. This is the magic time where they’ll harden and become ready for use.
Common Mistakes to Avoid
While soap-making can be incredibly rewarding, it’s not without its pitfalls. Here are a few common mistakes and how to avoid them:
- Lye Safety Neglect: Always prioritize your safety. Wear goggles and gloves, and do this in a well-ventilated area.
- Rushing the Process: Precision is key, so take your time when measuring and mixing. Rushing can lead to unsuccessful soap.
- Temperature Ignorance: Using oils and lye mixtures that are too hot or too cool can affect trace time and final bar quality.
- Ignoring Cure Time: Patience is a virtue. Don’t use your bars immediately. They need time to cure for optimal results.
Quick Beauty Tips for Using Your Soap
Your homemade soap isn’t just for cleansing; it can enhance your entire skincare routine! Here are a few tips to maximize your experience:
- Exfoliate: Use a loofah or washcloth with your soap to gently exfoliate your skin while you bathe.
- Foaming Fun: Break your bar into smaller chunks to create more lather and enhance your bathing experience.
- Gift Idea: Wrap your handmade soaps in pretty packaging for thoughtful gifts. Friends and family will love them!
FAQs About Cold Process Soap
Can I use any type of oil?
Absolutely, but be mindful that different oils have different saponification values. Some oils yield softer bars, while others yield harder bars. Olive oil, for instance, is great for moisture, while coconut oil boosts lather.
How do I know if my soap is ready to use?
A well-cured soap will be firm and dry. You’ll also notice reduced odor and a lighter color. Trust your instincts!
What if my soap doesn’t harden?
If your soap remains soft, it might be due to too much superfatting or not letting it cure long enough. In such cases, keep it in a cool, dry area and give it more time.
Can I add natural colorants?
Definitely! Natural colorants like turmeric, paprika, or spirulina powder can give your soap beautiful hues. Just be aware they can affect lather quality.
Bonus Self-Care Ideas
After making your DIY soap, why not indulge in a complete self-care routine? Here are a few ideas to elevate your experience:
- Facial Mask: Whip up a quick homemade mask using honey and oatmeal for a nourishing treat.
- Soothing Bath Soak: Mix Epsom salt with essentials oils for a relaxing soak.
- Mindfulness Moment: Take a few minutes to meditate, focusing on your breathing while soaking in the goodness of your creations.
Best Routine for Busy Women
I know life can get hectic, especially for us busy women. So, if you’re asking how to fit self-care into your routine, here’s a simple plan:
- Make Soap Over the Weekend: Schedule a block of time on the weekend to make your soap. It’s a great way to unwind.
- Incorporate in Daily Rituals: Use your handmade soap during your shower or bath. Create a small ritual around it—light a candle, listen to your favorite music, and enjoy the moment.
- Share and Inspire: Invite a few friends over for a soap-making party. You’ll create lasting memories and beautiful bars!
Final Thoughts
If you’re ready to step into the delightful world of soap-making, this cold process soap recipe is your ticket! I hope you feel as inspired as I do every time I craft a new batch. It really is a wonderful journey of blending ingredients, scents, and creativity.
You might be wondering if you’ll really love making soap, but trust me, the satisfaction of crafting something so personal and nourishing for your skin is unmatched. So roll up those sleeves, put on your favorite playlist, and start creating bars that will not just cleanse, but also uplift your spirit.
Here’s to self-care, creativity, and reevaluating what the perfect bar of soap really means! Happy soap-making, beauty lovers!