
Boost Your Style with Simple Blue and Yellow Nail Designs
Get ready to elevate your nail game this summer with bright and playful blue and yellow nail designs! Perfect for sunny days and casual outings, this color combination captures the essence of freshness and fun. Whether you’re off to the beach or a picnic in the park, a chic manicure can take your look to the next level. Let’s explore some stunning designs and the inspiration you need for your next nail session!
Why You Will Love This Look
The blue and yellow color palette is not only vibrant but also incredibly versatile. Blue evokes feelings of tranquility and calmness, while yellow radiates warmth and cheerfulness. Together, they create an uplifting vibe that is perfect for sunny weather. This style is easy to personalize with patterns like polka dots, stripes, or floral designs, making it suitable for various occasions.
Nail Design Inspirations
We’ve curated a list of 25 fantastic designs for you to explore! From subtle and elegant to bold and eye-catching, there’s something for every style preference. Here are a few highlights from our collection:
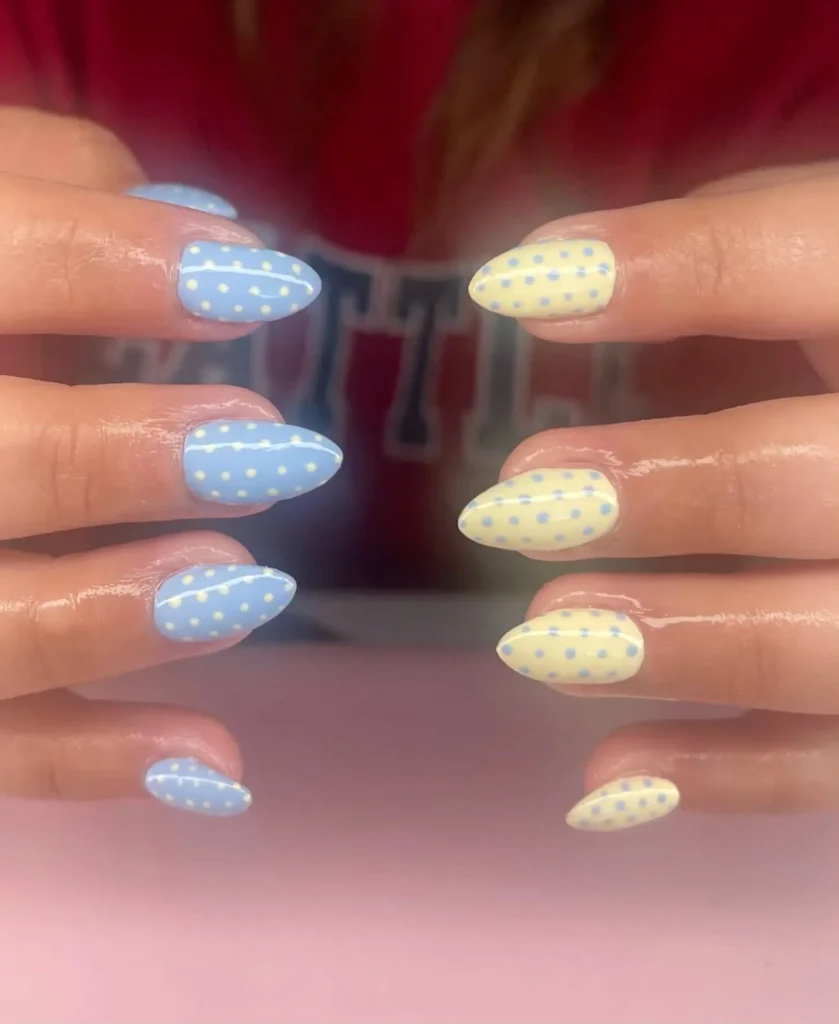
- Polka Dot Madness: Combine a sunny yellow base with blue polka dots for a playful twist.
- Ombre Bliss: Start with a deep blue at your cuticles, fading to a soft sunny yellow at the tips.
- Floral Accents: Paint a blue flower on a yellow background for a lovely, nature-inspired look.
- Stripes and Chevrons: Create alternating stripes of blue and yellow for a trendy geometric design.
Step-by-Step Guide to Achieve Your Nail Look
To help you apply these designs at home, here’s a simple step-by-step guide.
Ingredients
- Blue nail polish
- Yellow nail polish
- Clear topcoat
- Base coat
- Nail art tools (like dotting tools or brushes)
- Nail file and buffer
Equipment
- Small containers (for mixing colors if needed)
- Nail polish remover
- Cotton pads
- UV lamp (if using gel polish)
- Good lighting
Step-by-Step Instructions
Prep Your Nails:
- Start by removing any old polish with nail polish remover.
- Shape your nails with a file and gently buff the surface to create a smooth canvas.
Apply Base Coat:
- Apply a base coat to protect your natural nails and prevent staining.
Choose Your Design:
- Decide on which style you want to try. For example, if you’re going for polka dots, start with a solid yellow base.
Paint Your Base Color:
- Apply two coats of your selected base color, allowing each coat to dry fully.
Add Nail Art:
- If you’re doing polka dots, use a dotting tool dipped in blue polish to make dots on your yellow nails.
- For stripes, use nail tape to create straight lines before painting over them.
Finish with a Topcoat:
- Once all designs are complete and dry, apply a clear topcoat to seal your art and enhance shine.
Clean Up:
- Use a small brush dipped in nail polish remover to clean up any stray polish around the cuticles.
Tips for Success
- Patience is Key: Allow each layer of polish to dry completely to avoid smudging.
- Test First: Practice your nail art techniques on a piece of paper before applying them to your nails.
- Use Good Quality Products: Investing in quality polishes can make a noticeable difference in the final look.
Common Mistakes to Avoid
- Skipping Base Coat: This can lead to staining and a less professional finish.
- Not Allowing Dry Time: Rushing through steps can cause smudging and frustration.
- Overloading the Brush: This can lead to messy applications; it’s better to build layers slowly.
Variations and Customization Ideas
- Experiment with Colors: Try different shades of blue and yellow for a unique look.
- Add Glitter: Use a glitter accent nail to add sparkle and depth to your design.
- Stickers and Gems: Decorate your nails with nail art stickers or gems for an adventurous twist.
Storage and Shelf Life
- Store your nail polishes in a cool, dry place away from direct sunlight to prolong their shelf life.
- Ensure to tighten caps after use to prevent them from drying out.
Safety Tips
- Always ensure good ventilation when working with nail products, especially if you are sensitive to odors.
- Avoid direct contact of nail polish with your skin; use a barrier cream if necessary.
Frequently Asked Questions
1. How long does a typical manicure last?
A well-done manicure can last anywhere from a few days to over a week, depending on how well you take care of it.
2. Can I mix nail polish brands?
Yes, mixing brands is usually fine, but the formula may vary slightly, which can affect drying time and finish.
3. How can I fix smudged polish?
If your polish smudges, you can immediately apply a topcoat to help smooth out the surface, but it’s better to remove and redo that nail for a flawless finish.
4. Can I use regular polish for nail art?
Absolutely! Regular nail polish works well for detailed designs; just ensure you have the right tools for application.
5. What are the best tools for nail art?
Dotting tools, nail brushes, and tape are excellent for achieving various designs, but you can also use household items like bobby pins for dots.
Conclusion
Creating beautiful blue and yellow nail designs is a fun way to express your personal style while enjoying the sunny weather. With simple techniques and the right tools, you can achieve salon-quality results at home. Don’t be afraid to get creative and experiment with different styles that reflect your unique flair. So gather your supplies, follow the steps, and let your nails shine bright this season! Happy painting! 🌞✨