
Day 11: Serving Citrus Vibes with Juicy Nail Art
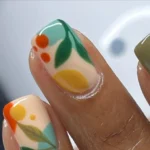
Welcome to Day 11 of our 30-day nail art challenge! Today, we’re diving into a vibrant, refreshing world of citrus-inspired nail designs that are sure to brighten up your manicure game. Think juicy oranges, tangy lemons, and zesty limes. These citrus vibes embody freshness and fun, making them perfect for spring and summer. Let’s explore how to create fresh, bright, and juicy nails that are not only aesthetically pleasing but also incredibly wearable!
Why You Will Love These Nails
There’s something undeniably cheerful about citrus-inspired nail art. It’s playful, colorful, and instantly lifts your mood. Whether you’re heading to brunch with friends or decorating your nails for a festive celebration, citrus nails add that fun touch to your overall look. They’re also perfect for expressing your personality—a little slice of optimism right at your fingertips!
What You Need
To recreate this citrus nail art, you’ll need:
- Base coat
- Bright nail polishes in colors like orange, yellow, and green
- A dotting tool or a fine nail art brush
- Top coat for a glossy finish
- Optional: nail art stencils or stickers featuring fruit designs
- Nail file and buffer
How to Recreate the Look
Choose Your Base: Start with clean, filed nails. Apply a base coat to protect your nails and enhance adhesion.
Select Your Colors: For a classic citrus look, choose a bold orange for the main color and a bright yellow or green for accent designs.
Paint the Base Color: Apply two coats of your chosen orange polish. Make sure to let each coat dry completely.
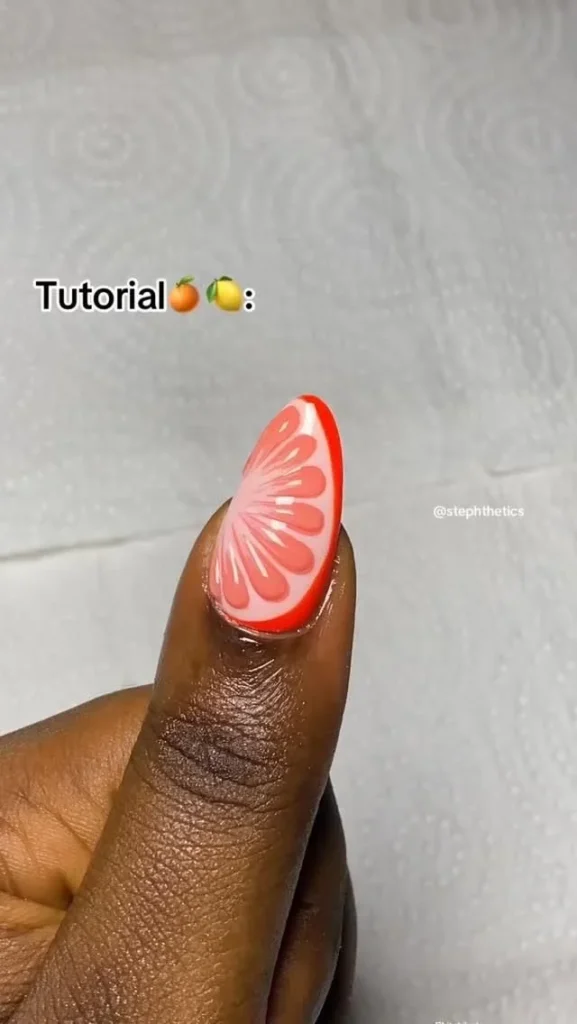
Add Citrus Details: Use a dotting tool or fine brush to create citrus slices. With yellow and green, create half-moons or dots to mimic lemon and lime accents around the orange base.
Add Some Fun: Consider painting one accent nail with a full citrus slice or mixing it up with a combination of orange, lemon, and lime designs.
Finish with Top Coat: Seal your artwork with a glossy top coat to give the nails a fresh finish and enhance durability.
Best Nail Shapes for This Design
This citrus nail art can flourish on various nail shapes, including:
- Almond nails: This soft, elongated shape complements the fun curves of citrus designs.
- Square nails: Perfect for a bold look, square nails can enhance the vibrancy of your citrus colors.
- Stiletto nails: If you’re feeling adventurous, a stiletto shape can make the design even more striking.
Best Nail Length
For this nail art, both short and long nails can work beautifully.
- Short nails: Keep it simple with a single accent design on one or two fingers.
- Long nails: You have the freedom to get creative with multiple designs that wrap around the nail.
Color Combinations
While oranges and yellows are the staples for this design, consider:
- Orange and lime green for a more playful twist.
- Lemon yellow paired with pastel hues for a softer approach.
- Neon colors for a trendy, standout look.
Cute Variations to Try
Citrus Ombre: Blend from orange at the cuticle to yellow or green at the tip for a fun gradient effect.
Fruit Salad Mix: Combine citrus designs with other fruits like watermelon or strawberries for a playful fruit salad look.
Glitter Touch: Add some sparkle with glitter polish on accent nails for an extra touch of fun.
Nails for Different Occasions
Citrus nail art is suitable for numerous occasions:
- Casual Outings: Perfect for day trips, picnics, or simply hanging out with friends.
- Beach Days: These cheerful colors complement summer looks and beachwear.
- Festivals: Bring out your creative side and stand out at music festivals with playful, eye-catching designs.
Seasonal Ideas
Citrus vibes truly shine during spring and summer, but you can also adapt them for fall:
- Add a bit of brown or burnt orange to represent autumnal citrus like blood oranges.
- Use a matte topcoat and earthy colors for a unique twist on the look.
Beginner Tips
If you’re new to nail art, try these simple tips:
- Start Small: Begin with a single accent nail to build your confidence.
- Use Stencils: Consider using nail art stencils for crisp designs without the pressure of freehand painting.
- Practice Makes Perfect: Don’t be discouraged if your first attempt doesn’t turn out as expected. Keep practicing!
How to Make Your Manicure Last Longer
To keep your citrus nail art looking fresh:
- Always use a base coat and top coat to protect your nails and designs.
- Avoid hot water for the first few hours after your manicure as it can lift polish.
- Regularly apply cuticle oil to keep your nails hydrated, preventing chips and breaks.
Frequently Asked Questions
How can I customize my citrus nail art?
You can personalize your design with different shades and by adding other fruit patterns. Consider combining various fruit shapes around the citrus theme to create a unique look.
What if I am not good at nail art?
That’s okay! You can always opt for pre-made nail stickers or decals that feature citrus designs for an effortless look.
Will this design suit short nails?
Absolutely! Citrus designs can be scaled down for short nails and still look fabulous.
Conclusion
Citrus-themed nail art is not only visually stunning but also brings a sense of joy and freshness to any manicure. With bright colors, playful designs, and endless variations, there’s no shortage of inspiration to brighten your day. Whether you decide to take this on as a DIY project or get it done at a salon, these juicy citrus vibes are sure to refresh your nail game. We encourage you to try out this fun style and let your nails reflect the sunshine in your life! 🍊✨