
How to Make Candles: A Complete Beginner’s Guide
Candle making is a delightful and satisfying craft that allows you to create beautiful, aromatic, and personalized candles for your home or as thoughtful gifts. Whether you’re preparing for a cozy night in or celebrating a special occasion, homemade candles can elevate any atmosphere. In this guide, we’ll walk you through the candle-making process, from selecting the right ingredients and equipment to troubleshooting common mistakes.
Why You Will Love This Recipe
Making candles is not just a fun DIY project; it’s a great way to express your creativity. You’ll learn to choose scents that resonate with you, create different colors and shapes, and even design unique containers. Plus, candles make fantastic handmade gifts! They’ll not only warm your home but also warm the hearts of those who receive them.
Ingredients
To make candles, you’ll need a few essential ingredients:
Wax: The most common types are soy wax, paraffin wax, and beeswax. For this tutorial, we will use soy wax for its eco-friendly properties.
- Amount: 1 pound (16 oz) of soy wax will yield about 2 standard 8 oz candles.
Fragrance Oil: This is optional but adds a delightful scent to your candles.
- Amount: 1 oz of fragrance oil per pound of wax is a good starting point.
Dye (optional): If you want colored candles, you can use candle dye or crayon shavings.
- Amount: A small pinch for light color, or more for a deeper color.
Wicks: The size and type depend on your candle diameter. A medium-sized wick works for an 8 oz container.
Equipment
Having the right tools will make your candle-making process smoother:
- Double boiler or a makeshift double boiler (a pot with water and a heat-safe bowl on top)
- Thermometer (candy or liquid)
- Stirring utensil (silicone spatula)
- Measuring cups and spoons
- Candle containers (like glass jars or metal tins)
- Wick holder or a pencil to keep the wick centered
- Scale (for accurately measuring your wax and fragrance)
Step-by-Step Instructions
Preparation Time: 10 minutes
Making Time: 30–45 minutes
Approximate Yield: 2 candles (8 oz each)
Measure the Wax: Use your scale to measure 16 oz of soy wax.
Prepare the Double Boiler: Fill your pot with a couple of inches of water and place it on the stove. Bring the water to a simmer over medium heat.
Melt the Wax: Place the wax in the top of your double boiler (the bowl). Use the thermometer to monitor the temperature. Aim for 170°F to 180°F (77°C to 82°C) for most soy waxes.
Add Color (if using): Once the wax has melted, add your dye and stir thoroughly.
Add Fragrance: At around 180°F, add your fragrance oil. Stir well for about 1-2 minutes to ensure even distribution.
Prepare the Containers: While the wax cools slightly to around 150°F, secure your wick in each container’s center using a dab of melted wax or super glue. A wick holder can help keep it upright.
Pour the Wax: When the wax temperature reaches 150°F, carefully pour it into your prepared containers, leaving a small amount of wax in the pot.
Cool and Set: Allow the candles to cool completely (about 4-6 hours). You may need to reheat and pour the remaining wax if you notice sinkholes forming.
Trim the Wicks: Once the candles are cool, trim the wicks to about ½ inch above the surface.
Cure the Candles: Let them cure for about 48 hours before burning. This helps the scent to develop better.
Tips for Success
- Temperature Control: Always keep an eye on the temperature while melting the wax; overheating can cause it to become brittle.
- Test the Wicks: If you’re unsure of your wick choice, make small “test” candles using different sizes of wicks to see which burns best.
- Ventilation: Ensure your workspace is well-ventilated, especially when working with fragrances.
Common Mistakes to Avoid
- Using the Wrong Wick Size: A wick that’s too small won’t burn effectively, while one that’s too large can create excessive soot.
- Skipping the Cure Time: Not allowing your candles to cure can result in reduced scent throw when burned.
- Pouring Too Hot: Pouring wax at a temperature that’s too high can cause cracking and uneven surfaces.
Variations and Customization Ideas
- Scent Blends: Experiment with blending different fragrance oils for unique scents.
- Color Techniques: Try layering different colors for a striped effect.
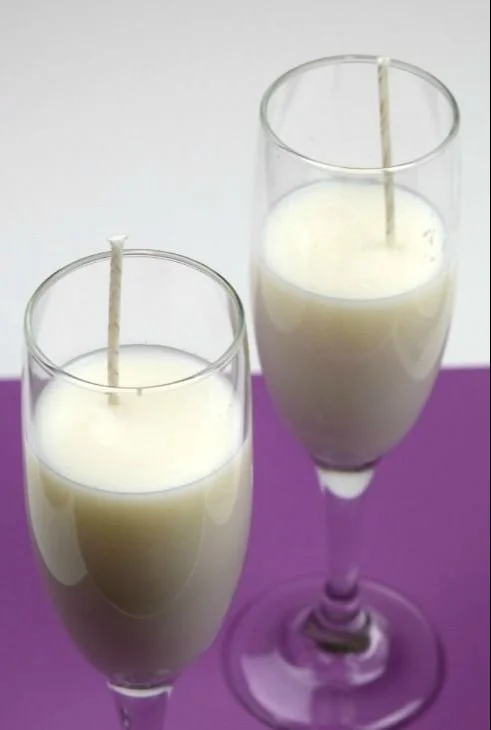
- Container Choices: Use unusual containers like teacups or old jars for a more personalized touch.
Storage and Shelf Life
Store your finished candles in a cool, dry place away from direct sunlight. When stored properly, homemade candles can last up to a year, retaining their scent and quality.
Safety Tips
- Use the Right Equipment: Always use heat-safe containers, and ensure that your work area is safe from flammable materials.
- Handle Hot Materials Carefully: Wax can reach high temperatures and cause burns. Use oven mitts if necessary.
- Monitor Burning Conditions: Never leave burning candles unattended and keep them away from flammable objects.
Frequently Asked Questions
1. How do I know what wick size to use?
- Wick size can depend on the diameter of your container. Check wick sizing charts available from candle suppliers to find the appropriate size based on your wax type and container diameter.
2. Can I use essential oils instead of fragrance oils?
- Yes, you can use essential oils, but be aware that they often have a weaker scent throw compared to synthetic fragrance oils.
3. What happens if my candle has uneven surfaces?
- This can happen if the wax was poured too hot or cooled too quickly. To fix them, you can gently re-melt the top layer with a heat gun or hairdryer for a smooth finish.
4. Do I need to use a double boiler?
- While not mandatory, a double boiler helps prevent overheating and burning the wax, making it safer for beginners.
5. How do I get the best scent throw?
- The best way to maximize scent throw is to use the recommended fragrance load for your wax and ensure proper curing time.
Conclusion
Making your own candles is an enjoyable and rewarding experience that can lead to beautiful results. With simple ingredients and basic equipment, you can create customized scents, colors, and styles. Remember to take your time, enjoy the process, and don’t hesitate to get creative! So gather your materials and start your candle-making adventure—happy crafting!