
Creating a DIY Cinnamon Candle to Fill Your Home with Delicious Scents
Imagine this: you’re cozied up on the couch after a long day, a soft blanket wrapped around you, and an enchanting aroma wafts through the air, instantly making you feel at home. Isn’t it the little things that make a house feel like a sanctuary? Today, I want to share an easy and delightful DIY project that not only helps you unwind but also fills your space with warm, comforting scents. We’re talking about a DIY cinnamon candle. Trust me, it’s easier than you think, and I’m here to guide you every step of the way.
Why Cinnamon Candles Are a Must-Have
Cinnamon is more than just a holiday flavor; it has a unique ability to evoke cozy feelings. Here’s why making cinnamon candles should be high on your self-care list:
Warmth and Comfort: The scent of cinnamon can bring about feelings of warmth and comfort, perfect for creating a snug atmosphere in your home.
Aromatherapy Benefits: Cinnamon oil has properties that can help reduce stress and improve focus. If you’re juggling a million things at once (let’s be honest, who isn’t?), this could be a game-changer.
Affordable and Personal: Making your own candles is not just cost-effective, but it also gives you a chance to add a personal touch with your favorite scents.
Let’s Get Crafty with Candle Making
Before we dive into the steps, let’s talk about some of the materials you’ll need. Don’t worry; most of these can be found at your local craft store or online, so you won’t have to spend hours hunting them down.
What You’ll Need
- Soy wax or beeswax: This is your candle base.
- Cinnamon essential oil: Your star ingredient.
- Candle wicks: Look for cotton or wooden wicks.
- Containers: Mason jars, tea cups, or any small container you adore.
- Double boiler: This helps melt your wax. If you don’t have one, you can use two pots—a larger one filled with water and a smaller one for melting.
- Thermometer: Optional, but useful to ensure the wax reaches the right temperature.
- Optional additives: You can add other essential oils, herbs, or glitter for decoration if you like.
Step-by-Step Guide to Making Your Cinnamon Candle
Now for the fun part! Let’s get started with a step-by-step guide. Don’t worry if you’re new to this whole candle-making scene; I’ve got your back.
Step 1: Prepare Your Workspace
Clear off a counter or table to create a workspace. Candle making can get a little messy, but that’s part of the fun. Lay out all your materials within reach, and if you have any newspaper or a plastic cover, put it down to protect your surface.
Step 2: Measure Your Wax
Depending on how many candles you want to make, measure out the wax. A good rule of thumb is to fill your containers with wax flakes and then double that amount (to account for melting downs).
Step 3: Melt the Wax
Place your wax in the double boiler and let it melt slowly. If you’re using a thermometer, you want the wax to reach about 170°F to 180°F (76°C to 82°C). This is when you can add your essential oils.
Step 4: Add Cinnamon Essential Oil
Once your wax is melted, remove it from the heat and add your cinnamon essential oil. I suggest starting with about 1 ounce of oil per pound of wax for a strong scent. Stir gently for a few minutes to let the oil fully integrate into the wax.
Step 5: Attach the Wick
Here comes a crucial step: securing the wick. Use a bit of melted wax to stick the wick to the bottom of your container. Alternatively, you can dip it in the melted wax first. Allow it to sit for a minute or so until it’s secured.
Step 6: Pour the Wax
Carefully pour the wax into your containers, leaving a little space at the top. If you’re feeling fancy, you can try layering by pouring a little wax, allowing it to set, and then adding more.
Step 7: Stabilize the Wicks
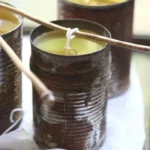
As you’re pouring, ensure that the wick is centered. You can use a pencil laid across the top of the container to hold the wick in place while the wax cools and hardens.
Step 8: Let the Candles Set
Allow your candles to cool completely; this usually takes a few hours. Resist the urge to move them around during this time! You want them to set evenly.
Step 9: Finish Up
Once the candles are fully set, trim the wick to about 1/4 inch above the wax. This will help ensure a good burn and a beautiful flame.
Step 10: Enjoy or Gift Your Candles
Now for the most enjoyable part—light your candle and bask in the cozy warmth of cinnamon-spiced air. Alternatively, these handmade treasures make thoughtful gifts for friends or family. They’ll appreciate the personal touch (and the delicious smell!).
Common Mistakes to Avoid
Now, before you dive in, let’s chat about a few things to watch out for—it’s all part of learning, right?
Too Much Fragrance: While you might be tempted to dump in extra oil, trust me, it can overpower the scent and lead to an unpleasant experience.
Not Securing Wicks: If you skip this step, your wick may end up drifting around, and no one wants an uneven burn.
Pouring Temperature: If your wax is too hot when you pour it, you might end up with a rough surface instead of a smooth, pretty finish.
Quick Beauty Tips for Candle Enjoyment
Once your candles are ready, here are some tips to maximize your candle experience:
Pair with Elements of Nature: Bring in some fresh greenery or dried flowers to complement the warm cinnamon scent.
Create Ambiance: Dim the lights and play some soft music. Lighting a homemade candle makes for a perfect wind-down ritual after a hectic day.
Mind Your Space: For the best scent throw, place your candle in a small, enclosed area, like your bathroom or cozy corner, instead of open spaces.
FAQs about Candle Making
Do I need special tools to make candles?
Not really! While certain tools can make the process easier, a double boiler and some basic measuring tools will suffice.
Can I customize the scent?
Absolutely! Get creative. Try mixing cinnamon with vanilla or clove for a spiced scent heaven.
How do I prevent my candle from tunneling?
Make sure you allow your candle to burn long enough on the first go (ideally a couple of hours) to get an even melt pool.
Bonus Self-Care Ideas for a Cozy Night In
You’ve got your beautiful cinnamon candles, but why stop there? Here are a few more ideas for an indulgent self-care night:
Warm Bath: Light your candle and run a warm bath with some soothing bath salts or bubbles. We all deserve a little pampering!
Comfort Food: Whip up some homemade cookies or a warm drink—cinnamon tea anyone?
Good Book or Movie: Snuggle in with a heartwarming book or a feel-good movie that resonates with you.
Conclusion
Creating a DIY cinnamon candle is not just a fun and crafty project; it’s a way to infill your home with warmth, love, and a sense of peace. Just like we nurture our skin and well-being, bringing these cozy scents into our spaces is a beautiful form of self-care.
So, what are you waiting for? Gather your supplies, set some time aside for yourself, and ignite the spirit of creativity that lives within you. You might be surprised at how good it feels to light your very own creation, fill your home with its sweet aroma, and relax into the cozy embrace of your favorite space. Here’s to celebrating the little moments of comfort in our lives!