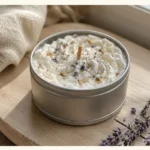

DIY Coffee Scented Candle Guide: Make Your Own Coffee Candles
Welcome to our step-by-step guide on how to make your very own coffee-scented candles! If you’re a coffee lover or just enjoy the comforting aroma of fresh coffee, creating these candles will be a fun and rewarding DIY project. We’ll walk you through everything you need to know—from using coffee grounds to making beeswax coffee candles. Perfect for beginners, this guide will give you the skills to create unique homemade treasures for yourself or as gifts.
Why You Will Love This Recipe
Coffee-scented candles are not only great for their invigorating aroma but also evoke a sense of warmth and coziness that makes any space feel more inviting. The best part? You can customize them to reflect your style! Whether you’re looking for a simple coffee ground candle DIY or a luxurious beeswax creation, you’ll find a variety of ideas here. Plus, making candles at home allows you to control the ingredients and scents, ensuring a natural and delightful end product.
Ingredients
Basic Coffee Candle Ingredients
Wax:
- 2 cups of soy wax or beeswax (soy wax is ideal for beginners, while beeswax offers a more luxurious feel and scent).
Fragrance Oil:
- 1 ounce of coffee fragrance oil or use 1 cup of ground coffee for a more natural scent.
Coffee Grounds:
- ½ cup (optional; for added texture and visual appeal).
Wicks:
- Candle wicks suitable for the wax type you’ve chosen (for example, cotton wicks for soy wax).
Container:
- Heat-resistant candle jars or tins (glass or metal containers are best).
Optional Add-Ons:
- Essential oils (like vanilla or cinnamon) for a custom scent.
- Other natural materials (like spices or dried coffee beans) for decoration.
Equipment
- Double boiler or a microwave-safe container for melting wax.
- Stirring utensils (wooden or silicone spatula).
- Thermometer (optional but recommended).
- Wick centering device (or a simple pencil to hold your wick in place).
- Measuring cups and spoons.
- Pouring pitcher (helps for an easier and neater pour).
Step-by-Step Instructions
Preparation Time: 10 minutes
Making Time: 30 minutes
Approximate Yield: 2-4 candles, depending on size
Step 1: Prepare Your Workspace
- Choose a flat, stable work surface. Lay down newspaper or silicone mats to catch any spills. Make sure that your containers are clean and dry.
Step 2: Measure Your Wax
- Measure out 2 cups of wax. If using soy wax or beeswax, this amount should allow you to fill multiple containers depending on their size.
Step 3: Melt the Wax
- Using a Double Boiler: Fill the lower pot with water and heat it to a simmer. Place the wax in the upper pot and stir occasionally until fully melted.
- Using a Microwave: Place wax in a microwave-safe container and heat in 30-second intervals, stirring in between, until completely melted.
Step 4: Add Fragrance and Coffee Grounds
- Once the wax is melted, if you’re using coffee fragrance oil, add 1 ounce and mix well. If you’re using coffee grounds, incorporate ½ cup now for texture and scent. Stir thoroughly.
Step 5: Prepare the Wick
- Attach your wick to the center of your container using a bit of melted wax or a wick sticker. Use a wick centering device or a pencil to keep it centered.
Step 6: Pour the Wax
- Allow the melted wax to cool to 140-150°F (if you have a thermometer). Carefully pour the wax into your prepared containers, leaving a small amount of wax in the pot for topping off later if needed.
Step 7: Secure the Wick
- Ensure the wick remains centered. Let your candle cool for a few hours at room temperature.
Step 8: Top Off (if necessary)
- If your candle has settled or created a sinkhole, reheat and pour the remaining melted wax on top to create a level surface.
Step 9: Trim the Wick
- Once cooled completely, trim the wick to about ¼ inch above the wax.
Tips for Success
- Always work in a well-ventilated area when melting wax.
- Ensure your containers are prepped before melting the wax to speed up the process.
- If adding essential oils, be careful not to exceed recommended amounts, as it may prevent the candle from setting properly.
Common Mistakes to Avoid
- Temperature Issues: Pouring the wax while too hot can cause cracks, so always let it cool to optimal temperatures before pouring.
- Using the Wrong Wick Size: This can lead to poor burning performance (too large leads to soot, too small may not burn properly). Refer to wick size charts for your container’s diameter and wax type.
Variations and Customization Ideas
- Layered Candles: Use different scents or colors to create a layered look. Just add one layer at a time and let it cool before adding the next.
- Scent Combinations: Mix coffee with vanilla or cocoa for a different twist. Experiment with essential oils to find a signature blend.
Storage and Shelf Life
Store your finished candles in a cool, dry place, away from direct sunlight. They should last for about 6-12 months if kept properly. Always ensure the wick is trimmed and the container is clean before burning.
Safety Tips
- Always monitor candles when burning; never leave them unattended.
- Keep candles away from flammable materials and drafts.
- Use proper equipment (heat-proof containers) to avoid burns.
Frequently Asked Questions
1. How long do coffee candles last?
With proper care, coffee candles can burn for about 20-30 hours. Ensure to keep the wick trimmed and burn away from drafts.
2. Can I use coffee grounds in the candle?
Yes! Coffee grounds can be added for texture and scent. However, it’s best to keep them to a moderate amount to avoid clutter when burning.
3. How do I know if my wick is the right size?
Conduct a test burn by lighting the candle for a couple of hours; if the flame is too tall or flickering, the wick may be too large.
4. Can I use any type of container for my candles?
You can use any container, but ensure it is heat-resistant (glass or metal is preferred) to avoid any risk of breaking during pouring or burning.
5. What other scents pair well with coffee for candles?
Vanilla, cinnamon, and chocolate are excellent choices to enhance the coffee aroma.
6. How do I clean up spills or wax drips?
Use warm water and soap to clean wax spills, or allow it to harden and scrape off with a plastic scraper gently.
Conclusion
Making your own coffee-scented candle is not only a delightful project but also a rewarding way to fill your home with cozy aromas. Whether you’re creating these candles for yourself or as thoughtful gifts for loved ones, your homemade creations are sure to bring joy. Remember to have fun experimenting with scents, colors, and textures, and don’t hesitate to share your unique candle creations with friends and family. Happy candle making!