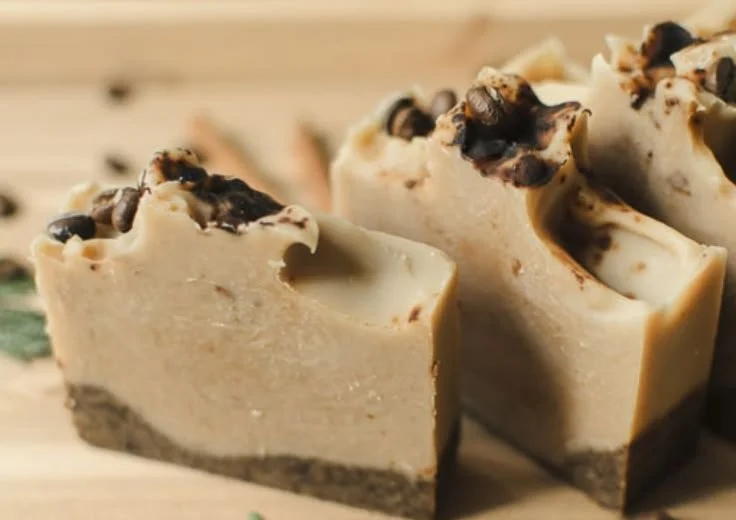

Homemade Goat Milk Coffee Soap: A Simple Guide for All Skin Types
Making your own soap is not only a rewarding experience, but it also allows you to create a product that is tailored to your preferences. Today, we’re going to make homemade goat milk coffee soap using the cold-process method. This soap is perfect for all skin types, makes an excellent gift, and fills your space with a delightful aroma.
Why You Will Love This Recipe
- Gentle on Skin: Goat milk is rich in vitamins and fatty acids, making it a nourishing option for all skin types, especially sensitive skin.
- Aromatherapy Benefits: The infusion of coffee in the soap not only smells divine but can also provide an invigorating touch to your morning routine.
- Beginner-Friendly: This cold-process soap recipe is easy to follow and requires basic ingredients that you can find at craft stores.
Let’s get started on our homemade goat milk coffee soap!
Ingredients
To make one batch of goat milk coffee soap (approximately 10-12 bars), you will need:
- Lye Mixture:
- 4.2 oz. sodium hydroxide (lye)
- 12 oz. distilled water
- Base Ingredients:
- 12 oz. goat milk (preferably frozen)
- 16 oz. olive oil
- 16 oz. coconut oil
- 16 oz. palm oil
- Additives:
- 2 oz. brewed coffee (cooled)
- 1 tablespoon coffee grounds (for exfoliating texture)
- Essential Oils (optional):
- 1 oz. coffee essential oil or vanilla essential oil for scent
Equipment
Before you begin, gather these essential tools:
- Digital scale
- Heat-safe containers (for mixing lye and oils)
- Stick blender
- Safety goggles and gloves
- Soap mold
- Thermometer
- Spatula
- Measuring cups and spoons
- Safety mask (for lye fumes)
- Parchment paper (for lining the mold)
Step-by-Step Instructions
Step 1: Prepare Your Workspace
- Work in a well-ventilated area and gather all your equipment.
- Put on your gloves, goggles, and mask to protect yourself from lye.
Step 2: Mix the Lye
- Carefully measure 4.2 oz. of lye using a digital scale.
- In a heat-safe container, slowly add the lye to 12 oz. of distilled water (never the other way around). The mixture will heat up and release fumes, so do this step in a well-ventilated area.
- Stir until the lye is completely dissolved and set aside to cool.
Step 3: Prepare Your Oils
- Measure 16 oz. each of olive, coconut, and palm oils using a scale.
- Combine the oils in a large pot and heat gently until melted.
- Allow the oils to cool to around 100-110°F.
Step 4: Combine Goat Milk
- If using frozen goat milk, let it thaw and place it in a heat-safe container.
- Slowly pour the cooled lye mixture into the goat milk (if adding ice to prevent overheating, do so now).
Step 5: Mix Lye and Oils
- Once both the lye solution and oils are around 100-110°F, slowly pour the lye mixture into the oils.
- Use the stick blender to blend until you reach "trace"—a thin consistency where the mixture leaves a trail when dripped from the blender.
Step 6: Add Coffee and Essential Oils
- Stir in the brewed coffee, coffee grounds, and any essential oils thoroughly until well incorporated.
Step 7: Pour into Mold
- Carefully pour the soap mixture into your prepared mold.
- Use a spatula to smooth the top and tap the mold to release any air bubbles.
Step 8: Insulate and Cure
- Cover the mold with a towel or blanket to retain heat.
- After 24 hours, check the soap. It should be firm enough to remove from the mold.
- Cut the soap into bars and place them on a drying rack to cure for 4-6 weeks.
Tips for Success
- Lye Measurement: Always use a reliable soap calculator to ensure you have the correct lye measurement based on the oils used.
- Temperature Monitoring: Check that your lye and oils are at a similar temperature before mixing.
- Stick Blender Caution: Take care when using a stick blender—do not let it run unattended.
Common Mistakes to Avoid
- Skipping Safety Gear: Always wear gloves and goggles when handling lye.
- Incorrect Measurements: Always measure ingredients by weight, not volume.
- Inadequate Curing Time: Don’t rush the curing process; it’s essential for saponification.
Variations and Customization Ideas
- Scents: Try different essential oils such as lavender or citrus for various aromatic profiles.
- Additives: You can add natural colorants like turmeric or cocoa powder for color.
- Textures: Additional exfoliants such as oatmeal or herbs can be added for a unique texture.
Storage and Shelf Life
- Store your finished soap bars in a cool, dry place away from direct sunlight.
- Properly cured soap can last up to a year or more if stored correctly.
Safety Tips
- Always use protective gear when handling lye.
- Ensure good ventilation when mixing lye and oils.
- Keep all ingredients and equipment out of reach of children and pets.
Frequently Asked Questions
1. Can I use lye alternatives?
While some DIY soap recipes suggest using melt-and-pour bases, true cold-process soap requires lye to saponify fats.
2. Is goat milk soap good for sensitive skin?
Yes! Goat milk is known for its soothing and moisturizing properties, making it a great choice for sensitive skin types.
3. Can I add color to my soap?
Absolutely! Natural colorants such as spirulina or activated charcoal can provide beautiful hues.
4. What should I do if my soap has a strong smell of lye?
This can happen if not enough time has passed for saponification. Ensure your soap cures for the recommended duration.
5. How can I tell if my soap has cured properly?
Cured soap should be hard and dry to the touch, and it should not have an overpowering lye smell.
Conclusion
Homemade goat milk coffee soap is not just an enjoyable DIY project; it’s a fulfilling way to create something beautiful and functional for your skin. By following this guide, you’ll have a stunning bar of soap that not only cleanses but also nourishes. So gather your supplies, put on your safety gear, and let the soap-making adventure begin! Happy crafting!