
Embrace Your Creativity with a Soy Wax DIY Mug Candle
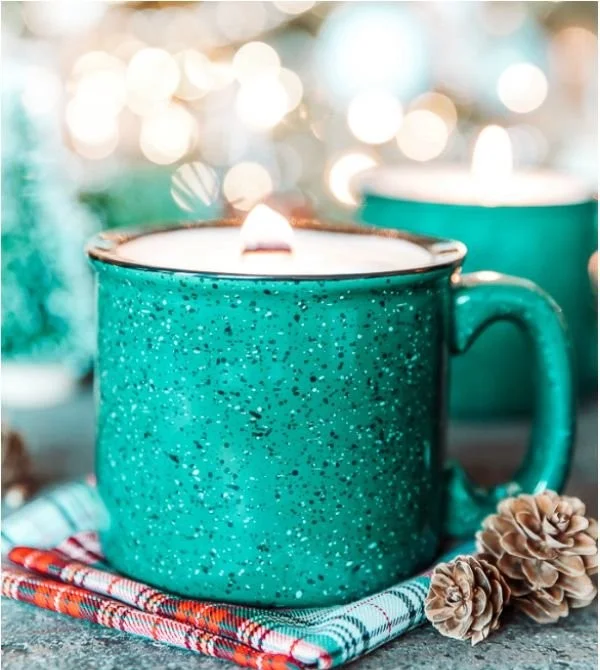
Imagine this: It’s a cozy Sunday afternoon. The sun is streaming through your window, casting a warm glow in your living room. You’ve got your favorite playlist humming in the background, and you’re just about to settle in with a warm cup of tea. But wait! Wouldn’t it be delightful to fill this space with a soothing scent that makes you feel right at home? Here’s a little secret I’ve discovered: you can create an inviting atmosphere with your very own DIY mug candle made of soy wax and a charming wood wick.
You might be wondering… How do you turn a beautiful mug, whether it’s a funky antique or a simple modern design, into a stunning candle? Let’s dive into this simple yet satisfying project that not only beautifies your space but also uplifts your spirit.
Why Soy Wax is the Way to Go
Let’s be honest—when you think about candle-making, wax is probably the first thing that comes to mind. And between paraffin, beeswax, and soy, soy wax is my personal favorite. Why?
- Eco-Friendly: Soy wax is made from soybeans, making it a renewable resource. It’s a better choice for our planet.
- Clean Burning: Compared to paraffin, soy wax burns cleaner and doesn’t release harmful toxins.
- Scent Throw: It holds fragrance beautifully, making your space smell wonderful without being overwhelming.
- Ease of Use: Soy wax melts at a lower temperature, making it safer and easier for beginners to handle.
You’re not alone if you’ve felt overwhelmed by the thought of starting a candle-making project, but don’t worry—this tutorial will guide you step-by-step.
What You’ll Need
Before we jump in, gather your supplies. Here’s your checklist:
Essential Supplies
- Soy wax flakes: Look for natural soy wax; it’s really the star of the show.
- Wood wicks: You’ll want the kind that produces that lovely crackling sound, just like a fireplace.
- Fragrance oil: Choose your favorite scent. Lavender for calm or vanilla for warmth? You decide!
- Heat source: A double boiler or a microwave-safe container will do.
- A heat-resistant mug: This could be your favorite vintage mug or one from a modern collection.
- Wick holder: This can be as simple as a chopstick or a wick centering device.
- Thermometer: Not necessary, but it’s handy for getting the wax to the right temperature.
- Pouring pitcher: A metal or silicone pitcher helps with an easy pour.
- Optional: Adhesive stickers to keep your wick anchored at the bottom.
Let’s Get Started
Ready to transform that mug into something spectacular? Here’s your step-by-step guide.
Step One: Prepare Your Work Space
First things first—create a clean workspace. Melted wax can get a little messy, so protect your surfaces. Lay down some newspaper or a silicone mat. Trust me; it’ll save you a headache later.
Step Two: Measure and Melt the Wax
- Measure: You’ll need about one cup of soy wax flakes per candle. If you’re making multiple candles, multiply accordingly.
- Melt: Using your double boiler, heat the wax gently until it’s completely liquefied. If you’re using a microwave, heat in 30-second intervals, stirring between each.
Quick tip: Aim for a temperature around 170°F for optimal scent throw when you add the fragrance. A thermometer comes in handy here!
Step Three: Add Fragrance
Here’s the fun part! Once your wax is melted, it’s time to add your fragrance oil. Generally, a good rule of thumb is about 1 ounce of fragrance oil for every pound of wax. Stir gently but thoroughly for about 2-3 minutes to ensure the scent is evenly distributed.
Step Four: Prepare the Wick
Now, let’s get that wick ready. If your wood wick doesn’t come with a base, you’ll need to attach it to the bottom of your mug. Use a bit of adhesive for this step, so it stays put when you pour in the melted wax.
Step Five: Pour the Wax
Carefully pour the melted wax into your mug, leaving a small gap at the top (around half an inch). Be cautious—you don’t want to burn yourself! If you’ve got a pour spout on your pitcher, use it to minimize spills.
Step Six: Stabilize the Wick
Place your wick holder on the top of the mug to keep the wick centered as the wax hardens. If you’re using a chopstick, simply balance it across the top of the mug.
Step Seven: Allow to Set
Let your candle cool for a few hours. You want it to harden completely before trimming the wick.
Step Eight: Finishing Touches
Once the candle has cooled, carefully trim the wood wick to about 1/4 inch above the wax surface. This will help to ensure a clean burn when you light it.
Step Nine: Light It Up
You’re ready to bring your candle to life! As you light your creation, embrace the comforting aroma filling your space. It’s not just a candle; it’s a handmade piece of art that you created.
Bonus Tips for Candle-Making Success
- Scent Strength: If your candle isn’t as fragrant as you’d like, don’t rush! Experiment with different fragrance oils and doses until you find your perfect mix.
- Coloring: Want more than just white? Look for candle dyes to add a splash of color. Just a drop can brighten your candle and mood!
Common Mistakes to Avoid
We’ve all made our fair share of DIY mistakes. Here are a few to watch out for:
- Skipping Safety: Always be cautious while handling hot wax. Keep a first aid kit nearby, just in case.
- Too Much Fragrance: Adding too much can cause your candle to burn improperly or even affect the wax’s consistency.
- Impatience: Allow the candle to cool completely. Rushing may lead to a cracked top or uneven burning.
FAQs about Soy Wax Candles
Can I reuse old candles?
Absolutely! If you have old candles, melt them down carefully and combine them with new wax. Just be sure they’re similar types (like all soy or all paraffin).
How do I clean up wax spills?
If you spill melted wax, allow it to harden, then gently chip away the bulk and use warm soapy water for the residue.
Can I use a regular wick?
Using a wood wick is ideal for this project. Regular cotton wicks may not give you that satisfying crackling sound or the same ambiance.
Final Thoughts on Your DIY Adventure
Making a DIY soy wax mug candle is not just about crafting; it’s a little act of self-care and creativity that brings warmth and joy into your home. Whether you’re creating them for yourself or as gifts for loved ones, these candles are special because they carry a piece of your heart.
So, the next time you’re looking for a calming afternoon activity or a thoughtful gift idea, reach for that beloved mug and some wax. You might just find your new favorite way to unwind!
Trust me, you won’t just be lighting a candle; you’ll be igniting warmth and creativity in your space. Happy crafting!