
Create Bakery-Inspired Candles: How to Make Candle Wax Look Like Frosting
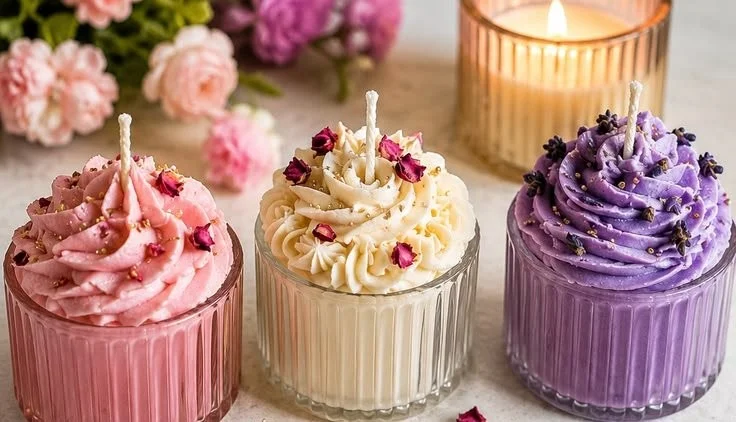
Are you a DIY enthusiast looking to elevate your candle-making game? If you love sweet treats and want to bring that aesthetic into your home, creating bakery-inspired candles that look like they’ve come straight from a bakery is a delightful project to undertake. In this guide, we’ll walk you through the process of how to make candle wax look like frosting, including tips for achieving smooth piped candle wax, fluffy whipped candle wax, and stunning fake frosting candles that look professionally made.
Why You Will Love This Recipe
Creating bakery-inspired candles is more than just a fun project; it’s an opportunity to express your creativity. These beautiful candles serve as charming home décor, unique handmade gifts, or even delightful party favors. Plus, the sweet, inviting scents from your homemade candles will fill your space with warmth and happiness.
Ingredients
Here’s what you’ll need to get started:
For Piped Candle Wax:
- Wax Type: Paraffin wax or soy wax (1 lb)
- Fragrance Oil: Your choice of scents (0.5 oz)
- Dye (Optional): Candle dye suitable for the wax type (a few drops to achieve desired color)
- Stearic Acid: (Optional, for added hardness when mixing with the wax) (1 oz)
For Whipped Candle Wax:
- Wax Type: Soy wax (14 oz)
- Fragrance Oil: Your favorite scent (1 oz)
- Dye (Optional): Candle dye suitable for the wax type (a few drops for color)
For Frosting Effects:
- Buttercream Fragrance Oil: (0.5 oz)
- Additional Wax for Base Layer: (to fill the container)
Equipment
Before diving into the candle-making process, gather the following equipment:
- Double boiler or microwave-safe container
- Thermometer
- Whisk or electric mixer (for whipped wax)
- Piping bags and decorative tips (for piped wax)
- Candle containers or molds
- Stirring utensils
- Scale for accurate measurements
- Wick (appropriate size for the candle container)
Step-by-Step Instructions
Making Piped Candle Wax
Melt the Wax: Use a double boiler to melt 1 lb of paraffin or soy wax. Heat to approximately 185°F (85°C).
Add Fragrance and Color: Stir in 0.5 oz of fragrance oil and a few drops of dye (if desired). Mix until well combined.
Cool the Wax: Remove the pot from heat and allow the wax to cool slightly to around 150°F (65°C).
Transfer to Piping Bag: Carefully pour the melted wax into a piping bag fitted with a decorative tip.
Pipe on Containers: Quickly pipe the wax onto the top of your prepared containers. Work swiftly as the wax can harden quickly.
Let It Set: Allow the wax to cool and harden completely.
Making Whipped Candle Wax
Melt the Wax: Melt 14 oz of soy wax using the double boiler method until it reaches about 185°F (85°C).
Incorporate Fragrance and Color: Stir in 1 oz of fragrance oil and add dye for color if desired. Mix thoroughly.
Cool and Whip: Allow the wax to cool to about 120°F (49°C). Once it has cooled, use a whisk or electric mixer to whip the wax until it reaches a light, fluffy consistency.
Fill Containers: Spoon or pipe the whipped wax into your containers, creating a frost-like appearance.
Set: Allow the candles to cool completely.
Tips for Success
- Use High-Quality Fragrance Oils: To achieve a strong, long-lasting scent, use high-quality fragrance oils specifically designed for candles.
- Wick Size Matters: Make sure to use a wick suitable for the diameter and type of your container to guarantee even burning.
- Temperature Control: Monitor the temperature of the wax closely to avoid overheating, which can degrade the wax and fragrance.
Common Mistakes to Avoid
- Not Prepping Containers: Always ensure your containers are clean and dry before pouring in your wax.
- Poured Wax Too Hot: Pouring wax that is too hot can warp or crack your containers, especially if they’re glass.
- Neglecting Wick Testing: Always test wick sizes for new candle designs to ensure an even burn.
Variations and Customization Ideas
- Color Blending: You can mix different colors of candle dye for a custom look.
- Layering Scents: Create layered candles with different scents in each layer.
- Decorative Touches: Add sprinkles or small embellishments to your candle tops before the wax hardens for a fun touch.
Storage and Shelf Life
Store your finished candles in a cool, dry place away from direct sunlight. They can last for several months if stored properly. Ensure lids are securely in place to maintain fragrance.
Safety Tips
- Use Caution with Hot Wax: Always handle melted wax with care to avoid burns.
- Wick Placement: Ensure the wick is centered in the container for an even burn and to prevent soot buildup.
- Supervise Burning: Never leave burning candles unattended and keep them out of reach of children and pets.
Frequently Asked Questions
1. Can I use essential oils instead of fragrance oils?
Yes, you can use essential oils, but make sure they are suitable for candle-making, as they may not provide the same strong scent throw as fragrance oils.
2. How do I choose the right wick size?
Wick size depends on the container’s diameter and wax type. A good rule of thumb is to consult a wick guide or do a burn test with several sizes.
3. Can I reuse candle containers?
Yes, but ensure they are thoroughly cleaned, and any old wax remnants are removed before adding new wax.
4. What do I do if my wax doesn’t set properly?
If your wax is too soft, it may need more stearic acid or a different wax blend. Ensure you’re following the recommended ratios for your specific wax type.
Conclusion
Making bakery-inspired candles is a rewarding and enjoyable DIY project. With this easy guide on how to make candle wax look like frosting, you can create delightful candles that not only look good but also fill your space with wonderful aromas. So gather your supplies, unleash your creativity, and get started on crafting these charming candles that reflect your personal style! Happy candle-making!