
DIY Beeswax Candles: Cozy Up Your Home This Winter
As the temperatures drop and the nights grow longer, there’s nothing quite like the warm, inviting glow of a candle to create a cozy atmosphere in your home. If you’re looking for a simple yet rewarding DIY project, making your own beeswax candles is a fantastic way to infuse your space with warmth and fragrance. In this article, I’ll guide you through the process of crafting the easiest DIY beeswax candles with clear, step-by-step instructions, useful tips, and a bit of background on the materials involved.
Why You Will Love This Recipe
Making beeswax candles is not only easy, but it’s also an enjoyable way to add a personal touch to your home decor while creating handmade gifts for your loved ones. Beeswax has natural antibacterial properties and burns cleanly, producing minimal smoke or soot compared to paraffin candles. Plus, the subtle honey-like scent adds a lovely ambiance to any room. Once you learn this simple technique, you’ll be well on your way to enjoying lovely homemade candles or giving thoughtful, handmade gifts.
Ingredients
- Beeswax: 1 pound (approximately 450 grams)
- Cotton or wood wicks: Size will depend on your container’s width
- Optional fragrance oil: 1 ounce (if you want your candles scented)
Equipment
- Double boiler (or a heat-safe bowl over a pot of simmering water)
- Candle containers or molds (glass jars, metal tins, silicone molds)
- Thermometer (optional but useful for measuring wax temperature)
- Stirring utensil (wooden spoon or heat-safe spatula)
- Wick holder or a pencil (to keep your wick centered)
- Scissors (for trimming wicks)
Step-by-Step Instructions
Prep Your Workspace: Lay down newspaper or a drop cloth to catch any wax spills. Gather all your materials and make sure your candle containers are clean and dry.
Melt the Beeswax: Fill the bottom pot of your double boiler with water and bring it to a gentle simmer. Add the beeswax to the top pot or bowl. Stir occasionally until melted. The melting process usually takes about 10-15 minutes.
Add Fragrance (Optional): If you’d like to add fragrance to your candles, once the beeswax is fully melted, remove the bowl from heat and stir in your desired fragrance oil. A good starting ratio is 1 ounce of fragrance per pound of beeswax.
Prepare the Wick: While the wax cools slightly (a temperature of around 160-180°F is often ideal), attach the wick to the bottom of your container. You can use a bit of melted wax or a wick sticker. Lean a pencil or a wick holder across the top of the container to keep the wick upright.
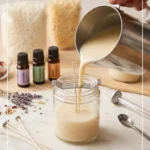
Pour the Wax: Slowly pour the melted beeswax into your prepared container while keeping the wick centered. Fill it to your desired height, leaving some space at the top.
Secure the Wick: Adjust the wick if needed to ensure it’s centered. Let your candle cool for several hours, preferably overnight.
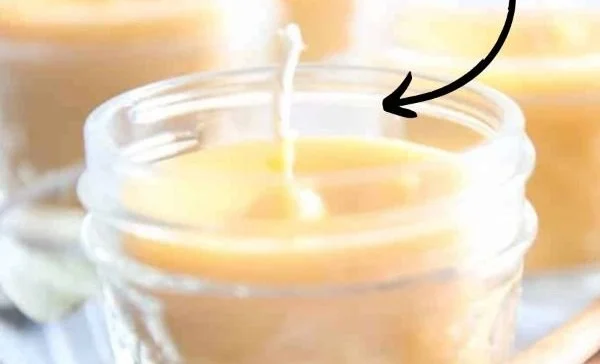
Trim the Wick: Once cool and solidified, trim the wick to about 1/4 inch above the wax surface.
Enjoy Your Candle: Your homemade beeswax candle is now ready to be lit! Burn it safely and enjoy the cozy ambiance it brings to your home.
Tips for Success
Temperature Matters: Make sure not to overheat the beeswax. If it gets too hot, it can affect the burn quality.
Wick Testing: Different molds and containers may require different wick sizes. If you have leftover material, take time to test a few wicks to see which burns best in your settings.
Avoid Air Bubbles: If you notice air bubbles forming in your candle, give the wax a gentle stir before pouring it.
Common Mistakes to Avoid
Using the Wrong Wick Size: This can lead to poor burning; too small and the candle won’t burn well, too large and it can burn too quickly. Always choose the right size based on your container’s diameter.
Filling Containers Too Quickly: Avoid pouring the wax too fast as it can create air pockets and uneven surfaces.
Using Low-Quality Fragrance Oils: Cheap fragrances may not adhere well to the wax and can burn poorly. Look for high-quality oils designed specifically for candle making.
Variations and Customization Ideas
Coloring Your Candles: Add natural candle dyes to the melted beeswax for colored candles. Always check that any dye you use is non-toxic and safe for candle making.
Essential Oils: For a natural fragrance, use pure essential oils instead of synthetic fragrance oils. Popular choices include lavender, eucalyptus, or vanilla.
Creative Containers: Use unique jars, teacups, or molds for fun shapes that add personality to your candles.
Storage and Shelf Life
Homemade beeswax candles can last for years if stored properly. Keep them in a cool, dry place away from direct sunlight, which can fade colors or affect the scent of your candles. Ideally, store them in an airtight container or wrapped in breathable fabric.
Safety Tips
Supervise Heating Wax: Always monitor melting wax and never leave it unattended.
Fire Safety: Keep candles away from flammable materials and ensure they are placed on a heat-resistant surface.
Proper Wick Length: Always keep your wick trimmed to about 1/4 inch to reduce the likelihood of large flames or soot production during burning.
Frequently Asked Questions
1. How long do beeswax candles burn?
Typically, beeswax candles burn for longer than paraffin candles due to their density. On average, a beeswax candle can burn for about 10 hours per ounce of wax.
2. Can I use other types of wax besides beeswax?
Yes, while beeswax is ideal for its natural properties, you can also experiment with soy wax or palm wax for your candles, but be sure to adjust wick sizes and melting temperatures accordingly.
3. Why are my candles sweating or leaking?
This may happen if the wax temperature dropped too quickly or if it contains too much fragrance oil. Make sure to slowly cool the candles in a stable environment.
4. How can I get a strong scent in my beeswax candles?
To enhance scent throw, ensure the wax is heated to the right temperature before adding fragrance and use high-quality oils intended for candle making.
5. Are beeswax candles safe to burn indoors?
Yes, beeswax candles are known for burning cleanly and producing negative ions that can help purify the air, making them a great choice for indoor use.
6. Can I reuse old candle wax?
Yes! If you have leftover wax from old candles, you can melt it down and create new candles, just be mindful of the wick’s compatibility.
Conclusion
Making your own beeswax candles is a delightful, straightforward project that adds a personal touch to your home. Whether you choose to enjoy them yourself or gift them to friends and family, each candle holds a little part of your creativity and care. So grab your materials, follow these easy instructions, and let the inviting glow of your homemade candles fill your space with warmth this winter season. Happy crafting!