
Easiest Beeswax Candles with Only 2 Ingredients Scented with Essential Oils
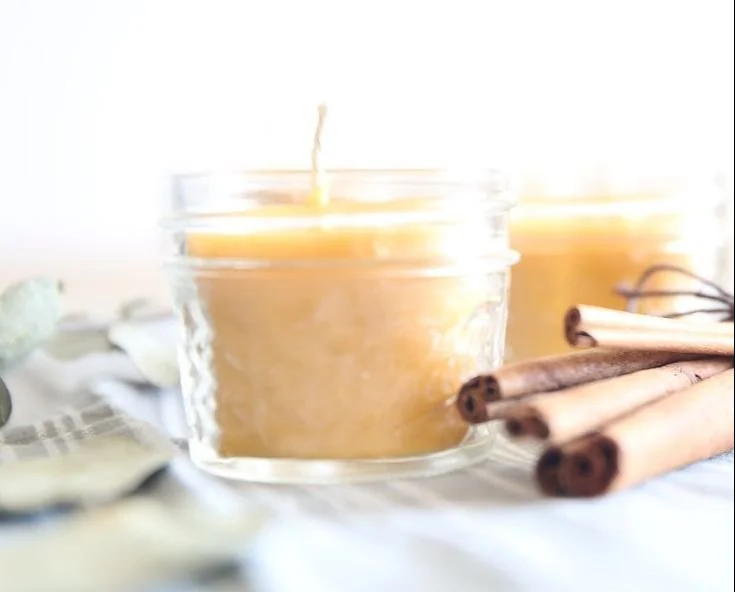
Making your own candles can be an incredibly rewarding experience, particularly when it involves just two simple ingredients. In this guide, I’ll show you how to create beautiful beeswax candles that not only brighten up your home but also add a delightful, natural scent with essential oils. Whether you’re looking for a new DIY project or thinking of making a heartfelt gift, this easy recipe is perfect for beginners.
Why You Will Love This Recipe
Homemade candles crafted from pure beeswax are not only stunning but also possess unique qualities that set them apart from mass-produced candles. Beeswax candles burn longer and cleaner, and they purify the air by releasing negative ions. Plus, their delicate honey fragrance is enhanced even further with the addition of your favorite essential oils. This project is quick, simple, and allows for a personal touch, making it an ideal choice for anyone interested in DIY.
Ingredients
To make your own beeswax candles, you’ll need the following ingredients:
- Pure Beeswax: 1 pound (approximately 450 grams)
- Essential Oils: 1-2 ounces (30-60 ml) of your favorite scent (like lavender, eucalyptus, or cedarwood)
Equipment
Gather these essential tools for your candle-making process:
- Double boiler or a microwave-safe bowl
- Stirring stick (a wooden chopstick or a stainless-steel spoon works well)
- Candle molds or heat-safe containers (like glass jars or tin containers)
- Wick (cotton or wood wicks)
- Wick holder (or a simple pencil will work for holding the wick in place)
- Thermometer (optional but helpful)
- Scale (for measuring ingredients)
Step-by-Step Instructions
Follow these easy steps to create your beeswax candles:
Step 1: Prepare Your Workspace
Ensure your workspace is clean and free from clutter. Place your double boiler on the stove or your microwave-safe bowl in the microwave. Gather all your ingredients and equipment so you’re ready to start.
Step 2: Measure the Beeswax
Using a scale, weigh out 1 pound of pure beeswax. If your beeswax comes in large blocks, chop it into smaller pieces to make melting easier.
Step 3: Melt the Beeswax
Using a Double Boiler: Fill the bottom of the double boiler with water and bring it to a simmer. Place the beeswax in the top section and stir occasionally until fully melted.
Using a Microwave: Place the chopped beeswax in your microwave-safe bowl. Heat in 30-second intervals, stirring in between, until completely melted.
Tip: The ideal melting temperature is around 145°F (63°C). Always keep an eye on it to prevent overheating.
Step 4: Add Essential Oils
Once your beeswax is melted, remove it from heat. Allow it to cool slightly before adding your essential oils to ensure the scent remains potent. Stir thoroughly to evenly distribute the oils throughout the wax.
Step 5: Prepare the Wick
While the wax cools, prepare your wick. Secure the wick to the bottom of your candle container using a bit of melted wax, a glue dot, or a wick sticker. Use a wick holder to keep the wick centered while you pour the wax.
Step 6: Pour the Wax
Carefully pour the melted beeswax into your prepared molds or containers, taking care not to disturb the wick. Fill to your desired level, but leave some space at the top if you’d like to add more wax later.
Step 7: Allow to Cool
Let the candles sit at room temperature until fully set, which usually takes a few hours. For faster cooling, you can place them in the refrigerator for about 30-45 minutes.
Step 8: Trim the Wick
Once the candles are completely cooled and solidified, trim the wick to about 1/4 inch above the wax surface.
Tips for Success
- Essential Oils: Start with a smaller quantity of essential oils and increase based on your scent preference. A little goes a long way!
- Testing Scents: If you’re trying a new essential oil, test a small amount of melted wax with the oil before committing to the full batch.
- Temperature Control: Temperature can affect how your candles burn. Aim to pour the wax at around 140°F (60°C) for the best results.
Common Mistakes to Avoid
- Overheating the Wax: High temperatures can cause beeswax to become discolored or lose its natural properties, so monitor your melting carefully.
- Not Using Enough Wick: A wick that’s too short won’t be effective, while too long may cause excessive soot or an uneven burn.
- Pouring Too Quickly: Pouring melted wax too fast can lead to air bubbles, which can affect the appearance of your candles. Pour slowly and steadily.
Variations and Customization Ideas
Your two-ingredient beeswax candles can easily be customized. Consider trying:
- Layered Candles: Pour different colors of wax in layers for a beautiful effect, allowing each layer to cool slightly before adding the next.
- Adding Color: Use candle dyes specifically formulated for beeswax to give your candles a vibrant appearance.
- Scent Blends: Mix different essential oils (like vanilla and cinnamon) to create unique combinations that evoke special memories or ambiance.
Storage and Shelf Life
Store your finished beeswax candles in a cool, dry place away from direct sunlight. When stored properly, they can last for years, maintaining their fragrance and burn quality.
Safety Tips
- Minimal Supervision: Never leave melted wax unattended on the stove or other heat sources.
- Ventilation: Ensure you are working in a well-ventilated area when working with essential oils, as certain scents may be strong.
- Hot Wax: Be cautious of burns from melted wax. If you spill, let it cool completely before attempting to clean it up.
Frequently Asked Questions
Q1: Can I use other types of wax instead of beeswax?
A: This particular recipe focuses on beeswax for its unique benefits. However, you could experiment with soy wax or paraffin by adjusting the recipe accordingly.
Q2: How do I know what size wick to use for my container?
A: Wicks should be chosen based on the diameter of your candle container. As a rule of thumb, refer to wick sizing charts available online from candle-making suppliers.
Q3: Can I use fragrances instead of essential oils?
A: Yes, but ensure the fragrance is suitable for candle making to avoid burning issues or toxic fumes.
Q4: What should I do if my candle doesn’t burn evenly?
A: An uneven burn could be due to wick size, wax temperature during pouring, or the type of container. Adjust wick size or temperature next time.
Q5: How can I safely remove spilled wax?
A: Allow the wax to harden, then scrape it off with a plastic spatula. For stubborn areas, gently warm it with a hairdryer before wiping with a cloth.
Q6: How much essential oil is safe to use?
A: Generally, 1-2 ounces per pound of wax is recommended, but ensure to check safety guidelines for specific essential oils.
Conclusion
Creating your own beeswax candles is a joyful experience that combines simplicity and elegance. With just two ingredients, you can craft delightful creations perfect for decorating your home or gifting to friends and loved ones. Don’t be afraid to experiment and make the process your own. So gather your materials and get started on this enjoyable DIY project — you might find it hard to stop at just one! Happy candle making!