
Candle Making: Your Ultimate Guide to Creating Beautiful Homemade Candles
Candle making is such a fun hobby to get into, using all kinds of recycled containers from seashells to flowerpots to make unique homemade candles. Whether you’re looking to create lovely gifts for friends or simply want to fill your home with delightful scents, this master guide will cover everything you need to know about making candles at home.
Why You Will Love This Guide
Choosing candle making as a DIY project allows you to express your creativity while also experimenting with different scents, colors, and shapes. Not only will you end up with beautiful candles that can brighten any space, but you’ll also gain valuable skills that you can share with friends and family. Plus, candles make wonderful handmade gifts for special occasions!
Ingredients
To create your homemade candles, you will need the following ingredients:
Wax (choose from paraffin, soy, or beeswax)
- Soy wax is a popular choice for beginners due to its ease of use and clean burn.
- Amount: Approximately 1 pound of wax yields 2-3 standard-size candles.
Fragrance oil (optional)
- Choose a suitable candle scent—essential oils or candle fragrance oils work well.
- Amount: Use about 1 ounce of fragrance oil per pound of wax for a fragrant candle.
Dye chips (optional)
- If you want to color your candles, choose dye chips specifically meant for candle making.
- Amount: Start with 1-2 chips and adjust based on the desired intensity.
Wicks
- Choose the appropriate wick size based on the candle diameter. Cotton wicks are a safe choice for beginners.
- Amount: 1 wick per candle.
Equipment
Here’s a basic list of equipment you will need:
- Double boiler or a dedicated wax melter
- Thermometer (preferably a candy or infrared thermometer)
- Measuring cup or scale (for accurate wax measurement)
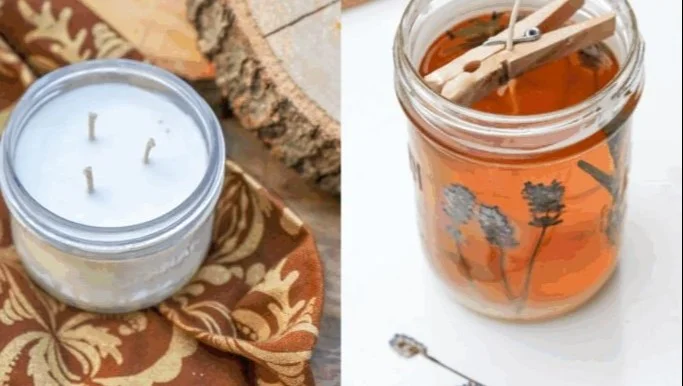
- Wick holder (to keep the wick centered)
- Stirring spoon (preferably wooden or silicone)
- Containers (ensure they are heat resistant; glass jars, tins, or even seashells work well)
- Safety equipment (heat-resistant gloves and goggles for protection)
Step-by-Step Instructions
Step 1: Prepare Your Workspace
- Find a clean, clutter-free area to work in with good ventilation.
- Lay down newspaper or a drop cloth to catch any spills.
Step 2: Measure and Melt the Wax
- Measure the amount of wax you need based on your container size. Typically, one pound of wax will fill a 16 oz container.
- Use a double boiler to melt the wax. Fill the bottom pot with water, and bring it to a simmer. Place the wax in the top pot or a pouring pitcher.
- Monitor the temperature and heat the wax until it reaches 180°F – 190°F.
Step 3: Add Fragrance and Dye
- Once the wax is fully melted, take it off the heat.
- If coloring, add the dye chips now and stir until fully melted.
- Measure and add your fragrance oil, stirring gently for 1-2 minutes to ensure it’s evenly distributed.
Step 4: Prepare the Containers
- While the wax is cooling a bit, secure your wick in the center of your container using a wick holder or a small amount of melted wax.
- Ensure the wick is standing straight and centered.
Step 5: Pour the Wax
- Allow the wax to cool to about 140°F for a smoother pour.
- Carefully pour the wax into your container, leaving about ½ inch at the top.
- Use a skewer to adjust the wick if it was moved during pouring.
Step 6: Let it Set
- Allow the candle to cool for 4-6 hours or until fully set.
- Trim the wick to about ¼ inch above the wax surface.
Tips for Success
- Test Your Wick: Experiment with different wick sizes if you’re not sure what works best for your container.
- Keep It Simple: Start with one scent and color before branching out into complex mixtures.
- Be Patient: Allow your candles to set undisturbed to prevent cracking.
Common Mistakes to Avoid
- Pouring wax that is too hot can cause hazardous spills or cracks in the candle.
- Adding too much fragrance oil can affect the burning quality of your candle.
- Using the wrong wick size can lead to poor burning or uneven melting.
Variations and Customization Ideas
- Mason Jar Candles: Use rustic mason jars for a charming look.
- Layered Candles: Pour layers of different colors and scents for a stunning visual effect.
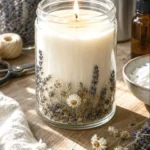
- Embedded Objects: Place dried flowers, herbs, or shells into your candles for added beauty.
Storage and Shelf Life
Store your finished candles in a cool, dry place away from direct sunlight. Properly stored, they can last for 1-2 years.
Safety Tips
- Always make candles in a well-ventilated area.
- Never leave melting wax unattended.
- Follow the manufacturer’s instructions for the wax and fragrance oils.
- Use heat-resistant gloves and goggles when pouring hot wax.
Frequently Asked Questions
1. How can I tell if my wick is the right size?
Test burn candles with different wick sizes to check for an even burn and no excessive smoke.
2. Can I use essential oils for fragrance?
You can, but remember that essential oils might not throw scent as well as synthetic fragrances.
3. What’s the best wax to use for beginners?
Soy wax is user-friendly and readily available, making it perfect for beginners.
4. Why did my candle crack?
Cracking may occur due to rapid cooling or pouring hot wax into a cold container.
5. How do I fix a sinkhole in my candle?
Melt a little wax and pour it over the sinkhole to fill it in, ensuring that it blends well with the rest of the candle.
Conclusion
Candle making can be a delightful and fulfilling hobby that nurtures your creativity while providing practical gifts for yourself and others. Armed with this guide, you’ll be well on your way to crafting beautiful, personalized candles at home. So gather your materials, get set up, and start pouring those beautiful candles! Enjoy the process, experiment with scents, and make it uniquely yours. Happy candle making!