
Discover the Joy of Candle Making as a Creative Escape
Imagine this: you walk into your home after a long day, the air is crisp, and the mood feels just a bit off. What if, with a small flicker of flame and the comforting aroma of vanilla, you could create an inviting atmosphere? That’s the magic of homemade candles. You might be thinking, "But I’ve never done this before! Is it really that simple?" Here’s the truth: making candles at home is not only easy, it’s a wonderfully satisfying experience. Whether you’re looking to enhance your self-care routine or find a fun new hobby, this step-by-step guide to candle making for beginners will show you just how simple and rewarding it can be.
Choosing the Right Wax for Your Candles
Before we jump into the fun part, let’s explore one of the most crucial aspects of candle making: the wax. You might be surprised to learn that there are several types of wax to choose from, each offering different benefits.
Types of Wax
Paraffin Wax: This is the most common and widely used wax. It burns well and holds fragrance nicely, but it’s derived from petroleum, which might not appeal to everyone.
Soy Wax: Perfect for beginners, soy wax is plant-based and burns cleaner than paraffin. It’s great for holding scents and is more eco-friendly.
Beeswax: This natural wax emits a lovely honey scent and has air-purifying qualities. It burns longer than both paraffin and soy but can be more expensive.
Palm Wax: Like soy, this is a natural, plant-based option. It creates a beautiful crystalline effect on the candle surface but can be tricky to work with.
For beginners, I usually recommend starting with soy wax. It’s forgiving, easy to work with, and produces wonderful results.
Gathering Your Supplies
Now that you’ve chosen your wax, let’s gather the materials. Here’s what you’ll need for your candle-making adventure:
Essential Supplies
- Wax: Your selected type (soy, beeswax, etc.)
- Double Boiler: If you don’t have one, a makeshift double boiler using two pots will work fine.
- Fragrance Oils: Choose your favorite scents. Lavender or vanilla are popular choices!
- Wicks: Make sure to choose the right size for your container.
- Containers: Glass jars or metal tins are perfect for beginners.
- Thermometer: To check the temperature of your wax.
- Stirring Utensil: A wooden stick or a spoon.
- Pouring Pot: To make pouring easier if you’re using a double boiler.
Optional Supplies
- Color Dyes: For those wanting to add a pop of color to their candles.
- Decorative Elements: Think dried flowers, herbs, or glitter for unique touches.
Getting these items together is part of the fun! You might already have some of this at home.
The Candle Making Process Step-by-Step
Ready to dive in? Let’s get to the heart of the matter—making your candles.
Step 1: Prepare Your Workspace
Set up a clean and organized area where you won’t be disturbed. Lay down newspaper or parchment paper to catch any spills, and have all your supplies within reach. You might want to wear an apron to avoid pesky wax splatters on your clothes.
Step 2: Measure Your Wax
For a standard-sized candle, measure out the amount of wax you’ll need. A good rule of thumb is about one pound of wax for each 16 oz. container. Always use a digital scale for accuracy.
Step 3: Melt the Wax
Fill the bottom pot of your double boiler with water and heat it to a gentle simmer. Add the wax to the top pot and stir occasionally until it’s fully melted. You might wonder, "How long does this take?" Generally, it takes about 10 to 15 minutes. Just keep an eye on it!
Step 4: Add Fragrance and Color
Once your wax is melted, it’s time to make it smell divine! Add your fragrance oils—usually about 1 ounce for every pound of wax. If you want to add color, this is the moment to do so! Just remember, a little can go a long way.
Step 5: Check the Temperature
Using your thermometer, check the temperature of the wax. You’ll want it to be around 180°F before pouring. This ensures that the fragrance is well incorporated and that the wax binds well to the wick.
Step 6: Secure Your Wick
While the wax cools a bit, prepare your container by securing the wick at the bottom. You can use a small amount of melted wax, or a wick sticker if you have one. Center it as much as possible.
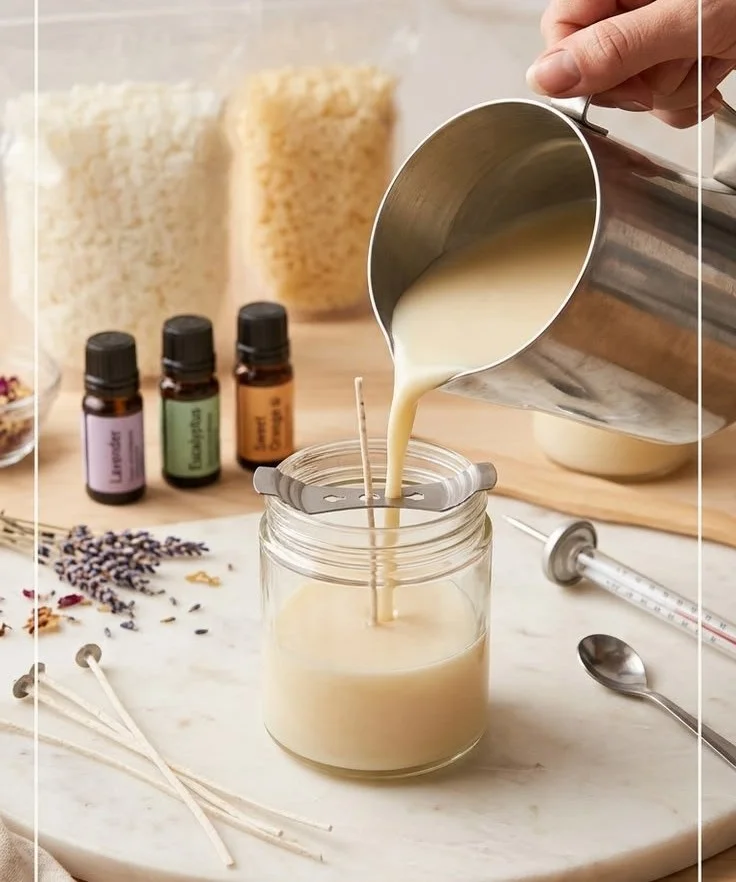
Step 7: Pour the Wax
When the wax cools to about 140°F, it’s time to pour! Slowly and carefully pour the wax into your container. Remember, it’s okay if a few bubbles form—it’s all part of the process!
Step 8: Let It Cool
This is the hardest part—you’ve done so well but now you’ll need to be patient! Allow the candle to cool completely, which could take a few hours. Avoid moving it during this time to prevent any imperfections.
Step 9: Trim the Wick
Once cooled, trim the wick to about ¼ inch. This helps your candle burn cleaner and longer.
Step 10: Enjoy Your Candle
Now for the rewarding part—lighting your newly made candle! You’ve taken the time to create something beautiful, and trust me, there’s nothing quite like it.
Common Mistakes to Avoid
We’ve all made mistakes, especially when trying something new. Here are a few pitfalls you might want to dodge:
Overheating the Wax
Too much heat can cause your wax to lose fragrance, and no one enjoys a candle that smells like… nothing!
Adding Fragrance Too Late
Timing is everything! If you add fragrance when the wax is too cool, it won’t bind properly and will lead to scentless candles.
Skipping the Wick Test
Wicks come in various sizes. If you select the wrong size, your candle could burn too quickly or too slowly, leading to a disappointing experience.
Quick Candle Making Tips
- Start Simple: Stick to basic scents when starting out before experimenting with blends.
- Use Quality Materials: Cheap materials can sometimes hinder your end result.
- Experiment with Sizes: Make various candle sizes to see which you enjoy the most.
- Label Your Candles: If you’re giving them as gifts, personal labels can add a thoughtful touch.
FAQs About Candle Making for Beginners
Q: How long will my homemade candles last?
A: With proper care, they can last up to 50-100 hours depending on the size and wax type.
Q: Can I make candles without a double boiler?
A: Yes! You can use a microwave-safe container to melt the wax, just monitor it closely to avoid overheating.
Q: Are homemade candles safer?
A: When made with natural ingredients and proper care, homemade candles can be safer than many commercial options.
Bonus Self-Care Ideas
Making candles can be a fantastic part of your self-care ritual, but let’s add a few more elements to create a complete experience:
- Set the Mood: Play your favorite calming music while you craft.
- Pause for a Skin Treat: While your candles are cooling, indulge in a quick face mask.
- Enjoy a Cozy Drink: Sip on herbal tea or your favorite coffee while waiting for your candles to set.
Wrap Up Your Candle Making Journey
We started this journey talking about creating a cozy atmosphere, and by now, you’ve taken the reins and made beautiful candles for your home. Here’s the thing: you’re not just making candles. You’re infusing your space with warmth, personality, and exquisite scents that reflect who you are.
So, should you explore this delightful DIY project? Absolutely! Whether you keep them for yourself or gift them to loved ones, your homemade candles are sure to brighten anyone’s day. Remember, there’s no right or wrong in this process—just enjoy the creativity and find joy in every step. You’re embarking on a delightful journey filled with scents, warmth, and a sprinkle of artistry. So go ahead, light that candle and embrace the magic of what you’ve created!