
Embrace the Art of Soap Making with a Twist of Basil
Imagine stepping into your kitchen, the air rich with the scent of fresh herbs. You find yourself ready to embark on a delightful journey of self-care, crafting a product not just for cleanliness but for nurturing your skin. We’ve all been there—looking for ways to infuse more joy into routine chores, right? Let’s explore how you can create the perfect kitchen soap recipe that’s moisturizing, easy to make, and just a little fancy with the addition of dried basil.
The Beauty of Cold Process Soap
Cold process soap making may sound like an intricate art reserved for professionals, but trust me, it’s simpler than you think. This method allows for a creative blend of oils, herbs, and fragrances, giving us the freedom to customize our soap to suit our taste and needs.
You’ll love the moisturizing ingredients we’ll include, which means every time you wash your hands, your skin feels nourished rather than stripped of its natural oils. Plus, did I mention the delightful touch of dried basil? This herb is more than just a pretty addition. Its anti-inflammatory properties can work wonders on your skin, especially for those days when it feels especially sensitive or dry.
What You’ll Need
Before we dive into the making process, gather these ingredients and tools. You might want to jot down this list for your next grocery run!
Ingredients
- 12 oz. Olive Oil: A great moisturizing base.
- 12 oz. Coconut Oil: Adds lather and firmness to your soap.
- 12 oz. Palm Oil: Balances the hardness and moisturizing factors.
- 7.5 oz. Lye: Yes, lye! It’s crucial for saponification (the process that turns oils into soap).
- 20 oz. Distilled Water: Always use distilled to avoid impurities.
- 2 oz. Dried Basil: For that herbal twist and skin benefits.
- Essential Oils (optional): Lavender or lemon would pair beautifully with the basil.
Tools
- Digital scale
- Mixing bowls (one heat-resistant for lye)
- Hand blender
- Soap mold
- Safety gear: gloves, goggles, and a long-sleeved shirt
Step-by-Step Soap Making Process
Ready to get your hands dirty? Here’s a simple breakdown of the process. Don’t worry; I’ll walk you through each step!
Step 1: Safety First
Let’s be honest: lye can be harmful if not handled correctly. Make sure you’re wearing your gloves and goggles. Best to locate your workspace in a well-ventilated area as well—safety is key!
Step 2: Mix the Lye and Water
Always add lye to water, not the other way around! Measure 20 oz. of distilled water and slowly sprinkle in 7.5 oz. of lye. You’ll notice it heats up quickly as it dissolves—this is perfectly normal! Stir until completely dissolved, then set it aside to cool.
Step 3: Melt and Mix the Oils
In a separate bowl, measure out the olive, coconut, and palm oils. Gently heat them until everything is melted. This step can be done in the microwave or on the stove—just be cautious not to overheat! You want to aim for a temperature around 100-110°F.
Step 4: Combine the Mixtures
Once your lye solution and melted oils are both around the same temperature, carefully pour the lye mixture into the oils. Using your hand blender, blend until you achieve trace (this is when the soap mixture leaves a trail when drizzled on the surface).
Step 5: Add the Herbs and Essential Oils
At this point, you can add your dried basil and any essential oils you like. Stir it in well, ensuring an even distribution. The scent and color will start to come alive!
Step 6: Pour and Mold
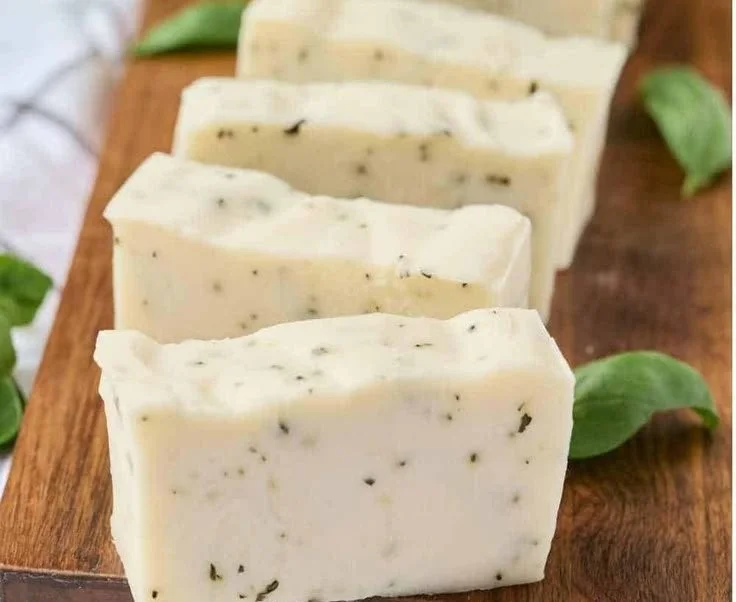
Pour your mixture into the soap mold. If you’re feeling crafty, you can even add a layer of basil on top for a rustic look. Cover the mold with a towel to keep the heat in, allowing your soap to saponify.
Step 7: Wait and Cut
Let your soap sit in the mold for about 24-48 hours. Once it’s firm, pop it out and cut it into bars. If you can resist the temptation, allowing your soap to cure for 4-6 weeks will significantly improve its texture and longevity.
Enjoying Your Homemade Soap
You’re all set! Each time you wash your hands with this lovely soap, you’ll feel the benefits of the oils and the calming aroma of basil. Picture how satisfying it is to run your hands over this beautiful, unique bar, knowing you made it with care and love.
Quick Beauty Tips for Using Your Soap
- Pair it with a gentle scrub: For extra exfoliation, use your soap with a soft loofah.
- Store your soap properly: Keep it in a dry area, allowing it to breathe. An old wooden soap dish works wonders!
- Use it as a gift: Wrap bars in beautiful paper and share your creation with friends or family. It’s personal, thoughtful, and practical.
Common Mistakes to Avoid
We all learn from our missteps, so here are some tips to keep your soap-making experience smooth sailing:
- Don’t skip safety gear: Seriously, lye can be dangerous, so safety first!
- Avoid temperature extremes: Mixing lye and oils at different temperatures can result in poor texture.
- Be patient: Curing your soap is critical. Don’t rush the process!
FAQs About Soap Making
What can I do if my soap didn’t reach trace?
If your soap mixture doesn’t reach trace, continue blending. Sometimes it takes a little longer than expected.
Can I use different herbs?
Absolutely! Feel free to experiment with other dried herbs or flowers, just test in small batches initially.
How long will this soap last?
When properly cured and stored, homemade soap can last several months.
Bonus Self-Care Ideas
Incorporate your new soap into a broader self-care ritual. Try a relaxing bath or create an at-home spa day. Maybe add some calming music and a glass of herbal tea while soaking your soap in warm water for a nourishing hand wash.
Best Routine for Busy Women
Life can be hectic. Let’s be honest—finding time for self-care can feel impossible. But this simple soap-making project not only enriches your daily routine but also adds a personal touch to your self-care efforts. Spend a Saturday afternoon crafting, and you’ll have a unique product you can enjoy long after the day is over.
Wrapping It Up with Herbal Bliss
So there you have it! A delightful journey into cold process soap making that’s both rewarding and indulgent. With your new skills and the beautiful moisturizing soap in hand, you’re well-equipped for a moment of pure bliss. The touch of dried basil makes your creation uniquely special. So next time you wash your hands, take a moment to appreciate not just the cleanliness, but also the love and care you poured into making this beauty.
You’ve totally got this, and I’m cheering for you every step of the way!