
How to Make Melt and Pour Soap Recipes for Beginners
Creating your own homemade soap can be a delightful and rewarding process. One of the simplest and most enjoyable methods for beginners is melt and pour soap making. This approach allows you to craft beautiful, personalized soaps without the complexities of lye handling, making it perfect for anyone new to DIY projects.
Why You Will Love This Recipe
Melt and pour soap making empowers you to unleash your creativity while learning a fun new skill. It requires minimal equipment, is safe and straightforward, and you can customize your soap to suit your preferences. Whether you want to create a thoughtful handmade gift or treat yourself to a luxurious self-care product, the versatility of melt and pour soap makes it an ideal choice.
Ingredients
For this beginner-friendly melt and pour soap recipe, you will need:
- Soap Base (1 lb):
- You can choose from various bases like glycerin, shea butter, or goat milk.
- Fragrance Oil (1 oz):
- Use your favorite scent like lavender, vanilla, or citrus.
- Colorants (optional):
- Soap-safe colorants can enhance your soap’s appearance.
- Recommended quantity: a few drops (start with one drop, then adjust as needed).
- Additives (optional):
- Dried herbs, oatmeal, or exfoliating agents (e.g., coffee grounds) can be added to enhance texture and benefits.
Equipment
To get started, gather the following equipment:
- Microwave-safe bowl or double boiler for melting the soap base
- Silicone molds or other soap molds of your choice
- Thermometer (optional, but helpful for checking soap temperature)
- Spoon or spatula for mixing and pouring
- Spray bottle with rubbing alcohol to eliminate bubbles on the soap surface
Step-by-Step Instructions
Preparation Time: 10 minutes
Making Time: 30 minutes
Yield: Approximately 4-6 bars depending on mold size
Prep Your Workspace: Clear your workspace and lay down newspaper or parchment paper to catch any drips.
Cut the Soap Base: Take your soap base and cut it into small chunks (about 1 inch). This helps it melt evenly.
Melt the Soap Base:
- Microwave Method: Place the soap chunks in a microwave-safe bowl. Microwave in 30-second intervals, stirring in between until completely melted.
- Double Boiler Method: Fill the bottom pot with water and bring to a gentle simmer. Place the soap chunks in the top pot and stir occasionally as it melts.
Add Fragrance and Color: Once melted, add your chosen fragrance oil, colorant, and any other additives. Stir well to incorporate everything.
Pour Into Molds: Carefully pour the melted soap into your silicone molds. Leave a little space at the top, as the soap may expand slightly when cooling.
Spritz with Alcohol: Spray the top of the soap with rubbing alcohol to eliminate surface bubbles.
Let it Cool: Allow the soap to cool completely, which usually takes about 30 minutes. For quicker results, you can place the molds in the refrigerator for about 10-15 minutes.
Remove from Molds: Once hardened, gently pop the soap out of the molds.
Cure and Store: Although melt and pour soap doesn’t require curing, it’s best to store it in a cool, dry place to prevent sweating or stickiness.
Tips for Success
- Use the Right Mold: Silicone molds are easiest to work with for beginners because they allow for easy release.
- Measure Carefully: Accurate measurements ensure consistent quality and results.
- Mix Thoroughly: Ensure that colorants and fragrance are fully incorporated for the best results.
Common Mistakes to Avoid
- Overheating the Soap: Microwaving for too long can scorch the soap, resulting in an unpleasant odor and texture. Always melt slowly.
- Too Much Fragrance: Adding excessive fragrance can affect the soap’s texture and make it more prone to sweating.
- Skipping Alcohol Spray: This step is crucial if you want a smooth finish without bubbles.
Variations and Customization Ideas
Feel free to experiment with different ingredients! Here are some ideas for customization:
- Himalayan Salt Bars: Add a pinch of fine Himalayan salt for a touch of exfoliation and a rustic look.
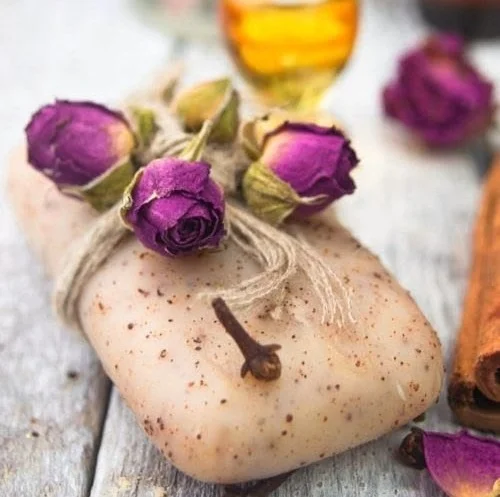
- Herbal Infusions: Mix in dried herbs or botanicals like chamomile or lavender for an aesthetically pleasing touch.
- Layered Soap: Pour a layer, let it solidify slightly, then pour a different color on top for a layered effect.
Storage and Shelf Life
Homemade melt and pour soap generally lasts about 6-12 months, depending on the ingredients used. To preserve quality, wrap bars in wax paper or store in an airtight container. Keep them out of direct sunlight and in a cool, dry place.
Safety Tips
- Always use heat-resistant gloves or mitts when handling hot soap or containers.
- Ensure your workspace is well-ventilated, especially when adding fragrance oils.
- Do not consume any of the ingredients, and keep them out of reach of children and pets.
Frequently Asked Questions
1. Can I use regular kitchen measuring spoons for fragrances and colorants?
Yes, but it’s best to use the same spoons for consistency throughout all your projects.
2. How can I avoid my soap sweating?
Store your soap in a cool, dry area, and make sure you let it cool fully before wrapping or storing.
3. What is the best way to cut my soap bars?
If your molds aren’t in bar shape, use a sharp knife to cut the cooled soap evenly.
4. Can I remelt and reshape my soap if I make a mistake?
Absolutely! You can remelt the soap as many times as needed, just ensure it’s not overheated.
5. Is it safe to add essential oils instead of fragrance oils?
Yes, but be cautious with the amount, as essential oils are often stronger than synthetic fragrance oils.
Conclusion
Making melt and pour soap is a fulfilling endeavor for anyone wanting to dive into DIY projects. With just a few simple steps, you can create beautiful, customized soaps that you can gift or enjoy yourself. Don’t hesitate to personalize your soap recipes and experiment with different designs and scents. Enjoy the process, and happy soap making!